This is the multi-page printable view of this section. .
Applications
- 1: Enterprise Self-Hosted Supabase
- 2: Odoo: Self-Hosted Open Source ERP
- 3: Dify: AI Workflow Platform
- 4: InsForge: AI Backend-as-a-Service
- 5: Hindsight: AI Long-Term Memory
- 6: FerretDB: MongoDB Protocol
- 7: Teable: AI No-Code Database
- 8: Gitea: Self-Hosted Git Service
- 9: NocoDB: Open-Source Airtable
- 10: Mattermost: Open-Source Team Collaboration
- 11: Wiki.js: OSS Wiki Software
- 12: Maybe: Self-Hosted Personal Finance
- 13: Immich: Self-Hosted Photo and Video Library
- 14: Kong: API Gateway
- 15: Metabase: BI Analytics Tool
- 16: Registry: Container Image Cache
- 17: JumpServer: Open-Source Bastion Host
- 18: ByteBase: Schema Migration
- 19: pgAdmin: PostgreSQL GUI
- 20: PGWeb: Browser-based PostgreSQL Client
- 21: PostgREST: Auto-Generated API
- 22: Electric: PostgreSQL Sync Engine
- 23: Jupyter: Notebooks and Data Analysis
- 24: PGLOG: PostgreSQL Log Analysis Application
- 25: NOAA ISD Global Weather Station Historical Data Query
- 26: WHO COVID-19 Pandemic Dashboard
- 27: StackOverflow Global Developer Survey
- 28: DB-Engines Database Popularity Trend Analysis
- 29: AWS & Aliyun Server Pricing
Pigsty applications have two categories:
- Software Templates: Docker Compose templates under
~/pigsty/app/<name>for stateless business components. - Data Applets: PostgreSQL + Grafana analytics demos, mainly for learning and showcase use.
Application Model
The recommended application deployment workflow is:
app.yml copies app/<name> templates to /opt/<name>. It replaces .env with apps.<name>.conf, then runs docker compose up -d.
Maintained Config Templates
The following app config templates are actively maintained (conf/app/*.yml, conf/supabase.yml, and the conf/app/supa.yml symlink):
app/difyapp/odooapp/teableapp/mattermostapp/electricapp/maybeapp/immichapp/jumpserverapp/registryapp/insforgeapp/hindsightsupabase
These templates are ready to use with the ./configure -c ... and ./app.yml workflow.
Lightweight Compose Apps
For apps like bytebase, gitea, jupyter, kong, metabase, minio, nocodb, pgadmin, pgweb, postgrest, pg_exporter, and wiki, you can also use the per-app Compose templates directly.
FerretDB is provided as the Docker APP layer of PostgreSQL Mongo mode. Deploy it from the fork/mongo configuration template with docker.yml and app.yml.
To manage these apps with Pigsty IaC, run:
Legacy Applets
Data applets like pglog, covid, db-engine, sf-survey, cloud, and isd are kept as reference examples for data modeling and visualization ideas.
They are no longer the primary application delivery path. Prefer the software template workflow above.
1 - Enterprise Self-Hosted Supabase
Pigsty can deploy Supabase on your physical, virtual, or cloud servers with a single command. Self-hosting provides more extensions, performance options, control, and potential cost savings.
As of August 2026, the official Supabase self-hosting guide recommends Docker and classifies other implementations as community projects. Pigsty is an independent community integration and is not currently listed on that page.
This tutorial requires basic Linux knowledge. Otherwise, consider using Supabase cloud or plain Docker Compose self-hosting.
The current template tracks the coordinated Supabase self-hosted/v0.8.2 release (commit 564eab8), with Envoy 1.39.1 as the default gateway and Studio 2026.09.07-sha-7996410.
It uses external Pigsty-managed PostgreSQL, with PG18 as the template default. This combination has passed basic functional checks on PG18.6. See docker-compose.yml for the complete image versions and the upgrade procedure for existing deployments.
TL;DR
Prepare a Linux server, follow the Pigsty standard single-node installation process with the supabase config template:
After installation, access Supa Studio on port 8000 with username supabase and password pigsty.
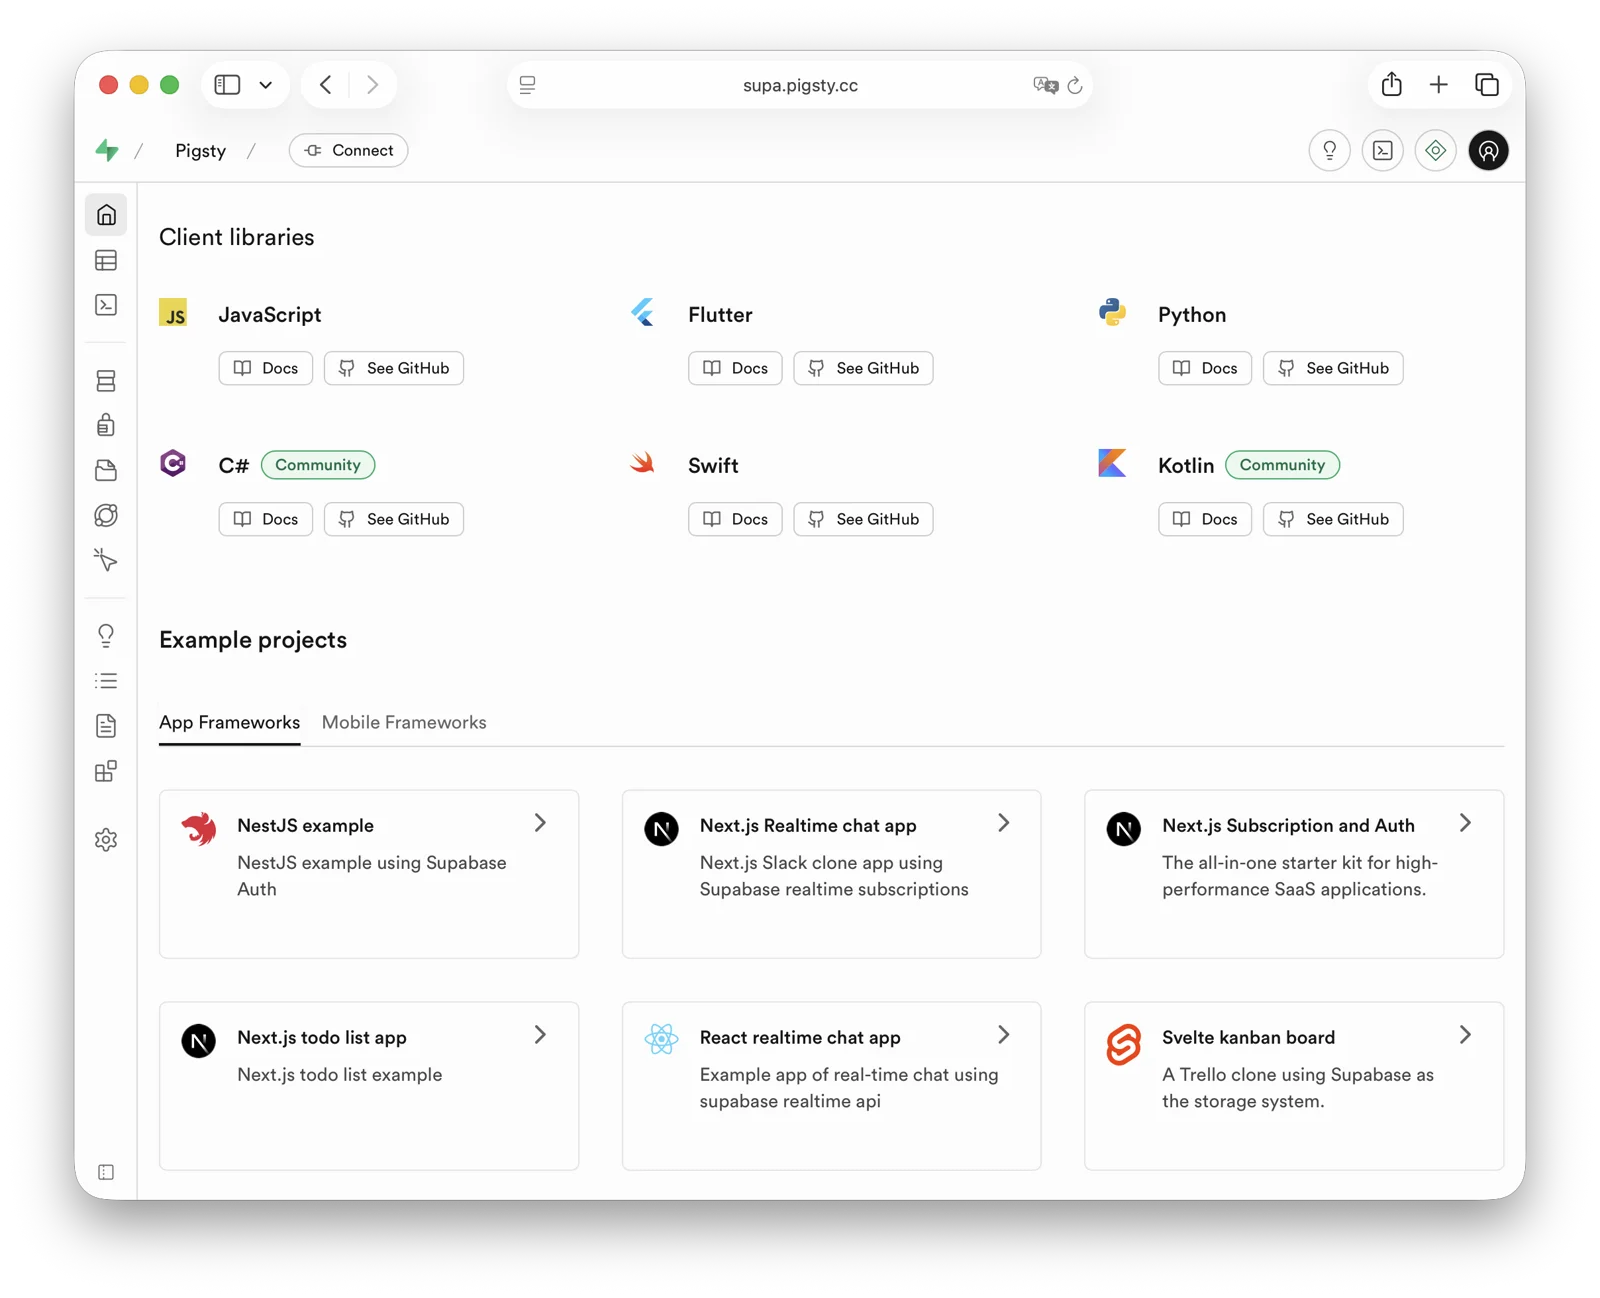
demo/supabase.cast — /demo/supabase.cast
Checklist
- At least one 2-core/4 GB server; 4 cores/8 GB or more is recommended for the full stack
- Static internal IPv4 address
- Supported Linux distro installed
- Standard Pigsty installation
- Modified config file: domain, passwords, IP address
- Docker module installed, ensure proxy/mirror available
- Use Pigsty’s
app.ymlto start Supabase
Table of Contents
- What is Supabase?
- Why Self-Host?
- Single-Node Quick Start
- Upgrading Existing Deployments
- Advanced: Security Hardening
- Advanced: Domain Configuration
- Advanced: External Object Storage
- Advanced: Using SMTP
- Advanced: True High Availability
What is Supabase?
Supabase is an open-source Backend as a Service (BaaS) and Firebase alternative. It is widely used for AI agent database and backend services. Supabase adds authentication, messaging, edge functions, and object storage to PostgreSQL. It generates REST APIs from the database schema. Enable pg_graphql when you need GraphQL APIs.
Supabase combines backend services to reduce development and infrastructure maintenance work. Developers can focus on database design and the frontend to build applications quickly. Vibe coding can help create the frontend and schema for complete applications.
Supabase is one of the most popular open-source projects in the PostgreSQL ecosystem. As of August 2026, its GitHub repository has more than 100,000 stars. Supabase also offers a free hosted tier. The current Free plan includes shared CPU, 500 MB of RAM, a 500 MB database quota, and 1 GB of file storage; consult the official page for later changes.
Why Self-Host?
Self-hosting can address cost, functionality, and control requirements.
Costs can rise quickly when data, compute, or availability requirements exceed a managed-service tier. See Is Cloud Database an IQ Tax?. Reliable local enterprise NVMe SSDs have a cost advantage of three to four orders of magnitude over cloud storage. Self-hosting can use this advantage.
Functionality is another reason. Multi-tenant security and licensing constraints exclude many PostgreSQL extensions from cloud services. Although extensions are a core PostgreSQL feature, Supabase promises more than 50 preconfigured extensions. The exact list changes with platform releases. Self-hosting with Pigsty provides up to 600 ready-to-use extensions.
Self-hosting gives users control and helps avoid vendor lock-in. Supabase aims to provide an open-source Firebase alternative without vendor lock-in, but enterprise self-hosting still requires work. Supabase develops and maintains PostgreSQL extensions. It acquired the Oriole team in 2024 and offers OrioleDB as an optional Public Alpha. OrioleDB is not the production default or a confirmed replacement for native PostgreSQL. Some Supabase extensions and patched kernels are absent from the official PGDG repository.
Missing packages create a dependency on the supabase/postgres Docker image for self-hosting. Pigsty provides these packages for other deployment methods. The 10 missing Supabase extensions are available as RPM/DEB packages for the supabase template matrix. This covers EL 8/9, Debian 12, and Ubuntu 22.04/24.04/26.04 on x86_64 and aarch64. See supported Linux distributions.
| Extension | Description |
|---|---|
pg_graphql | GraphQL support in PostgreSQL (Rust), provided by PIGSTY, enabled on demand |
pg_jsonschema | JSON Schema validation (Rust), provided by PIGSTY |
wrappers | Supabase foreign data wrapper bundle (Rust), provided by PIGSTY |
index_advisor | Query index advisor (SQL), provided by PIGSTY |
pg_net | Async non-blocking HTTP/HTTPS requests (C), provided by PIGSTY |
vault | Store encrypted credentials in Vault (C), provided by PIGSTY |
pgjwt | JSON Web Token API implementation (SQL), provided by PIGSTY |
pgsodium | Table data encryption TDE, provided by PIGSTY |
supautils | Security utilities for cloud environments (C), provided by PIGSTY |
pg_plan_filter | Filter queries by execution plan cost (C), provided by PIGSTY |
Supabase deployments install most extensions by default. Enable them as needed. Newer templates install the pg_graphql package without creating its extension object. For GraphQL APIs, run CREATE EXTENSION IF NOT EXISTS pg_graphql; in the target database. The template event trigger rebuilds graphql_public.graphql and its permissions.
Pigsty manages the highly available PostgreSQL and Silo object storage clusters. It also manages Docker, the Nginx reverse proxy, domains, and HTTPS certificates. Run any number of stateless Supabase container clusters with Docker Compose. Store their state in external Pigsty-managed database services.
The current template supports PostgreSQL 15-18, with 18 as the default. You can install 600 extensions and scale Supabase, PostgreSQL, and Silo independently. You are responsible for operating and securing this infrastructure.
Single-Node Quick Start
Start with single-node deployment. Multi-node high availability is covered later.
Prepare a fresh Linux server, use the Pigsty supabase configuration template for standard installation,
then run docker.yml and app.yml to start stateless Supabase containers (Envoy uses HTTP port 8000 by default; the Nginx portal provides HTTPS).
Before deploying Supabase, modify the auto-generated pigsty.yml configuration file (domain and passwords) according to your needs.
For local development/testing, you can skip this and customize later.
If configured correctly, after about ten minutes, you can access the Supabase Studio GUI at http://<your_ip_address>:8000 on your local network.
Default username and password are supabase and pigsty.
Notes:
- In mainland China, Pigsty uses 1Panel and 1ms DockerHub mirrors by default, which may be slow.
- You can configure your own proxy and registry mirror, then manually pull images with
cd /opt/supabase; make pull. Before exporting offline images, runmake pulland thenmake save. The complete bundle includes both the default Envoy and optional Kong gateways. We also offer expert consulting services including complete offline installation packages. - If you need object storage functionality, you must access Supabase via domain and HTTPS, otherwise errors will occur.
- For serious production deployments, always change all default passwords!
Key Technical Decisions
Here are some key technical decisions for self-hosting Supabase:
Single-node deployment does not provide PostgreSQL/Silo high availability. Compared with the official Docker Compose setup, it provides monitoring, extension installation, independent component scaling, and point-in-time recovery.
Pigsty’s Supabase template does not start the upstream Compose db or supavisor containers, and does not use Supabase’s bundled connection pooler.
Stateless containers connect directly to the PostgreSQL service managed by Pigsty; the single-node template uses service port 5436 by default, which always routes to the current primary.
Logflare / Analytics uses _analytics in the separate _supabase database instead of postgres._analytics in the application database. This keeps internal tables such as oban_jobs and oban_peers out of the project database’s public schema. It prevents Supabase Advisor RLS warnings about those tables. LOGFLARE_DB and LOGFLARE_SCHEMA control these locations.
The Query Performance page in Supabase Studio accesses pg_stat_statements with a public, extensions search path.
Pigsty keeps the pg_stat_statements extension objects in the monitor schema for compatibility with pg_exporter and existing monitoring dashboards. The template creates a compatibility view and functions in the extensions schema for Studio.
Envoy is the default gateway, under the Compose service name api-gw. Kong 3.9.3 remains available as a transition option. To enable Kong, run this combination from the application directory:
Both gateways use API_GW_HTTP_PORT for their HTTP port, defaulting to 8000. Only the Kong configuration also exposes KONG_HTTPS_PORT (default 8443).
For one server or cloud-hosted servers, Pigsty recommends external S3 instead of local Silo for PostgreSQL backups and Supabase Storage. This supports recovery on an hour scale after single-node failure. Actual RPO depends on the latest recoverable backup, WAL archives, and object-storage availability. The topology does not guarantee a fixed RPO.
For production, Pigsty recommends at least 3-4 nodes with multi-node high availability for Silo and PostgreSQL. This requires more nodes and disks. Update pigsty.yml and Supabase configuration to use high-availability endpoints.
Some Supabase features require sending emails, so SMTP service is needed. Unless purely for internal use, production deployments should use SMTP cloud services. Self-hosted mail servers’ emails are often marked as spam.
If your service is directly exposed to the public internet, we strongly recommend using real domain names and HTTPS certificates via Nginx Portal.
Next, we’ll discuss advanced topics for improving Supabase security, availability, and performance beyond single-node deployment.
Upgrading Existing Deployments
Back up PostgreSQL, object storage, and application volumes, and review local customizations before upgrading. The old gateway service was named kong; the new service is api-gw. Before replacing the old Compose files, run docker compose down in the old application directory, without -v. This stops the old gateway and releases its ports while preserving volumes and external data. Running only up -d with the new files can leave the old kong container behind and cause port or container-name conflicts.
files/supabase.sql is a fresh-install baseline. Do not replay it over an existing database. Updating containers alone does not apply new SQL grants or remove old database settings. Version 0.8.2 removes the SQL-visible app.settings.jwt_secret and PostgREST’s PGRST_APP_SETTINGS_JWT_SECRET. Application-level JWT verification settings and app.settings.jwt_exp remain in place.
First review custom SQL functions that depend on current_setting('app.settings.jwt_secret'). If they still need a signing key, migrate them to a restricted Vault secret as described in the upstream migration guidance. Allow only the function owner to read it, and avoid exposing the decrypted key through a public RPC.
After handling these dependencies and backing up the database, run from the Pigsty installation root, connect to the target Supabase database as an administrator, and apply the idempotent narrow upgrade script:
The script resets only the old database-level secret setting in the current database and grants the webhook owner supabase_functions_admin USAGE on the extensions schema. It preserves JWT expiration and existing data. Also remove the old parameter from the deployment inventory, update Compose, and recreate PostgREST. If you injected the same secret through ALTER ROLE, server settings, or session SQL, review and remove those sources separately. Existing connections may retain the old value. Reconnect and verify as an ordinary application role in a new session without printing the secret:
For older deployments, also check that supabase_storage_admin has CREATE on the target database and that the upstream 2026-07-30 pg_cron privilege migration has been applied. See the template upgrade notes for the checks and remedies. Fresh-install and same-version container recreation tests do not replace an upgrade rehearsal for an existing application database.
Advanced: Security Hardening
Pigsty Components
For production, changing Pigsty component passwords is strongly recommended. These defaults are public:
grafana_admin_password:pigsty, Grafana admin passwordpg_admin_password:DBUser.DBA, PostgreSQL superuser passwordpg_monitor_password:DBUser.Monitor, PostgreSQL monitoring user passwordpg_replication_password:DBUser.Replicator, PostgreSQL replication user passwordpatroni_password:Patroni.API, Patroni HA component passwordhaproxy_admin_password:pigsty, Load balancer admin passwordminio_secret_key:S3User.MinIO, Silo root user secretetcd_root_password:Etcd.Root, ETCD root user password- Additionally, strongly recommend changing the PostgreSQL business user password for Supabase, default is
DBUser.Supa
These are Pigsty component passwords. Strongly recommended to set before installation.
Supabase Keys
Besides Pigsty component passwords, you need to change Supabase keys, including:
JWT_SECRET: JWT signing key, at least 32 charactersANON_KEY: Anonymous user JWT credentialSERVICE_ROLE_KEY: Service role JWT credentialSUPABASE_PUBLISHABLE_KEY/SUPABASE_SECRET_KEY: New opaque API keys, can be left empty if not enabledJWT_KEYS/JWT_JWKS: Asymmetric JWT keys and JWKS, can be left empty if not enabledANON_KEY_ASYMMETRIC/SERVICE_ROLE_KEY_ASYMMETRIC: Asymmetric signing JWTs, can be left empty if not enabledPG_META_CRYPTO_KEY: PostgreSQL Meta service encryption key, at least 32 charactersSECRET_KEY_BASE: Random secret used by RealtimeREALTIME_DB_ENC_KEY: Realtime database encryption keyDASHBOARD_USERNAME: Supabase Studio web UI default username, defaultsupabaseDASHBOARD_PASSWORD: Supabase Studio web UI default password, defaultpigstyLOGFLARE_PUBLIC_ACCESS_TOKEN: Logflare public access token, at least 32 random charactersLOGFLARE_PRIVATE_ACCESS_TOKEN: Logflare private access token, at least 32 random charactersLOGFLARE_DB/LOGFLARE_SCHEMA: Internal database and schema used by Logflare / Analytics, defaulting to_supabase/_analytics
Please follow the Supabase tutorial: Securing your services:
- Generate a
JWT_SECRETwith at least 40 characters, then use the tutorial tools to issueANON_KEYandSERVICE_ROLE_KEYJWTs. - Use the tutorial tools to generate an
ANON_KEYJWT based onJWT_SECRETand expiration time — this is the anonymous user credential. - Use the tutorial tools to generate a
SERVICE_ROLE_KEY— this is the higher-privilege service role credential. - If you use newer opaque API keys or asymmetric JWTs, also generate and fill
SUPABASE_PUBLISHABLE_KEY,SUPABASE_SECRET_KEY,JWT_KEYS,JWT_JWKS, and the corresponding asymmetricANON_KEY/SERVICE_ROLE_KEY. - Specify a random string of at least 32 characters for
PG_META_CRYPTO_KEYto encrypt Studio UI and meta service interactions. SECRET_KEY_BASEmust be at least 64 characters;REALTIME_DB_ENC_KEYmust be exactly 16 characters.- Generate separate random credentials for
S3_PROTOCOL_ACCESS_KEY_IDandS3_PROTOCOL_ACCESS_KEY_SECRET; do not reuse an object-storage administrator password. - If using different PostgreSQL business user passwords, modify
POSTGRES_PASSWORDaccordingly. - If your object storage uses different passwords, modify
S3_ACCESS_KEYandS3_SECRET_KEYaccordingly. - If Edge Functions are exposed to untrusted clients, set
FUNCTIONS_VERIFY_JWTtotrueas needed. API_EXTERNAL_URLshould now be the external Auth service URL, retaining the/auth/v1suffix, for examplehttps://supa.pigsty.io/auth/v1; keepSITE_URLandSUPABASE_PUBLIC_URLat the site root URL.- The current template defaults
PGRST_DB_SCHEMAStopublic,graphql_public; thestorageschema is used by the Storage API and is no longer exposed through PostgREST by default.
To enable asymmetric authentication, configure JWT_KEYS, JWT_JWKS, and all four opaque/asymmetric API-key variables together, then enable the corresponding Compose override. Without the override, the default remains HS256:
If you also select Kong, insert -f docker-compose.kong.yml before -f docker-compose.asymmetric.yml. Use the same override combination for subsequent starts and updates. Edge Functions receive JWT_JWKS through SUPABASE_JWKS and fall back to HS256 when it is empty. Update the worker together with the shared volumes/functions/deno.jsonc import map to support @supabase/functions-js, @supabase/server, and the per-request SUPABASE_FUNCTION_SLUG. See the pinned source notes.
After changing Supabase credentials, update configuration and recreate the containers. The commands below and later startup examples without Compose overrides apply only to the default Envoy + HS256 stack:
For Kong or asymmetric JWTs, first update configuration with ./app.yml -l supabase -t app_config, then enter /opt/supabase and run up -d with the same -f file combination shown above to retain the gateway and JWT overrides.
Advanced: Domain Configuration
If using Supabase locally or on LAN, you can directly connect to the API gateway’s HTTP port 8000 via IP:Port.
An internally resolved static domain is possible. For production, a real domain and HTTPS are recommended. Use a server with a public IP and a domain that you own. Point the domain to the public IP through your cloud, DNS, or CDN provider. Local /etc/hosts resolution is an optional fallback.
The simple approach is to batch-replace the placeholder domain (supa.pigsty) with your actual domain, e.g., supa.pigsty.io:
If not configured beforehand, reload Nginx and Supabase configuration:
The modified configuration should look like:
For complete domain/HTTPS configuration, see Certificate Management. You can also use Pigsty’s built-in local static resolution and self-signed HTTPS certificates as fallback.
Advanced: External Object Storage
You can use S3 or S3-compatible services for PostgreSQL backups and Supabase object storage. Here we use Alibaba Cloud OSS as an example.
Pigsty provides a
terraform/spec/aliyun-s3.tftemplate for provisioning a server and OSS bucket on Alibaba Cloud.
First, modify the S3 configuration in all.children.supabase.vars.apps.supabase.conf to point to Alibaba Cloud OSS:
Reload Supabase configuration:
You can also use S3 as PostgreSQL backup repository. Add an aliyun backup repository definition in all.vars.pgbackrest_repo:
Select aliyun with all.vars.pgbackrest_method. Check the current backup and run check mode first. After explicit authorization, regenerate pgBackRest configuration on the named cluster, initialize the stanza, and create a new full recovery point:
The new repository does not automatically receive old backups. A recovery-window gap remains until its first full backup succeeds. See Switching Repositories for the complete procedure.
Advanced: Using SMTP
You can use SMTP for sending emails. Modify the supabase app configuration with SMTP information:
Reload the configuration with ./app.yml -l supabase -t app_config,app_launch.
Advanced: True High Availability
These steps provide a single-node Supabase setup with a public domain, HTTPS, SMTP, PITR backups, monitoring, and IaC. It can use 600 PostgreSQL extensions. See other Pigsty documentation for high availability. Hands-on Supabase self-hosting consulting is available for $400 USD.
Single-node RTO/RPO depends on external object storage for recovery. After node failure, redeploy Supabase on a new node and restore from external S3 backups. This provides an hour-scale recovery fallback. RPO depends on actual backups and WAL archives and must be verified with restore drills. “MB-level” is not a fixed guarantee.
For RTO below 30 seconds with acknowledged transactions preserved, use multiple nodes. Explicitly select the fast RTO preset and crit.yml strict-synchronous policy. Validate them with failure drills. The default norm preset targets RTO below 45 seconds. Asynchronous replication does not promise RPO=0:
- ETCD: DCS needs three or more nodes to tolerate one node failure.
- PGSQL: PostgreSQL synchronous commit (no data loss) mode recommends at least three nodes.
- INFRA: Monitoring infrastructure failure has less impact; production recommends dual replicas.
- Supabase stateless containers can also be multi-node replicas for high availability.
In this case, you also need to modify PostgreSQL and Silo endpoints to use DNS / L2 VIP / HAProxy high availability endpoints.
For these parts, follow the documentation for each Pigsty module.
Reference conf/ha/trio.yml and conf/ha/safe.yml for upgrading to three or more nodes.
2 - Odoo: Self-Hosted Open Source ERP
Odoo is open-source ERP software with CRM, sales, inventory, and other business applications. The template stays on Odoo Community 19.0 for addon compatibility and uses PostgreSQL 18.
Odoo 19 requires PostgreSQL 13 or later and Python 3.10 or later; the official Docker image provides Python.
Quick Start
On a fresh Linux x86_64 / ARM64 server running a compatible operating system:
Port 8069 is published on all host interfaces by default. Open http://<ip>:8069. The initial application login is admin / admin; change the password at first login.
The template pre-creates the odoo database and disables the database manager. ODOO_ADMIN_PASSWORD is the database-management master password, separate from the application login password.
Configuration Template
Source: conf/app/odoo.yml.
Basics
The deployed configuration is in /opt/odoo/.env:
ODOO_PORT is the published host port number. Compose maps it to the fixed container port 8069 with "${ODOO_PORT}:8069". ODOO_DBNAME selects one database; its name must not contain commas.
For manual deployment, create the PostgreSQL role, database, and extensions first, then run these commands on the Docker host. The Make helpers require Docker Compose, jq, and permission to set directory ownership.
Makefile
Using External PostgreSQL
PostgreSQL 13 or later is supported. Create a dedicated role, database, and the unaccent / pg_trgm extensions:
Replace pg-meta below with the actual database cluster name:
Point PG_HOST, PG_PORT, PG_USERNAME, and PG_PASSWORD in .env to that database, and configure HBA to allow the application. This single-database template does not require CREATEDB or SUPERUSER for the Odoo role.
Check connectivity, entering the password at the prompt:
Expose Odoo Service
You can also access Odoo through the Nginx portal. Use ODOO_PROXY_MODE=true for proxy access and false for direct access only. Run make up after changing .env.
Point domain to the Nginx host and endpoint to the Odoo host and published port. Update this port if you change ODOO_PORT.
With the default workers=0, HTTP and WebSocket share port 8069. Multiple workers require separate port 8072 and /websocket routing; see the Odoo 19 deployment guide.
Use HTTPS in production. Trust Pigsty’s files/pki/ca/ca.crt on the client or configure a publicly trusted certificate.
Odoo Addons
Use addons compatible with Odoo 19. Extract them into /data/odoo/addons (mounted at /mnt/extra-addons in the container) and install their dependencies. Set directory ownership to uid=100, gid=101.
Run make restart after changing addon code. Enable Developer mode, then refresh and install addons in Apps → Update Apps List. Find more addons in Odoo Apps.
Updates and Backups
To update the Odoo 19 image, run make pull, then make up. make restart does not apply a new image or environment. For a fixed version, set ODOO_VERSION to a published dated 19.0 tag. A major-version upgrade requires database migration and compatible addons.
Use Pigsty/pgBackRest for database backups. Manage filestore and addon backups yourself with Restic or PGFS.
Demo
Public demo (availability varies): http://odoo.pigsty.io, username [email protected], password pigsty.
3 - Dify: AI Workflow Platform
Dify is an open-source platform for developing generative AI and LLM applications. It supports agent creation, AI workflows, RAG retrieval, and model management. These features help users build and operate generative AI applications.
Pigsty supports self-hosted Dify with single-command deployment. Critical state resides in externally managed PostgreSQL. You can use pgvector in the same PostgreSQL instance as the vector database to simplify deployment.
The template uses Dify
v1.17.1with plugin daemonv0.6.10-localand sandboxv0.2.15. Validation on 2026-10-08 covered login, an existing Code workflow, and service connections on Linux amd64 with PostgreSQL 18.6. Dify v1.16 and later handle PostgreSQL 18’s built-inuuidv7()without a local migration patch.
Quick Start
On a fresh Linux x86/ARM server running a compatible operating system:
Dify listens on port 5001 by default. Access http://<ip>:5001 in your browser and set up your initial user credentials to log in.
After Dify starts, install extensions and configure system models to begin using it.
Why Self-Host
Data security is a primary reason to self-host Dify. Dify’s Docker Compose template uses basic database images. It lacks enterprise features such as high availability, disaster recovery, monitoring, IaC, and PITR.
Pigsty provides declarative Dify deployment and image mirrors for access in China. The template places PostgreSQL and pgvector under Pigsty management. It deploys Compose Redis, VictoriaMetrics/Grafana monitoring, and an Nginx reverse proxy. After public DNS, ports, and Certbot are configured, it can request a Let’s Encrypt certificate. Files use DIFY_DATA (/data/dify) by default, with optional Silo/S3 object storage.
The template places PostgreSQL/pgvector in an externally managed Pigsty database. API files and plugin data use DIFY_DATA, which defaults to /data/dify. Compose Redis data remains in /opt/dify/volumes/redis/data. Sandbox dependencies and Certbot data also use /opt/dify/volumes/. The Agent local sandbox also stores /home/dify and /workspace in separate named volumes. Backups must include these volumes as well as the database and host directories.
Installation
Start with a single-node Dify deployment. Production high-availability deployment is covered later.
First, use Pigsty’s standard installation process to install the PostgreSQL instance required by Dify:
The ./configure -c app/dify command generates configuration from conf/app/dify.yml and your current environment. Edit passwords, domains, and other required settings in pigsty.yml. Then run ./deploy.yml to perform the standard installation.
Next, run docker.yml to install Docker and Docker Compose, then use app.yml to complete Dify deployment:
You can access the Dify Web admin interface at http://<your_ip_address>:5001 on your local network.
The first login will prompt you to set up default username, email, and password.
You can also use the locally resolved placeholder domain dify.pigsty, or follow the configuration below to use a real domain with an HTTPS certificate.
Configuration
When you run ./configure -c app/dify, Pigsty generates a configuration file from the conf/app/dify.yml template and the current environment. The snapshot below matches the v4.5.0 source template:
Checklist
Check these configuration items:
- Hardware/Software: Prepare required machine resources: Linux
x86_64/arm64server, fresh installation of a mainstream Linux OS - Network/Permissions: SSH passwordless login access, user with sudo privileges without password
- Ensure the machine has a static IPv4 network address on the internal network and can access the internet
- If accessing via public network, ensure you have a domain pointing to the node’s public IP address
- Ensure you use the
app/difyconfiguration template and modify parameters as neededconfigure -c app/dify, enter the node’s internal primary IP address, or specify via-i <primary_ip>command line parameter
- In production, change every example password, application secret, and database credential. [Required]
grafana_admin_password:pigsty, Grafana admin passwordpg_admin_password:DBUser.DBA, PG superuser passwordpg_monitor_password:DBUser.Monitor, PG monitoring user passwordpg_replication_password:DBUser.Replicator, PG replication user passwordpatroni_password:Patroni.API, Patroni HA component passwordhaproxy_admin_password:pigsty, Load balancer admin password
- Change the PostgreSQL business user password and the application settings that use it.
- Default username
difyand passworddifyai123456are generated by Pigsty for Dify; modify according to your needs - In the Dify configuration block, modify
DB_USERNAME,DB_PASSWORD,PGVECTOR_USER,PGVECTOR_PASSWORDaccordingly
- Default username
- Change Dify’s default encryption key.
- You can randomly generate a password string with
openssl rand -base64 42and fill in theSECRET_KEYparameter - Also replace the three Agent development secrets:
DIFY_AGENT_API_TOKEN,DIFY_AGENT_SERVER_SECRET_KEY, andDIFY_AGENT_LOCAL_SANDBOX_AUTH_TOKEN. Generate independent random values; use the format produced bysecrets.token_urlsafe(32)for the server secret.
- You can randomly generate a password string with
- Change the domain used by Dify.
- Replace placeholder domain
dify.pigstywith your actual domain, e.g.,dify.pigsty.io - You can use
sed -ie 's/dify.pigsty/dify.pigsty.io/g' pigsty.ymlto modify Dify’s domain
- Replace placeholder domain
Domain and SSL
To use a real domain with HTTPS, update these settings in pigsty.yml:
- The
difydomain in theinfra_portalparameter - It’s best to specify an email address
certbot_emailfor certificate expiration notifications - Configure Dify’s
NGINX_SERVER_NAMEparameter to specify your actual domain
Use the following commands to request Nginx certificates:
Run the app.yml playbook to redeploy Dify service for the NGINX_SERVER_NAME configuration to take effect:
Upgrading
Before upgrading, verify the PostgreSQL backup and back up the files and named volumes listed below. With MIGRATION_ENABLED=true, the API container runs database migrations at startup. After updating configuration, pulling the new images, and recreating the API container, confirm that it runs the new version before invoking migrations explicitly:
Dify 1.17.1 includes the pre-1.15 legacy model type migration in this process. The separate flask data-migrate legacy-model-types command is no longer needed. Deployments upgrading from before 1.15 that have not completed the plugin auto-upgrade backfill must still run it once:
When upgrading from 1.16, rename EDITION to DEPLOYMENT_EDITION, DIFY_AGENT_SHELLCTL_AUTH_TOKEN to DIFY_AGENT_LOCAL_SANDBOX_AUTH_TOKEN, DIFY_AGENT_SHELLCTL_ENTRYPOINT to DIFY_AGENT_LOCAL_SANDBOX_ENDPOINT, and AGENT_BACKEND_RUN_TIMEOUT_SECONDS to DIFY_AGENT_RUN_TIMEOUT_SECONDS in deployment overrides. Use DIFY_AGENT_RUNTIME_BACKEND=local for the bundled self-hosted sandbox.
Version 1.17.1 fixes document extraction, Human Input workflows, collaboration, and Agent behavior. Re-import CSV, Notion, and XLS documents that were previously extracted incorrectly; replacing the image does not repair indexed text. See the 1.17.1 release notes.
The Agent feature remains Beta and should be exposed only to trusted users. SSRF_PROXY_ALLOW_PRIVATE_IPS and SSRF_PROXY_ALLOW_PRIVATE_DOMAINS apply to both workflow and Agent proxies. Leave them empty for the default private-network deny policy. Explicitly allowlisting api, agent_backend, or a network covering their addresses also allows their other ordinary paths; use precise targets. The Agent shellctl control network still permits direct access from the local sandbox to agent_backend.
File Backup
Use restic to back up Dify file state. Include at least /data/dify, /opt/dify/.env, and /opt/dify/volumes/. The last directory contains Compose Redis, Sandbox dependencies, and any Certbot data. Back up PostgreSQL separately with Pigsty/pgBackRest. Also back up the dify_agent_local_sandbox_home and dify_agent_local_sandbox_workspace named volumes, whose actual names include the Compose project prefix. The Restic commands below do not include these two volumes.
After creating the Restic backup repository, you can backup Dify with:
Another option is to place /data/dify on a shared filesystem managed by the JUICE module. File data can live in Silo/S3 or in a PostgreSQL jfs_blob table; the latter is not PostgreSQL large-object storage.
To store JuiceFS metadata and file data in PostgreSQL, declare a dedicated database and least-privilege user in pg_databases. Then declare the instance on the Dify node. The example passwords are placeholders. Do not use them in production.
Handle database creation and JUICE deployment separately. After confirming the exact targets, run the playbooks:
Database creation, initial filesystem formatting, and mounting change the target environment. Confirm the backup, database name, and host group before execution. Start Dify only after the mount is ready. See JUICE configuration and its PITR consistency boundary. Before mounting over a nonempty /data/dify, stop Dify and plan migration of existing files.
Reference
4 - InsForge: AI Backend-as-a-Service
InsForge is an open-source Backend-as-a-Service platform for AI coding agents, built around PostgreSQL. It provides authentication, database APIs, file storage, a model gateway, edge functions, site deployment, and payment integrations. These features reduce common backend implementation work.
Pigsty provides the app/insforge template. It runs stateless InsForge OSS services in Docker Compose and stores critical state in Pigsty-managed PostgreSQL. This provides high availability, backup and recovery, monitoring, ingress domains, and infrastructure services. The database does not depend on an ephemeral container volume.
The template targets InsForge OSS v2.3.3 and uses external PostgreSQL. It runs three services by default: InsForge Dashboard/API, PostgREST, and Deno Runtime. The latter two bind only to host loopback.
Quick Start
Run the following on a fresh Linux x86 / ARM server with a compatible operating system:
On a fresh deployment, run infra.yml first so node.yml can use its CA. Existing Pigsty deployments should retain their INFRA/ETCD inventory and avoid repeating initialization. See Database and Permissions for the utility library requirements on every database node.
After installation, the default access URLs are:
http://<your_ip_address>:7130http://isf.pigsty
The default administrator account is [email protected] / pigsty. In production, you must change the administrator account, administrator password, JWT secret, encryption key, and database password.
To access InsForge through isf.pigsty, add the following entry to /etc/hosts on the machine running your browser:
To expose the service to the public internet, use a real domain and HTTPS certificate, and modify infra_portal as described below.
Checklist
- Prepare a fresh Linux server with at least
2C4G; use an SSD/NVMe disk. - Confirm that the server has a static private IPv4 address and can access GHCR / Docker Hub, or that a registry mirror is configured.
- After running
./configure -c app/insforge, change the default passwords, domains, and keys inpigsty.yml. - Generate new
JWT_SECRETandENCRYPTION_KEYvalues separately withopenssl rand -base64 32. - Keep
POSTGRES_PASSWORDconsistent with the password ofdbuser_insforgeinpg_users. - For public access, configure a real domain, an HTTPS certificate, and firewall access rules.
- Install and preload
insforge_pg_utilson every PostgreSQL node, verify the extension packages, and runpig pb infoafter deployment.
Architecture
The InsForge template separates the database from the application containers by default:
Components:
- InsForge App:
ghcr.io/insforge/insforge-oss:v2.3.3, providing the Dashboard and main API on port7130. - PostgREST:
postgrest/postgrest:v12.2.12, generating REST APIs from PostgreSQL schemas; bound to127.0.0.1:5430on the host. - Deno Runtime:
denoland/deno:alpine-2.0.6, running the bundled, pinned function host and bound to127.0.0.1:7133on the host. - PostgreSQL: Managed by Pigsty for persistent state, backup, monitoring, and high availability.
Configuration Template
conf/app/insforge.yml defines a single-node, self-hosted InsForge template. The default topology includes:
insforge: The node running the InsForge, PostgREST, and Deno Runtime containers.pg-meta: The PostgreSQL database cluster managed by Pigsty, including the roles, database, and extensions required by InsForge.infra: Infrastructure services such as Nginx ingress, Grafana, and VictoriaMetrics.etcd: The distributed configuration store required by Patroni.
Key configuration excerpts:
Important Parameters
app.yml copies the app/insforge directory to /opt/insforge and uses apps.insforge.conf to override /opt/insforge/.env. Common parameters include:
| Parameter | Default | Description |
|---|---|---|
JWT_SECRET | Sample secret | JWT signing secret; must be replaced in production, preferably with a random value of at least 32 characters |
ENCRYPTION_KEY | Sample secret | Encrypts runtime credentials; must be replaced in production and managed separately from JWT_SECRET |
ROOT_ADMIN_USERNAME | [email protected] | Root administrator account |
ROOT_ADMIN_PASSWORD | pigsty | Root administrator password; must be replaced in production |
POSTGRES_HOST / POSTGRES_PORT | 10.10.10.10 / 5432 | Pigsty PostgreSQL endpoint |
POSTGRES_DB | insforge | InsForge database |
POSTGRES_USER | dbuser_insforge | Application user that connects InsForge to PostgreSQL |
POSTGRES_PASSWORD | DBUser.Insforge | Application user password; must be replaced in production |
INSFORGE_VERSION | v2.3.3 | InsForge OSS image tag |
DENO_RUNTIME_IMAGE | denoland/deno:alpine-2.0.6 | Full Deno Runtime image reference |
INSFORGE_IMAGE | Empty | Optional full app image override, taking precedence over INSFORGE_VERSION |
APP_PORT | 7130 | External InsForge App port |
POSTGREST_PORT | 5430 | PostgREST loopback port |
DENO_PORT | 7133 | Deno Runtime loopback port |
ACCESS_API_KEY | Empty | Optional MCP / API access key; generated by InsForge when empty |
ACCESS_ANON_KEY | Empty | Optional anonymous frontend access key; should begin with anon_ when set |
OPENROUTER_API_KEY | Empty | Optional OpenRouter model gateway key |
AWS_S3_BUCKET / S3_* | Empty | Optional object storage configuration |
DENO_DEPLOY_TOKEN | Empty | Optional Deno Deploy integration |
VERCEL_TOKEN / FLY_API_TOKEN | Empty | Optional site deployment and compute platform integrations |
STRIPE_* / RAZORPAY_* | Empty | Optional payment integrations |
Generate production secrets with:
When changing the database password, keep the application and database definitions synchronized. For example:
Once ENCRYPTION_KEY has been used for production data, keep it stable. Changing it may make stored runtime credentials such as API keys, OAuth tokens, and function secrets impossible to decrypt.
Database and Permissions
The default InsForge database is named insforge and owned by dbuser_insforge. The template creates the following roles:
| Role | Login | Purpose |
|---|---|---|
dbuser_insforge | Yes | Application user that connects InsForge to PostgreSQL; granted superuser in the template |
anon | No | PostgREST anonymous role |
authenticated | No | PostgREST authenticated-user role |
project_admin | No | Administrative role with service-key semantics and BYPASSRLS |
files/insforge.sql configures PostgREST role privileges, default privileges, ACLs for project_admin, and the helper function public.reload_postgrest_schema(). The function executes:
This notifies PostgREST to reload its schema.
insforge_pg_utils is a required PostgreSQL utility library. It lets project_admin manage RLS policies on managed tables and manage extensions; application migrations do not replace it. Copy the complete app/insforge/pgutils/ directory to every database node, install it before PostgreSQL initialization, and preload it through pg_libs. It exposes no SQL objects, so no CREATE EXTENSION is needed.
pgutils/install.sh downloads and verifies pinned official source, applies the PG16–18 compatibility patch, and builds it with PGXS. For PG18 on Debian/Ubuntu, use postgresql-server-dev-18 and /usr/lib/postgresql/18/bin/pg_config. On EL/RPM, use postgresql18-devel, gcc, make, curl, patch, and /usr/pgsql-18/bin/pg_config. The script does not change configuration or restart a cluster; plan preload configuration and restart separately for an existing deployment.
cron.use_background_workers: true runs scheduled jobs as background workers without adding a loopback trust rule. Reserve enough max_worker_processes slots for cron, replication, and other extensions.
Service Ports and Persistence
The default Docker Compose services are:
| Service | Container | Host Port | Description |
|---|---|---|---|
| InsForge App | insforge | 7130 | Dashboard and main API |
| PostgREST | insforge-postgrest | 127.0.0.1:5430 | Automatically generated REST API |
| Deno Runtime | insforge-deno | 127.0.0.1:7133 | Edge function runtime |
Remote clients use the main InsForge API for data and functions; do not expose PostgREST or Deno directly. The Docker compute provider is optional, and the template does not mount the Docker socket by default. Enabling that mount grants the container root-equivalent access to the host.
The default Docker volumes are:
| Volume | Mount Point | Description |
|---|---|---|
storage-data | /insforge-storage | Local file storage |
insforge-logs | /insforge-logs | Application logs |
deno_cache | /deno-dir | Deno module cache |
By default, Docker containers connect to the Pigsty node at 10.10.10.10:5432. The template HBA rule permits 172.16.0.0/12, covering Docker’s default bridge and common custom bridge networks.
Domain and Ingress
The template adds an InsForge entry to infra_portal by default:
To use a real domain such as insforge.example.com, replace the placeholder in bulk:
Then apply the Nginx ingress configuration:
Before requesting an HTTPS certificate, verify that the domain resolves to the current node. Then add or update certbot under infra_portal.insforge:
Then run:
Operations
InsForge is installed in /opt/insforge. Common commands include:
Upgrade to v2.3.3
Before upgrading, back up PostgreSQL, including system.migrations, file storage, and deployment overrides. Preserve the existing JWT and credential-encryption keys. After you pull the new image and recreate the InsForge container, its startup migration runner applies and records 065_restrict-http-extension-to-admin.
This migration revokes PUBLIC EXECUTE on 13 outbound HTTP and curl-option function signatures from the http extension while retaining project_admin execution. This prevents normal users and anonymous API keys from invoking them through RPC. The new-install files/insforge.sql baseline includes the same restriction. Do not replay the full baseline on an existing database or run a separate copy of migration 065 manually.
After upgrading, check the migration ledger and actual function privileges. The defaults should be anon=false, authenticated=false, and project_admin=true. Custom role memberships or explicit grants can still confer additional access. See the template upgrade checks and official migration.
Offline Deployment
For offline environments, save the images in advance:
The first Deno startup needs access to deno.land and registry.npmjs.org to pre-cache the function host and worker dependencies. The SDK is pinned to @insforge/[email protected], and functions/deno.lock fixes the dependency graph. Configure DENO_HTTP_PROXY / DENO_HTTPS_PROXY if needed. make save archives images only, not the deno_cache volume; prepare and transfer that cache separately for offline use.
Default artifact locations:
/tmp/docker/insforge/postgrest.tgz/tmp/docker/insforge/insforge.tgz/tmp/docker/insforge/deno.tgz/tmp/insforge.tgz
Load the images on the target machine:
Data and Backup
InsForge state is divided into two categories:
- Business data, users, project metadata, permissions, and related state are stored in the Pigsty PostgreSQL database
insforge. - Local files and logs are stored in the Docker volumes
storage-dataandinsforge-logs.
By default, the template schedules a full PostgreSQL backup every day at 1:00 AM:
After deployment, check the backup status:
If file storage is configured to use S3 / MinIO, file objects are managed by that object storage system. If you keep local volumes, include them separately in your host-level backup strategy.
Troubleshooting
Check container status:
View logs:
Check whether PostgreSQL is reachable from the container:
Check whether the HBA rules include the Docker network:
Check whether the roles exist:
Check for port conflicts:
Common issues:
- Cannot log in: Verify
ROOT_ADMIN_USERNAME/ROOT_ADMIN_PASSWORDin/opt/insforge/.env. Check theinsforgecontainer logs. - PostgREST fails to start: Verify that
anon,authenticated, andproject_adminexist. Verify thatJWT_SECRETmatches the InsForge App setting. - Database connection fails: Verify
POSTGRES_HOST,POSTGRES_PORT, andPOSTGRES_PASSWORDagainstpg_users. Verify that HBA permits the Docker network. - File upload or download errors: When using S3 / MinIO, check
AWS_S3_BUCKET,S3_ENDPOINT_URL,S3_FORCE_PATH_STYLE, and the access-key configuration.
References
- InsForge project: https://github.com/InsForge/InsForge
- Pigsty template: https://github.com/pgsty/pigsty/blob/main/conf/app/insforge.yml
- Docker Compose: https://github.com/pgsty/pigsty/blob/main/app/insforge/docker-compose.yml
- Database baseline: https://github.com/pgsty/pigsty/blob/main/files/insforge.sql
5 - Hindsight: AI Long-Term Memory
Hindsight is a PostgreSQL-native long-term memory service for AI agents.
Pigsty provides the app/hindsight configuration template (conf/app/hindsight.yml). By default, it uses Pigsty-managed PostgreSQL instead of Hindsight’s built-in development database.
Quick Start
Default access URLs:
- UI:
http://hs.pigstyorhttp://<IP>:9999 - API:
http://hs-api.pigstyorhttp://<IP>:8888
Key Settings
conf/app/hindsight.yml overrides /opt/hindsight/.env through apps.hindsight.conf. Key parameters:
HINDSIGHT_API_PUBLISH_PORT: public API port, default8888HINDSIGHT_UI_PUBLISH_PORT: public UI port, default9999HINDSIGHT_DB_HOST/HINDSIGHT_DB_PORT/HINDSIGHT_DB_NAME/HINDSIGHT_DB_USER/HINDSIGHT_DB_PASSWORDHINDSIGHT_API_VECTOR_EXTENSION: defaultpgvectorHINDSIGHT_API_TEXT_SEARCH_EXTENSION: defaultnativeHINDSIGHT_API_LLM_PROVIDER: defaultnoneHF_HUB_OFFLINE: defaults to1to use bundled models; set it to0and provide outbound network access to download uncached models
With the default LLM provider, none, Hindsight can retain text and recall it using local embedding/reranker models. Fact extraction, reflection, and consolidation require Ollama or an OpenAI-compatible API.
The template preserves bundled and downloaded models in the hindsight-cache named volume. The database needs vector, plus pg_trgm installed in public. Check the pg_trgm location when reusing a database from another template; CREATE EXTENSION IF NOT EXISTS does not move an existing extension.
Operations
References
- Hindsight project: https://github.com/vectorize-io/hindsight
- Pigsty template: https://github.com/pgsty/pigsty/blob/main/conf/app/hindsight.yml
6 - FerretDB: MongoDB Protocol
FerretDB provides a MongoDB-compatible protocol over PostgreSQL and the DocumentDB extension. Pigsty’s app/ferretdb runs the stateless protocol proxy. PostgreSQL, the postgres database, DocumentDB extensions, and a backend PostgreSQL login role must already exist. The fork/mongo configuration template prepares these dependencies together.
Quick Start
Install mongosh or another MongoDB-compatible client separately. Then connect with the dedicated login from the template:
Key Configuration
Override template variables through apps.ferretdb.conf in the inventory. Do not edit the deployed /opt/ferretdb/.env directly:
Port 5436 is Pigsty’s PostgreSQL service that connects directly to the current primary. Linux host-gateway mapping connects the container through the local host and retains this primary routing. The MongoDB port listens on loopback by default. Change FERRETDB_BIND_ADDR explicitly only when remote clients need access.
FerretDB authenticates users through PostgreSQL. It does not currently implement MongoDB authorization, so MongoDB roles cannot isolate access. The template also does not enable MongoDB client TLS. Before exposing the service to an untrusted network, configure certificates and the FERRETDB_LISTEN_TLS* variables.
FerretDB releases specify a preferred DocumentDB version, while Pigsty may ship a newer compatible package. After upgrading either component, rerun an authenticated CRUD smoke test.
Optional Three-Node Topology
The fork/mongo template includes a commented three-node PostgreSQL / DocumentDB cluster. Each node runs a FerretDB container. HAProxy exposes port 27017 at the floating endpoint 10.10.10.4:27017 (mongo.pigsty). Enable the complete pg-mongo cluster and the additional etcd members, then run:
HAProxy uses TCP health checks to exclude stopped or unreachable FerretDB processes. The image’s built-in health check verifies the backend connection. Production deployments should use a shared Silo or external S3-compatible pgBackRest repository. This keeps the same backup history available after a PostgreSQL primary failover.
References
7 - Teable: AI No-Code Database
Teable is a no-code database platform for team collaboration.
Pigsty provides the app/teable template (conf/app/teable.yml). Its default dependencies are PostgreSQL + Silo + Docker. It does not require Redis.
Quick Start
Default endpoints:
http://<IP>:8890http://tea.pigsty
Key Settings
The template writes the following into /opt/teable/.env:
POSTGRES_HOST/POSTGRES_PORT/POSTGRES_DB/POSTGRES_USER/POSTGRES_PASSWORDPRISMA_DATABASE_URLPUBLIC_ORIGIN(public URL)PUBLIC_DATABASE_PROXYTEABLE_PORT(default8890)
Operations
References
- Teable docs: https://help.teable.io/
- Pigsty template: https://github.com/pgsty/pigsty/blob/main/conf/app/teable.yml
8 - Gitea: Self-Hosted Git Service
Gitea is a lightweight open-source Git hosting platform.
Pigsty’s app/gitea template uses external PostgreSQL mode by default. Configure the database through GITEA_DB_* values in .env.
Quick Start
Default endpoints:
- Web:
http://git.pigstyorhttp://<IP>:8889 - SSH:
<IP>:222
Database Preparation
Connection string example:
Reverse Proxy and Upgrades
Gitea 28 serves notifications at /-/ws. Enable WebSocket support on the Nginx portal:
Before upgrading, back up PostgreSQL and /data/gitea together and record the running image digest. Restore matching database and file backups when rolling back. Gitea 28 defaults to removing completed Actions runs, logs, and artifacts after 400 days; check retention settings if those records need to be kept longer. See the Gitea 28 release notes.
Common Commands
References
- Gitea docs: https://docs.gitea.com/
- Pigsty template: https://github.com/pgsty/pigsty/tree/main/app/gitea
9 - NocoDB: Open-Source Airtable
NocoDB is an open-source Airtable alternative that turns any database into a smart spreadsheet.
Use its visual interface to create database applications without code. NocoDB supports PostgreSQL, MySQL, SQL Server, and other databases. You can use it for internal tools and data management systems.
Quick Start
Pigsty provides a Docker Compose configuration file for NocoDB in the software template directory:
Review and modify the .env configuration file (adjust database connections as needed).
Start the service:
Access NocoDB:
- Default URL: http://nocodb.pigsty
- Alternate URL: http://10.10.10.10:8080
- First-time access requires creating an administrator account
Management Commands
Use these Makefile commands to manage NocoDB:
Connect to PostgreSQL
NocoDB can connect to PostgreSQL databases managed by Pigsty.
When adding a new project in the NocoDB interface, select “External Database” and enter the PostgreSQL connection information:
After connecting, NocoDB reads the table structure automatically. You can then manage data through the visual interface.
Features
- Smart Spreadsheet Interface: Excel/Airtable-like user experience
- Multiple Views: Grid, form, kanban, calendar, gallery views
- Collaboration Features: Team collaboration, permission management, comments
- API Support: Auto-generated REST API
- Integration Capabilities: Webhooks, Zapier integrations
- Import/Export: CSV, Excel format support
- Formulas and Validation: Complex data calculations and validation rules
Configuration
NocoDB configuration is in the .env file:
Data Persistence
By default, NocoDB stores metadata in external PostgreSQL. It can also store application data in PostgreSQL.
If using local storage, data is saved in the /data/nocodb directory.
Security Recommendations
- Change Default Secret: Modify
NC_AUTH_JWT_SECRETin the.envfile - Use Strong Passwords: Set strong passwords for administrator accounts
- Configure HTTPS: Enable HTTPS for production environments
- Restrict Access: Limit access through firewall or Nginx
- Regular Backups: Regularly back up the NocoDB metadata database
Related Links
- NocoDB Website: https://nocodb.com/
- Documentation: https://docs.nocodb.com/
- GitHub Repository: https://github.com/nocodb/nocodb
- Pigsty Software Template: https://github.com/pgsty/pigsty/tree/main/app/nocodb
10 - Mattermost: Open-Source Team Collaboration
Mattermost is an open-source team collaboration platform and a private alternative to Slack.
Pigsty provides app/mattermost (conf/app/mattermost.yml). It stores application state in external PostgreSQL and keeps file directories on host paths.
Quick Start
Default endpoints:
http://<IP>:8065http://mm.pigsty
On first access, initialize the admin account in the web UI.
Default Storage and Connections
Default template settings include:
- PostgreSQL URL:
POSTGRES_URL=postgres://dbuser_mattermost:DBUser.Mattermost@<IP>:5432/mattermost?... - Persistent directories:
/data/mattermost/{config,data,logs,plugins,client/plugins,bleve-indexes}
Operations
References
- Mattermost docs: https://docs.mattermost.com/
- Pigsty template: https://github.com/pgsty/pigsty/blob/main/conf/app/mattermost.yml
11 - Wiki.js: OSS Wiki Software
Public Demo: http://wiki.pigsty.cc
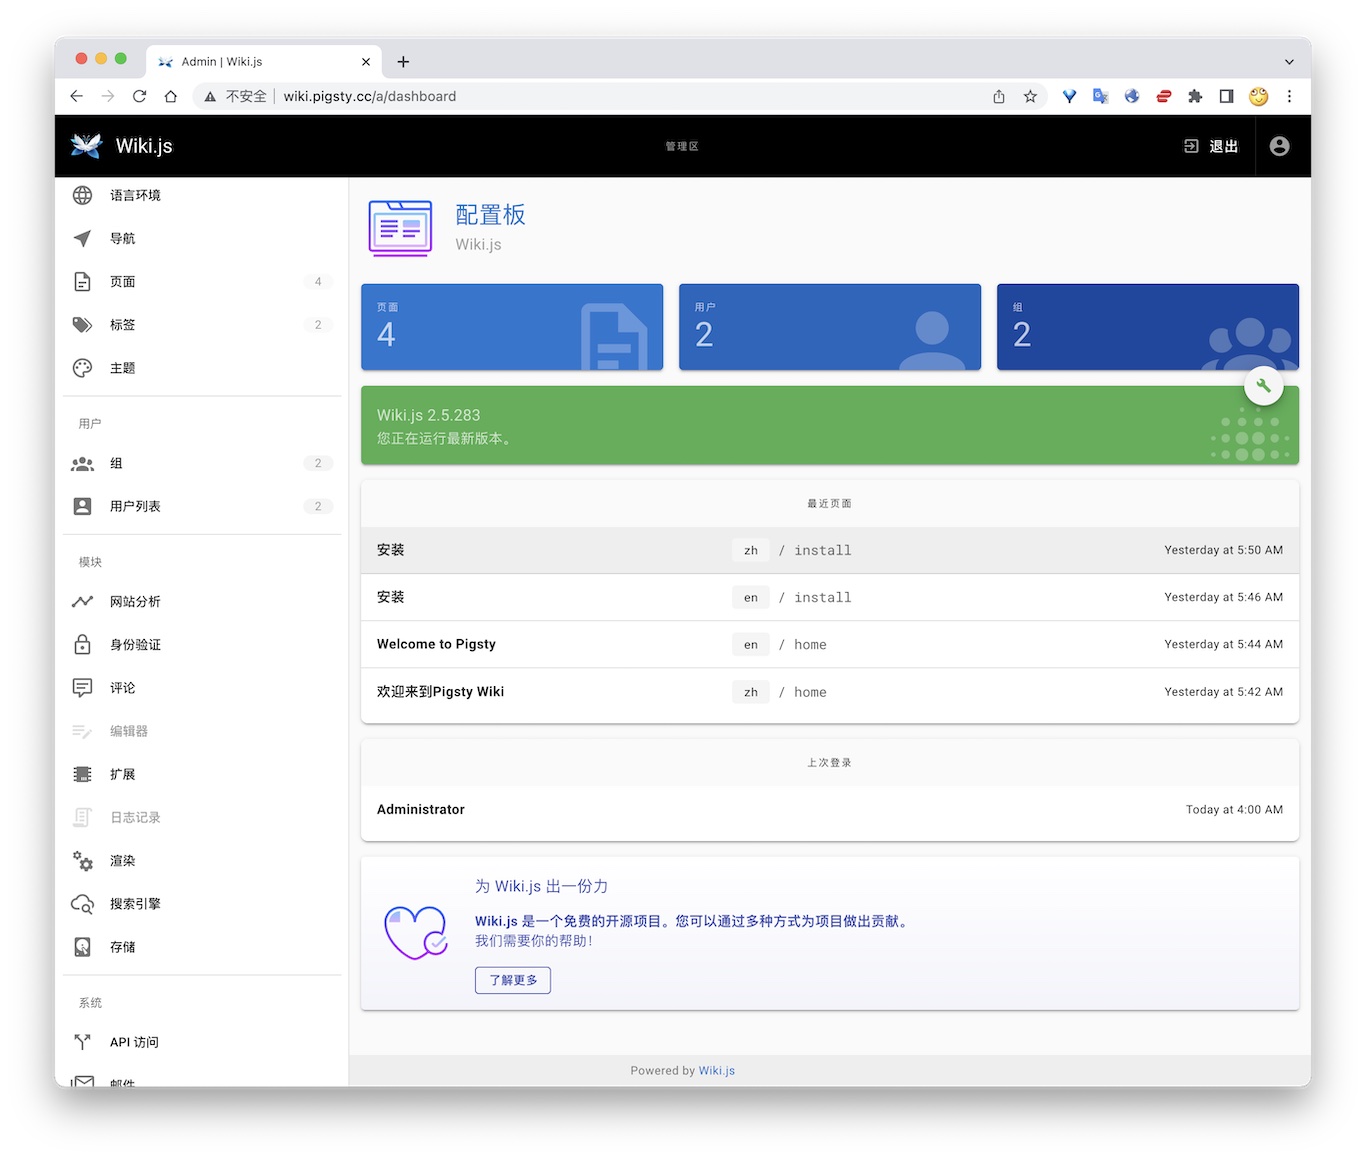
The current Compose uses the untagged requarks/wiki image. Stable 2.x releases are maintained in requarks/wiki-v2; the original requarks/wiki repository contains 3.x Beta releases. The image resolved to 2.5.316 during validation on 2026-10-08. Record and verify the actual image version before production upgrades.
TL; DR
Postgres Preparation
Configuration
Access
- Default Port for wiki: 9002
12 - Maybe: Self-Hosted Personal Finance
Maybe is an open-source personal finance application. It manages accounts, transactions, budgets, investments, and household financial views. This Rails application stores production business data in PostgreSQL and uses Redis for background job queues.
Pigsty’s app/maybe template connects stateless Maybe Web / Worker containers to Pigsty-managed PostgreSQL. Local Redis provides the Sidekiq queue. Financial data resides in a PostgreSQL cluster with backup, monitoring, and recovery support, rather than an ephemeral Docker volume.
The upstream Maybe repository has been archived, and its latest release is
v0.6.0. GHCR currently publishesstableandlatestimage tags. Pigsty usesstableby default, which tracks the latest release image.
Quick Start
Run the following on a fresh Linux x86 / ARM server with a compatible operating system:
Maybe listens on port 5002 by default. After installation, you can access it at:
http://<your_ip_address>:5002http://maybe.pigsty
On the first visit, select the account creation option on the login page. Register your first household account.
To access Maybe through maybe.pigsty, add the following entry to /etc/hosts on the machine running your browser:
To expose the service to the public internet, use a real domain and HTTPS certificate, and modify infra_portal as described below.
Checklist
- Prepare a fresh Linux server with at least
2C4G; use an SSD/NVMe disk. - Confirm that the server has a static private IPv4 address and can access GHCR / Docker Hub, or that a registry mirror is configured.
- After running
./configure -c app/maybe, change the default passwords, domain, and secrets inpigsty.yml. - Generate a new
SECRET_KEY_BASEwithopenssl rand -hex 64. - Keep
POSTGRES_PASSWORDconsistent with the password of themaybeuser inpg_users. - For public access, configure a real domain, an HTTPS certificate, and firewall access rules.
- Confirm that PostgreSQL backup jobs run correctly, and check
pig pb infoafter deployment.
Configuration Template
conf/app/maybe.yml defines a single-node, self-hosted Maybe template. The default topology includes:
maybe: The node running the Maybe Web / Worker / Redis containers.pg-maybe: The PostgreSQL database cluster managed by Pigsty.infra: Infrastructure services such as Nginx ingress, Grafana, and VictoriaMetrics.etcd: The distributed configuration store required by Patroni.
Key configuration excerpts:
Maybe / Rails uses maybe_production as its default production database name. You can rename it to maybe. Update POSTGRES_DB, pg_databases.name, pg_hba_rules.db, and all documentation and operational script references together.
Important Parameters
app.yml copies the app/maybe directory to /opt/maybe and uses apps.maybe.conf to override /opt/maybe/.env. Common parameters include:
| Parameter | Default | Description |
|---|---|---|
MAYBE_IMAGE | ghcr.io/maybe-finance/maybe | Maybe image repository |
MAYBE_VERSION | stable | Image tag; keep stable for production |
MAYBE_PORT | 5002 | Host port exposed by Maybe |
MAYBE_DATA | /data/maybe | Persistent directory on the host |
APP_DOMAIN | maybe.pigsty | Placeholder for the default Maybe ingress domain |
SECRET_KEY_BASE | Sample random string | Rails encryption and signing secret; must be replaced in production |
DB_HOST / DB_PORT | 10.10.10.10 / 5432 | Pigsty PostgreSQL endpoint |
POSTGRES_USER | maybe | Application user that connects Maybe to PostgreSQL |
POSTGRES_PASSWORD | MaybeFinance2026 | Application user password; must be replaced in production |
POSTGRES_DB | maybe_production | Maybe production database |
REDIS_VERSION | 7-alpine | Local Redis image tag |
Generate a production secret with:
When changing the password, keep the application and database definitions synchronized. For example:
Domain and Ingress
The template adds a Maybe entry to infra_portal by default:
To use a real domain such as finance.example.com, replace the placeholder in bulk:
Then apply the Nginx ingress configuration:
Before requesting an HTTPS certificate, verify that the domain resolves to the current node. Then add certbot under infra_portal.maybe:
Then run:
Operations
Maybe is installed in /opt/maybe. Common commands include:
The web container runs db:prepare at startup, so manual migration is usually unnecessary. After an image upgrade, inspect any migration errors in startup logs. Then run:
Data and Backup
Maybe state is divided into two categories:
- Business data is stored in the Pigsty PostgreSQL database
maybe_production. - Attachments and cache are stored in the host directories
/data/maybe/storageand/data/maybe/redis.
By default, the template schedules a full PostgreSQL backup every day at 1:00 AM:
After deployment, check the backup status:
If you use Maybe to store real financial data in production, at minimum:
- Regularly verify that PostgreSQL backups succeed.
- Place the pgBackRest repository on reliable storage or object storage.
- Include
/data/maybe/storagein file-level backups; for example, use restic to back it up to S3. - Do not expose
SECRET_KEY_BASE, database passwords, or API keys in a public repository.
Security Recommendations
Maybe manages highly sensitive personal and household financial data. For production use:
- Change all Pigsty default passwords, especially
pg_admin_password,pg_monitor_password,patroni_password, andhaproxy_admin_password. - Change the Maybe database user password in
POSTGRES_PASSWORD. - Use a new
SECRET_KEY_BASE; do not retain the sample value from the template. - Enable HTTPS for public access and restrict access to administration ports.
- If you enable
OPENAI_ACCESS_TOKENorSYNTH_API_KEY, assess both external API costs and the boundary of data exposure.
The upstream Maybe repository is archived. It suits users who accept the existing features and prefer long-term local ownership. If you need new features or automatic bank synchronization, evaluate upstream maintenance before adoption.
References
- Maybe project: https://github.com/maybe-finance/maybe
- Maybe Docker self-hosting guide: https://github.com/maybe-finance/maybe/blob/main/docs/hosting/docker.md
- Pigsty Maybe template: https://github.com/pgsty/pigsty/blob/main/conf/app/maybe.yml
- Pigsty Docker module
- Pigsty Nginx ingress
13 - Immich: Self-Hosted Photo and Video Library
Immich is a high-performance, self-hosted photo and video management application. It is a popular open-source alternative to Google Photos, licensed under AGPL-3.0. Features include web and mobile uploads, album sharing, timelines, maps, EXIF and RAW support, and LivePhoto. It also provides semantic search, facial recognition, and automatic backups.
Pigsty’s app/immich template runs the Immich application layer with Docker Compose and stores metadata in Pigsty-managed PostgreSQL.
The template follows Immich v3 and uses VectorChord by default for similar-image search, smart search, and face-search vectors. On 2026-10-08, both Server and ML images resolved to 3.3.0. Validation used a new media library on Linux amd64 with PostgreSQL 18.6 and covered uploads, thumbnails, and real machine-learning inference.
Immich’s official single-node Compose template runs PostgreSQL in an application container. Pigsty manages PostgreSQL separately, with monitoring, backups, PITR, extension management, and high-availability access.
Quick Start
Immich recommends at least 2 CPU cores and 6 GB RAM. For smooth operation, it recommends 4 CPU cores and 8 GB RAM. The v3 amd64 machine-learning image requires x86-64-v2 instructions. Linux with local SSD storage is recommended for production.
On a fresh x86 or ARM Linux server running a compatible operating system:
Default endpoints:
If you use photo.pigsty, add a hosts entry on the browser host or replace the template domain with a real domain.
Template Structure
conf/app/immich.yml defines a single-node self-hosted Immich template. The default topology includes:
immich: the node running Immich Server, Machine Learning, and local Valkey/Redis containers.pg-immich: the Pigsty-managed PostgreSQL cluster.infra: Nginx ingress, Grafana, VictoriaMetrics, and other infrastructure.etcd: the distributed configuration store required by Patroni.
Application containers include:
immich-server: API, Web UI, and background jobs, exposed on host port2283by default.immich-machine-learning: CLIP and facial-recognition model inference.redis: local Valkey queues and cache.
The template does not start the PostgreSQL container from Immich’s upstream Compose file. Pigsty provides the database through DB_URL.
Data Storage Strategy
Immich state is divided into three layers that must be managed separately:
- Media files: original photos and videos, thumbnails, transcoded videos, avatars, and the upload queue, stored in the host directory specified by
UPLOAD_LOCATION. - PostgreSQL: metadata for users, albums, assets, EXIF, file paths, job state, people, faces, and smart-search vectors.
- Valkey/Redis: queues, cache, and runtime state; it must not be treated as an authoritative data source.
Photo and video files are not stored in PostgreSQL. Rescanning the media directory cannot reconstruct complete application state. Database paths and metadata are also required.
A recoverable Immich backup requires both PostgreSQL and the media directory. A database-only backup omits photos. A file-only backup cannot reliably restore albums, users, shares, faces, and search state.
PostgreSQL
Default database connection and vector extension:
The template installs the extension packages on the pg-immich cluster and creates the database extensions:
vchord must be added to shared_preload_libraries through pg_libs; the template already configures it:
pg_trgm must be in public because Immich migrations reference gin_trgm_ops without a schema qualifier. Check its location when reusing a database from another template; CREATE EXTENSION IF NOT EXISTS does not move an installed extension.
The default connection goes directly to PostgreSQL on port 5432. Do not point Immich at PgBouncer transaction pooling. Direct PostgreSQL connections or session pooling are more reliable for migrations, indexes, and prepared statements.
Immich treats pre-existing PostgreSQL as an advanced deployment option. It notes that this enables WAL backup tools such as pgBackRest and Barman. Pigsty creates the database, user, and extensions in advance. The Immich application user therefore does not need PostgreSQL superuser privileges.
Media Files
Uploaded photos, videos, thumbnails, transcoded files, and avatars are stored in the host directory specified by UPLOAD_LOCATION:
PostgreSQL stores only metadata and file paths. Media files are not stored in PostgreSQL and are not automatically protected by pgBackRest.
A production deployment must back up at least two data layers:
- PostgreSQL: use Pigsty pgBackRest / PITR.
- Media files: perform a complete file-level backup of
/data/immich/library, including originals, the upload queue, thumbnails, transcoded files, avatars, and other generated assets.
For a more consistent combined backup, stop immich-server before backing up the database and media directory together. If the service cannot be stopped, back up the database first, followed by the filesystem.
Images and Networking
The default images come from GHCR and Docker Hub:
The Valkey digest matches the Immich 3.3.0 release Compose. Both make pull and make save resolve the same image reference from Compose.
If pulls are slow or restricted, configure the Docker daemon proxy; shell proxy_env alone does not configure Docker image pulls. Docker Hub mirrors do not cover GHCR. Use docker compose config --images to check the resolved image set.
Operations
After installation, enter /opt/immich:
To pin a specific Immich version, set the following in pigsty.yml:
Read the upstream release notes before upgrading Immich or VectorChord. After a VectorChord package upgrade, you will usually need to update the extension and rebuild related indexes in immich:
Rebuilding indexes for a large library can take a long time. Confirm that you have a backup and a maintenance window before proceeding.
References
- Immich project: https://github.com/immich-app/immich
- Immich pre-existing PostgreSQL: https://docs.immich.app/administration/postgres-standalone/
- Immich backup and restore: https://docs.immich.app/administration/backup-and-restore/
- Pigsty Immich template: https://github.com/pgsty/pigsty/blob/main/conf/app/immich.yml
- Pigsty Docker module
- Pigsty Nginx ingress
14 - Kong: API Gateway
Kong is an open-source API gateway.
Pigsty’s app/kong template stores configuration in PostgreSQL. It automatically runs the one-time kong-migration job.
Quick Start
Default ports:
- Proxy HTTP:
8000 - Proxy HTTPS:
8443 - Admin API:
8001
Database Preparation
Connection string example:
Common Commands
References
- Kong docs: https://docs.konghq.com/
- Pigsty template: https://github.com/pgsty/pigsty/tree/main/app/kong
15 - Metabase: BI Analytics Tool
Metabase is an open-source business intelligence tool. Teams can quickly explore and visualize data through its interface without SQL knowledge.
Metabase provides many chart types and connects to different databases. These features support enterprise data analysis.
The template defaults to metabase/metabase:v0.64.1.x. Use the single METABASE_IMAGE setting to override the full image reference. On 2026-10-08, the tag resolved to 0.64.1.1; validation on PostgreSQL 18.6 covered upgrading a restored metadata database, login, and querying an existing saved question.
Quick Start
Pigsty provides a Docker Compose configuration file for Metabase in the software template directory:
Review and modify the .env configuration file:
Before starting, create a dedicated metabase database and dbuser_metabase role matching the .env connection settings. Do not share the Pigsty CMDB database.
Start the service:
Access Metabase:
- Default URL: http://mtbs.pigsty
- Alternate URL: http://10.10.10.10:9004
- First-time access requires initial setup
Management Commands
Use these Makefile commands to manage Metabase:
Connect to PostgreSQL
Metabase can connect to PostgreSQL databases managed by Pigsty.
During Metabase initialization or when adding a database, select “PostgreSQL” and enter the connection information:
After connecting, Metabase scans the database schema automatically. You can then create questions and dashboards.
Features
- No SQL Required: Build queries through visual interface
- Rich Chart Types: Line, bar, pie, map charts, and more
- Interactive Dashboards: Create interactive data dashboards
- Auto Refresh: Schedule data and dashboard updates
- Permission Management: Fine-grained user and data access control
- SQL Mode: Advanced users can write SQL directly
- Embedding: Embed charts into other applications
- Alerting: Automatic notifications on data changes
Configuration
Metabase configuration is in the .env file:
Recommended: Use a dedicated PostgreSQL database for storing Metabase metadata.
Data Persistence
Metabase metadata (users, questions, dashboards, etc.) is stored in the configured database.
The template uses external PostgreSQL by default and does not configure a persistent /data/metabase directory for H2. Its /api/health check covers both the application and metadata database. Wait for healthy status during initial migrations.
Upgrading from Metabase 63 to 64 automatically migrates the metadata database. Back it up and record the old image digest first, then test on a restored copy. Rollback requires the matching database backup and old image; replacing the image alone does not undo database migrations. See the upgrade guide.
Performance Optimization
- Use PostgreSQL: Allocate separate resources for the metadata database and monitor its workload
- Increase Memory: Pass
JAVA_OPTSexplicitly in Compose’senvironmentto tune JVM memory; adding it to.envalone does not pass it into the container - Database Indexes: Create indexes for frequently queried fields
- Result Caching: Enable Metabase query result caching
- Scheduled Updates: Set reasonable dashboard auto-refresh frequency
Security Recommendations
- Change Default Credentials: Modify metadata database username and password
- Enable HTTPS: Configure SSL certificates for production
- Configure Authentication: Enable SSO or LDAP authentication
- Restrict Access: Limit access through firewall
- Regular Backups: Back up the Metabase metadata database
Related Links
- Metabase Website: https://metabase.com/
- Documentation: https://www.metabase.com/docs/
- GitHub Repository: https://github.com/metabase/metabase
- Pigsty Software Template: https://github.com/pgsty/pigsty/tree/main/app/metabase
16 - Registry: Container Image Cache
Pigsty provides the app/registry template (conf/app/registry.yml) for:
- Docker Registry cache service (default
5000) - Optional management UI (default
5080)
The default images are registry:3.1.2 and joxit/docker-registry-ui:2.6.0. The template is a pull-through cache for one upstream, Docker Hub by default. This mode does not accept image pushes.
Quick Start
Default endpoints:
- Registry API:
http://<IP>:5000orhttp://d.pigsty - Registry UI:
http://<IP>:5080orhttp://dui.pigsty
Image data is stored in /data/registry by default.
Docker Client Configuration
If you run HTTP without TLS, Docker must trust the registry explicitly:
registry-mirrors applies to Docker Hub pulls. It does not redirect explicit GHCR, Quay, or other registry references. For direct access through http://<IP>:5000, set both the mirror address and insecure-registries to the corresponding <IP>:5000 endpoint.
After editing /etc/docker/daemon.json, restart Docker:
Proxies and Upgrades
Configure the Docker daemon’s image-pull proxy separately from the Registry container’s upstream proxy. The latter uses REGISTRY_HTTP_PROXY / REGISTRY_HTTPS_PROXY with an address reachable from the container. Host 127.0.0.1 is not the container’s route to the host.
Registry 3.1.2 contacts its upstream during startup. A populated cache does not become an offline registry if the upstream is unavailable at restart. Keep the default unauthenticated cache on a trusted network. If upstream private credentials are configured, protect the cache endpoint too, to avoid exposing private images to all cache users.
Version 3.1.2 includes manifest/blob digest validation fixes. Preserve configuration and a cache copy before upgrading, then check /v2/, the UI backend, and cold/hot pulls by digest. See the 3.1.2 release notes.
Operations
app/registry/Makefile runs in /opt/registry by default:
References
- Docker Registry docs: https://docs.docker.com/registry/
- Pigsty template: https://github.com/pgsty/pigsty/blob/main/conf/app/registry.yml
17 - JumpServer: Open-Source Bastion Host
JumpServer is an open-source PAM and bastion-host system. It manages centralized access to SSH, RDP, database, and web assets. Pigsty’s app/jumpserver template runs Community Edition application containers with Docker Compose. Pigsty-managed PostgreSQL provides persistent database storage.
The template uses JumpServer v5.0.0-ce. It retains Community Edition core, celery, koko, kael, chen, and web services, plus local Redis. It removes the upstream installer’s built-in PostgreSQL service. Pigsty manages PostgreSQL, backups, monitoring, Nginx ingress, and the database lifecycle.
The image set follows the official v5.0.0 installer, checked on 2026-10-08. Docker Hub returned MANIFEST_UNKNOWN for the Core, KoKo, Chen, and Web v5.0.0-ce tags that day. The official Aliyun namespace provided the full set, so the template uses IMAGE_PULL_PREFIX. Keep component versions aligned when upgrading.
Quick Start
Use a fresh x86_64 Linux server running a compatible operating system. The selected images and tested platform are linux/amd64; ARM64 has not been validated:
The one-shot init service runs migrations, then uses a separate Django process to create a missing terminal host key and validate it. It preserves an existing key. Core starts only after init succeeds; Celery and connection components then wait for Core to become healthy. Check readiness:
Default endpoints:
Default web login:
Change the administrator password immediately after the first login.
Pre-Deployment Checklist
- Prepare a fresh Linux server with at least
4C8Gand 100 GB of disk; size production resources for concurrency and recording retention. - Verify that the server IP, DNS, NTP, SSH, and sudo work correctly.
- Verify that the Docker daemon can pull from
IMAGE_PULL_PREFIX, which defaults to the official Aliyun registry. Configure download proxies on the daemon that performs the pull; container loopback refers to that container. - After running
./configure -c app/jumpserver, change the default passwords,SECRET_KEY,BOOTSTRAP_TOKEN,CHAT_AI_DELEGATION_SECRET, andDOMAINSinpigsty.yml. - Ensure that
DOMAINScontains the hostname or IP actually used by the browser, such as10.10.10.10:8080. - Ensure that PostgreSQL backup jobs work; check
pig pb infoorpgbackrest infoafter deployment.
Configuration Template
conf/app/jumpserver.yml defines a single-node self-hosted JumpServer template. The default topology includes:
jumpserver: the node running JumpServer application containers and local Redis.pg-jumpserver: the Pigsty-managed PostgreSQL cluster.infra: Nginx ingress, Grafana, VictoriaMetrics, and other infrastructure.etcd: the distributed configuration store required by Patroni.
app.yml copies app/jumpserver to /opt/jumpserver. It updates values in /opt/jumpserver/.env using apps.jumpserver.conf, then runs docker compose up -d.
Core application services:
jms_core: Django API and web backend, listening on container port8080.jms_celery: asynchronous jobs, scheduled jobs, and background queues.jms_web: Nginx web ingress, mapped to host port8080by default.jms_koko: SSH / SFTP terminal endpoint, mapped to host port2222by default.jms_kael: the 5.x Community Edition AI gateway, listening internally on8083and exposed through Web at/kael/.jms_chen: the web database connector, listening internally on8082.jms_init: one-shot migrations and terminal-key validation; successful completion isExited (0).jms_redis: local Redis for caching, queues, and the Channels backend.
Key Parameters
Common parameters:
| Parameter | Default | Description |
|---|---|---|
IMAGE_PULL_PREFIX | registry.cn-beijing.aliyuncs.com/jumpservice | Full official image namespace |
JUMPSERVER_VERSION | v5.0.0-ce | One coordinated Community Edition version for all components |
REDIS_VERSION | 7.4.11-bookworm | Local Redis image version |
JUMPSERVER_DATA | /data/jumpserver | Persistent application directory |
DOMAINS | 10.10.10.10:8080,10.10.10.10,jump.pigsty | Trusted domains and IPs allowed for login |
SECRET_KEY | Example value | Encryption key; replace and retain it for production |
BOOTSTRAP_TOKEN | Example value | Component registration token; replace and retain it for production |
CHAT_AI_DELEGATION_SECRET | Example value | Shared Core / Kael delegation key; generate once and retain |
DB_HOST / DB_PORT | 10.10.10.10 / 5432 | Pigsty PostgreSQL endpoint |
DB_USER / DB_NAME | jumpserver / jumpserver | Application user and database |
DB_PASSWORD | DBUser.JumpServer | Application user password; replace it for production |
DOCKER_SUBNET | 192.168.250.0/24 | Internal JumpServer Compose subnet |
REDIS_HOST | 192.168.250.2 | Fixed IP of the local Redis container |
CORE_HOST | http://192.168.250.4:8080 | Internal JumpServer core endpoint |
HTTP_PORT | 8080 | Web ingress port |
SSH_PORT | 2222 | KoKo host SSH/SFTP port; container port stays 2222 |
KOKO_WEB_PROXY_PORT | 5001 | KoKo website proxy port |
KOKO_PRIVILEGED | true | Preserve the upstream KoKo default; SSH was also tested with this disabled |
WEB_PROXY_ALLOWED_HOSTS | localhost,127.0.0.1 | Allowed Website asset target hosts; retain loopback hosts for KoKo’s control API |
ANSIBLE_DOCKER_ENABLED | false | Execute Ansible inside Celery with the current data-directory layout |
CORE_WORKER | 2 | Number of Core Gunicorn workers |
CELERY_WORKER_COUNT | 2 | Worker concurrency for each Celery queue |
For Website asset proxying, add the target hostnames or IPs to WEB_PROXY_ALLOWED_HOSTS and retain localhost,127.0.0.1. Set the JumpServer Endpoint’s Web proxy port to match KOKO_WEB_PROXY_PORT.
Example commands for generating production keys:
Retain SECRET_KEY, BOOTSTRAP_TOKEN, and CHAT_AI_DELEGATION_SECRET after generation. Preserve their original values during upgrades. Store them together with database backups, /data/jumpserver, and /opt/jumpserver/.env. Losing the original SECRET_KEY may make encrypted account credentials in the database unrecoverable.
Do not use single or double quotes in DB_PASSWORD or REDIS_PASSWORD. This matches the behavior of the official JumpServer installer.
Login and DOMAINS
JumpServer validates trusted access domains during login. DOMAINS must include the Host actually used by the browser:
Normal login URL:
If the login page shows:
Check /opt/jumpserver/.env and the container environment:
Recreate the core container after correcting it:
Also update pigsty.yml or conf/app/jumpserver.yml; otherwise, the next ./app.yml run will overwrite /opt/jumpserver/.env again.
An old URL containing csrf_failure=1 shows a DOMAINS=... warning from the failed request. It does not verify the corrected configuration. Retest with the normal login page. Use an incognito window if necessary.
Docker Network
The template uses a fixed Docker bridge subnet:
Fixed IPs serve two purposes:
- Avoid transient Docker DNS resolution failures while JumpServer Python and Java components start.
- Allow PostgreSQL HBA rules to permit the application subnet precisely.
PostgreSQL sees container clients as coming from 192.168.250.0/24, so the template includes:
If 192.168.250.0/24 conflicts with an existing network, update all of the following together:
DOCKER_SUBNETand the fixed IP for each component, includingINIT_IP.REDIS_HOSTandCORE_HOST.pg_hba_rules.addrandpgb_hba_rules.addr.- Recreate the Compose network and containers.
Do not set DB_HOST to 127.0.0.1; inside a container, that address refers to the container itself. Use the host’s private IP or the Pigsty L2 VIP.
PostgreSQL
Upstream disables Job Center by default. To use it, enable Job Center under System Settings → Feature Settings and leave Ansible Docker Isolation disabled. This template uses ANSIBLE_DOCKER_ENABLED=false with its existing data layout. A saved database setting overrides .env, so check it after upgrading. Docker isolation also needs an executor image, host Docker control, and matching host paths; changing one variable is insufficient.
JumpServer 5.x uses PostgreSQL and requires PostgreSQL 16 or later. The template uses Pigsty to create the database, user, HBA rules, backup schedule, and optional PgBouncer endpoint.
The application database does not require additional PostgreSQL extensions:
The template defaults to PostgreSQL 18 and was tested with an external PostgreSQL 18.6 server. Upstream requires PostgreSQL 16 or later; validate other versions for your environment. For high availability, follow the commented pg_vip_enabled example. Set DB_HOST to the primary-database VIP.
JumpServer’s Django migrations and Celery Beat are unsuitable for PgBouncer transaction pooling. The default is a direct PostgreSQL connection on port 5432. If you use PgBouncer, configure session pooling for the jumpserver user.
Deployment Verification
After installation, run:
Expected results:
jms_core,jms_celery,jms_web,jms_redis,jms_koko,jms_kael, andjms_chenare allhealthy.make healthreturnsstatus=true,db_status=true, andredis_status=true.jms_initisExited (0); its log shows completed migrations and the terminal public-key fingerprint. An init failure blocks Core startup.- Sign in, create a test asset and permission, execute a safe command, and check audits and replay. Healthy containers alone do not prove every feature works.
Database checks:
Expected results:
- The Patroni cluster Leader is
running. - PostgreSQL is version 16 or later.
django_migrationscontains applied migration records; a fixed table count is not a version acceptance check.- The pgBackRest stanza status is
ok.
Troubleshooting
Login Page Reports a DOMAINS Configuration Error
Verify that both configuration layers match:
You must recreate the core container after changing .env:
Also update apps.jumpserver.conf.DOMAINS in the Pigsty inventory; otherwise, the next ./app.yml run will overwrite it.
admin / ChangeMe Cannot Log In
First distinguish between two kinds of errors:
- A red
DOMAINS=...box at the top of the page indicates a domain / CSRF configuration problem, not a password problem. - A form message reporting an incorrect username or password indicates a credential problem.
You can verify inside the container whether the default password is still valid:
Web Returns 502
Check core and web:
A race over the core log directory can cause this error on first startup. Verify that /data/jumpserver/core/data/logs exists. The template creates it in advance.
Containers Keep Restarting or Health Checks Time Out
JumpServer recommends at least 4C8G; concurrency and recording retention increase resource needs. The template defaults to:
If Gunicorn worker timeouts, SIGKILL, or memory exhaustion continue, add memory or swap, or reduce worker counts. Check resource use with:
Operations
After installation, enter /opt/jumpserver:
Upgrade from 4.10.19 to 5.0.0
The official v5.0.0 upgrade script accepts source versions from v3.10.11 onward. This template was tested on v4.10.19-ce → v5.0.0-ce, with no intermediate version. Check the official guide before upgrading other old versions.
- Verify a recoverable PostgreSQL backup, schedule maintenance, and stop the old stack.
- Back up the database, all of
/opt/jumpserver, and/data/jumpservertogether. Restore them into an independent database and directory to prove recovery. - Update the full Compose file,
init.sh, Makefile, and.env; keep all components onv5.0.0-ce. Preserve the originalSECRET_KEY,BOOTSTRAP_TOKEN, database password, and Redis password. Generate a new randomCHAT_AI_DELEGATION_SECRET. - Rename
LION_IPtoKAEL_IPand create the Kael persistent directory. Stop and remove the old Lion container, or disconnect it from the network to release Kael’s fixed IP. Retain the old data directory and backups. - Check image namespace, proxies, network, and ports. Pull the full image set, then start:
Recheck original logins, assets, permissions, credential decryption, host-key fingerprint, real sessions, and historical recordings. make restart, make migrate, and make upgrade-db all stop services, then follow the same init dependency order. Do not use docker compose restart to restart init and Core in parallel.
If init fails, retain the logs, correct the cause, and retry. Once 5.x migrations have run, changing back to 4.x images is insufficient: rollback requires restoring the pre-upgrade database, application files, and original keys.
Backup and Restore
For an upgrade checkpoint, stop application writes and back up the database, all of /opt/jumpserver, and /data/jumpserver together. Restrict backup-file permissions to administrators. Prove restoration with a separate database, directory, Compose project, subnet, and ports to avoid overwriting the live instance. Kael ordinary conversation history is stored in the Core database; Terminal AI files and component state also require application-file backups. Back up both.
JumpServer state has two layers:
- PostgreSQL database: back up with Pigsty pgBackRest / PITR.
- Application files:
/data/jumpserverand/opt/jumpserver/.env, which contain logs, recordings, component data, Redis persistence, and keys.
Restore the database, .env, and file directory from the same environment:
Restoring PostgreSQL without the original SECRET_KEY prevents JumpServer from decrypting stored account credentials correctly.
Community Edition Scope
This template uses JumpServer 5.0.0 Community Edition Core, Celery, KoKo, Chen, Kael, and Web, with a one-shot init service and local Redis. In 5.x, remote-desktop handling is integrated into KoKo, so there is no separate Lion container. JumpServer is licensed under GPLv3; the Pigsty template is Apache-2.0.
The external PostgreSQL 18 backend and PostgreSQL asset connections are separate paths. The tested scope is listed below. RDP/VNC, native clients, ARM64, enterprise components, and external-model inference were not validated. Kael authentication, conversation storage, and permission isolation can be checked without a model provider; inference needs separate configuration and validation. Upstream persists ordinary conversations that contain messages; empty drafts do not survive a restart. Core / Kael delegation was verified by loading 952 operation definitions.
| Validation path | Fresh 5.x | 4.10.19 → 5.0.0 |
|---|---|---|
| External PostgreSQL 18.6, normal application role | Passed | Passed |
| API/form login, denied unauthorized access | Passed | Passed; original users and permissions retained |
| Complete user/asset/account/permission CRUD | Passed; disposable objects created, read, updated, and deleted | Passed; original objects retained |
| KoKo SSH and terminal WebSocket safe commands | Passed | Passed; host key retained |
| Session/command audits and recording downloads | Passed | Passed; historical recording hashes match |
| Chen PostgreSQL asset query | Passed; version 180006 and synthetic value 42 | Passed |
| Celery credential verification | Passed | Passed |
| Kael authentication, conversation/message persistence, permission isolation | Passed | Passed |
The pre-upgrade backup was restored into an independent PostgreSQL database and application directory. Original ciphertext, host key, and recordings were compared successfully. Tests used synthetic users, assets, and data in an isolated M3 VM.
References
- Official JumpServer v5.0.0 release
- Pinned installer source
- Official upgrade guide
- JumpServer project: https://github.com/jumpserver/jumpserver
- JumpServer installer: https://github.com/jumpserver/installer
- Pigsty JumpServer template: https://github.com/pgsty/pigsty/blob/main/conf/app/jumpserver.yml
- Pigsty Docker module
- Pigsty Nginx ingress
18 - ByteBase: Schema Migration
Bytebase is a database schema change and version management tool.
Pigsty provides a Compose template in app/bytebase. It listens on 8887 by default and uses BB_PGURL to connect to external PostgreSQL.
Quick Start
Access:
http://ddl.pigstyhttp://<IP>:8887
After the first start, use the Bytebase setup wizard to initialize the admin account.
External PostgreSQL
Default connection string example:
You can create the database user and database in Pigsty first:
Common Commands
References
- Bytebase docs: https://www.bytebase.com/docs/
- Pigsty template: https://github.com/pgsty/pigsty/tree/main/app/bytebase
19 - pgAdmin: PostgreSQL GUI
pgAdmin is an open-source PostgreSQL administration and development GUI. Pigsty v4.5.0 provides the app/pgadmin Docker Compose template. It can generate a server list and password file from the current inventory.
The template login is [email protected] with password pigsty. It is suitable only for a local demo. Before deployment on a shared network or the Internet, change the credentials, restrict port access, and configure HTTPS.
Quick Start
conf/meta.yml declares pgAdmin on the app group by default. Deploy it against an explicitly limited target:
The default port is 8885; use http://<app_ip>:8885. http://adm.pigsty works only after infra_portal, Nginx, and DNS are configured.
The first container start can take tens of seconds. Check it on the application node:
Application Configuration
Override .env through apps.pgadmin.conf on the app group in pigsty.yml:
app.yml copies the template to /opt/pgadmin and writes overrides to /opt/pgadmin/.env. This file contains the login password and should remain mode 0600.
The current template uses the unpinned dpage/pgadmin4 image. For production, pin a tested version or digest in docker-compose.yml and validate image upgrades as separate changes.
Load the Server List
env_pgadmin generates:
/infra/pgadmin/servers.json: PostgreSQL instance list/infra/pgadmin/pgpass: database administrator password file
In the default conf/meta.yml, the infra and app groups use the same host. pgAdmin can therefore bind-mount both files read-only. With separate pgAdmin and Infra hosts, /infra/pgadmin/ is not automatically available on the application node. Securely distribute equivalent files or customize the mounts. A local path is not shared across hosts.
For the default topology with both services on one host, regenerate the files. Then import the list and password into the running container:
pgpass contains credentials for pg_admin_username. Restrict access to the files, backups, and application host. If pgAdmin should not hold DBA credentials, generate connection definitions for a dedicated least-privilege role instead.
Domain and HTTPS
Add an entry to infra_portal:
Update Nginx on the explicitly limited Infra group:
For a real public domain, point DNS at the server and set certbot on the portal entry:
See CA and Certificates for prerequisites and renewal. The directly exposed port 8885 is not an HTTPS endpoint.
State and Management
From /opt/pgadmin:
The Compose template does not persist /var/lib/pgadmin. Pigsty can re-import its generated server list. Container recreation can lose preferences, users, and other state created through the pgAdmin UI. To retain this state, add a protected persistent volume for this directory. Validate the template change, then include the volume in backups.
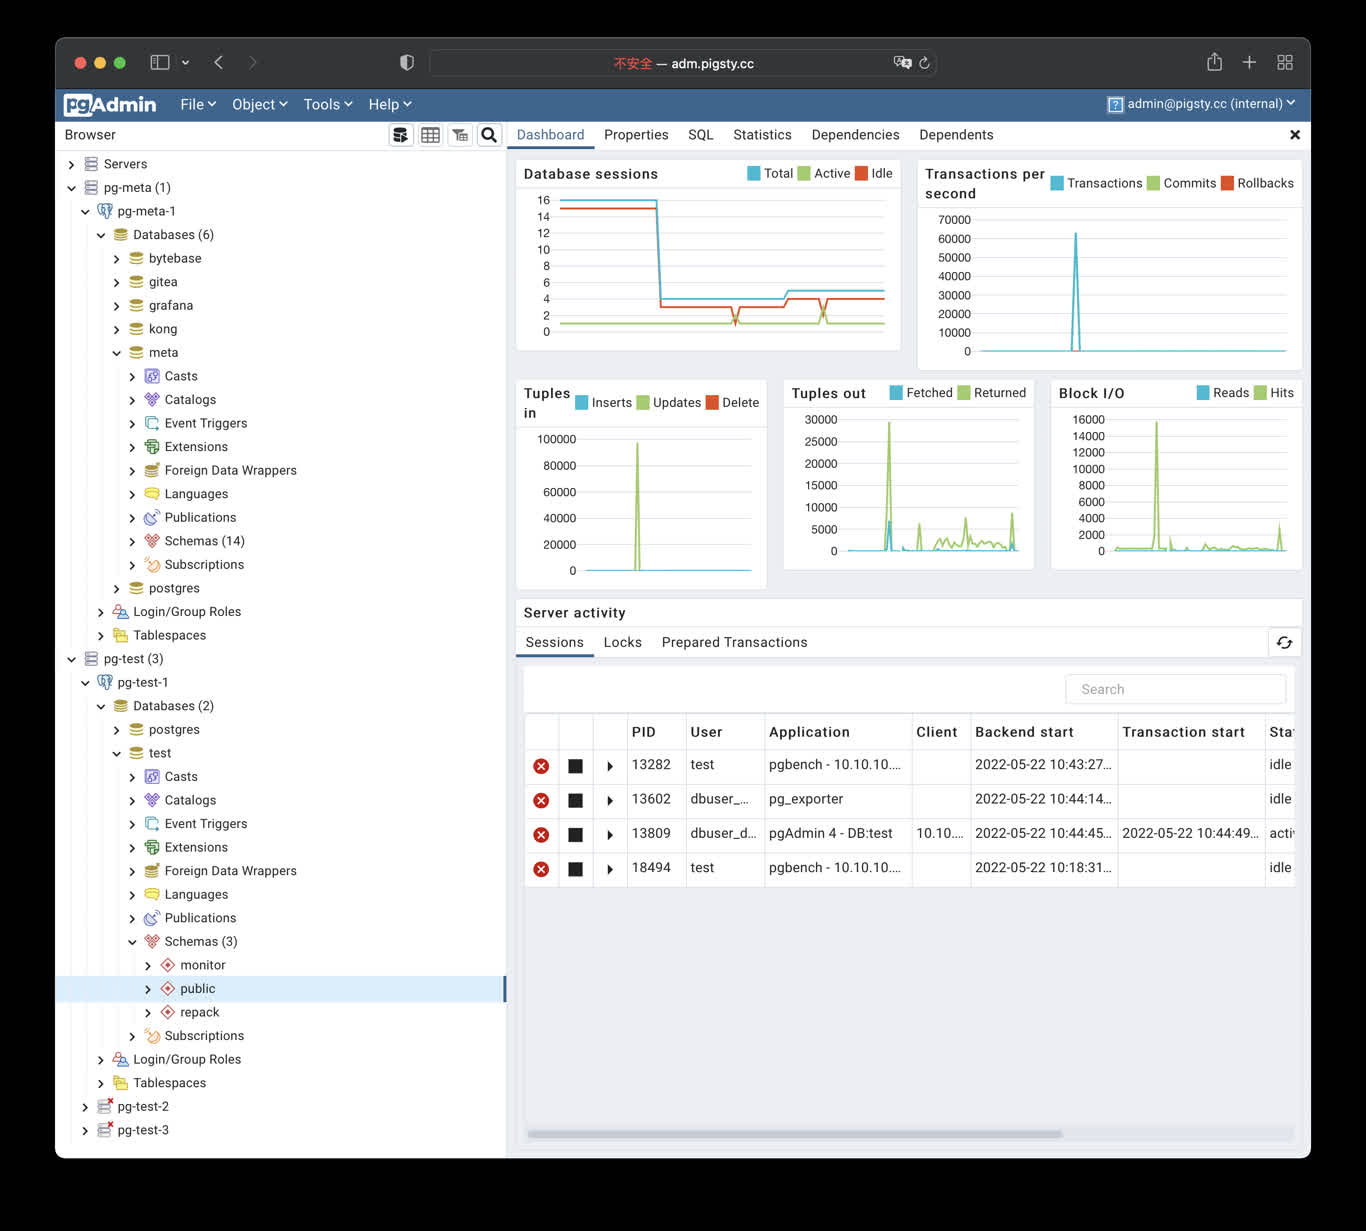
Security Checklist
- Change the default pgAdmin login and never distribute real credentials in scripts, screenshots, or tickets.
- The default port mapping listens on the host network; restrict sources with a firewall and use Nginx with valid HTTPS for Internet access.
- Protect
/infra/pgadmin/pgpassand/opt/pgadmin/.env; prefer a least-privilege database role. - Pin and validate the container image, and back up any pgAdmin state you choose to persist.
- pgAdmin can execute privileged SQL. Dropping a database, table, or data still requires separate target confirmation and a recent backup.
20 - PGWeb: Browser-based PostgreSQL Client
PGWeb Client
PGWeb is a browser-based PostgreSQL client. Pigsty includes a small Docker Compose template in app/pgweb. It publishes container port 8081 on host port 8886.
If the portal entry resolves to the Infra node, open http://cli.pigsty. Alternatively, open http://10.10.10.10:8886 directly. The public demo is http://cli.pigsty.cc.
PGWeb asks for a PostgreSQL connection URL. For example:
These strings use public demo defaults and disable TLS. For real deployments, use a least-privilege account, a non-default secret, and an appropriate sslmode. Do not expose an unauthenticated PGWeb container or database credentials to untrusted networks.
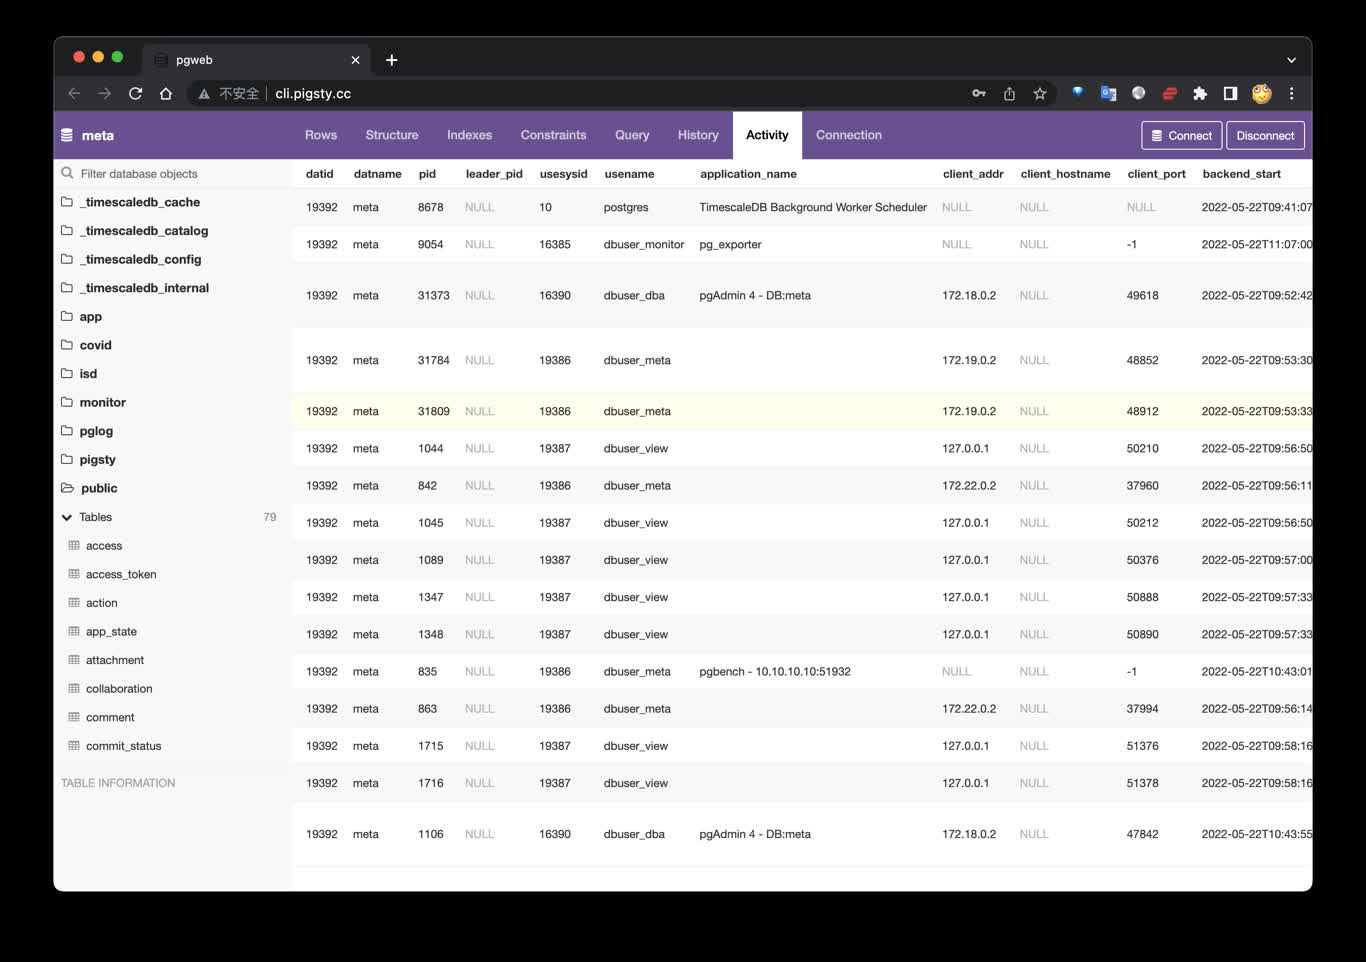
Shortcuts
The bundled Makefile provides:
The template currently uses the unpinned sosedoff/pgweb image. Pin an image digest or version in app/pgweb/docker-compose.yml when reproducible production deployment matters.
21 - PostgREST: Auto-Generated API
PostgREST exposes PostgreSQL schemas directly as REST APIs.
Pigsty provides the app/postgrest template, with default port 8884.
Quick Start
Default endpoints:
http://<IP>:8884http://api.pigsty(if ingress domain is configured)
Key Settings
Common .env parameters:
POSTGREST_DB_URI: database connection stringPOSTGREST_DB_SCHEMA: exposed schema (defaultpigsty)POSTGREST_DB_ANON_ROLE: anonymous rolePOSTGREST_JWT_SECRET: JWT secret
Swagger UI (Optional)
You can run Swagger UI separately to preview APIs:
Then open http://<IP>:8882.
Common Commands
References
- PostgREST docs: https://postgrest.org/en/stable/
- Pigsty template: https://github.com/pgsty/pigsty/tree/main/app/postgrest
22 - Electric: PostgreSQL Sync Engine
Electric is a PostgreSQL sync engine. It delivers database changes efficiently to frontend and edge applications.
Pigsty provides the app/electric template (conf/app/electric.yml). It configures the database, containers, and ingress in one workflow.
Quick Start
Default endpoints:
http://<IP>:8002http://elec.pigsty(default domain in the template)
Metrics port defaults to 8003 (ELECTRIC_PROMETHEUS_PORT).
Key Settings
conf/app/electric.yml writes apps.electric.conf into /opt/electric/.env. Common parameters:
DATABASE_URL: PostgreSQL connection string used by Electric (replication privileges required)ELECTRIC_PORT: Electric HTTP port (default8002)ELECTRIC_PROMETHEUS_PORT: metrics port (default8003)ELECTRIC_INSECURE: can betruefor development. Disable it in production and configure proper secrets.
Operations
References
- Electric website: https://electric-sql.com/
- Electric docs: https://electric-sql.com/docs
- Pigsty template: https://github.com/pgsty/pigsty/blob/main/conf/app/electric.yml
23 - Jupyter: Notebooks and Data Analysis
JupyterLab is an interactive notebook, terminal, and data-analysis environment. Pigsty v4.5.0 has two distinct deployment paths:
- The
VIBEmodule, managed by Ansible and systemd, for the complete v4.5.0 development sandbox. - The lightweight standalone
app/jupyterDocker Compose template documented here.
app/jupyter is not a default apps inventory entry. Prepare its data directory separately. app.yml -e app=jupyter does not handle directory ownership.
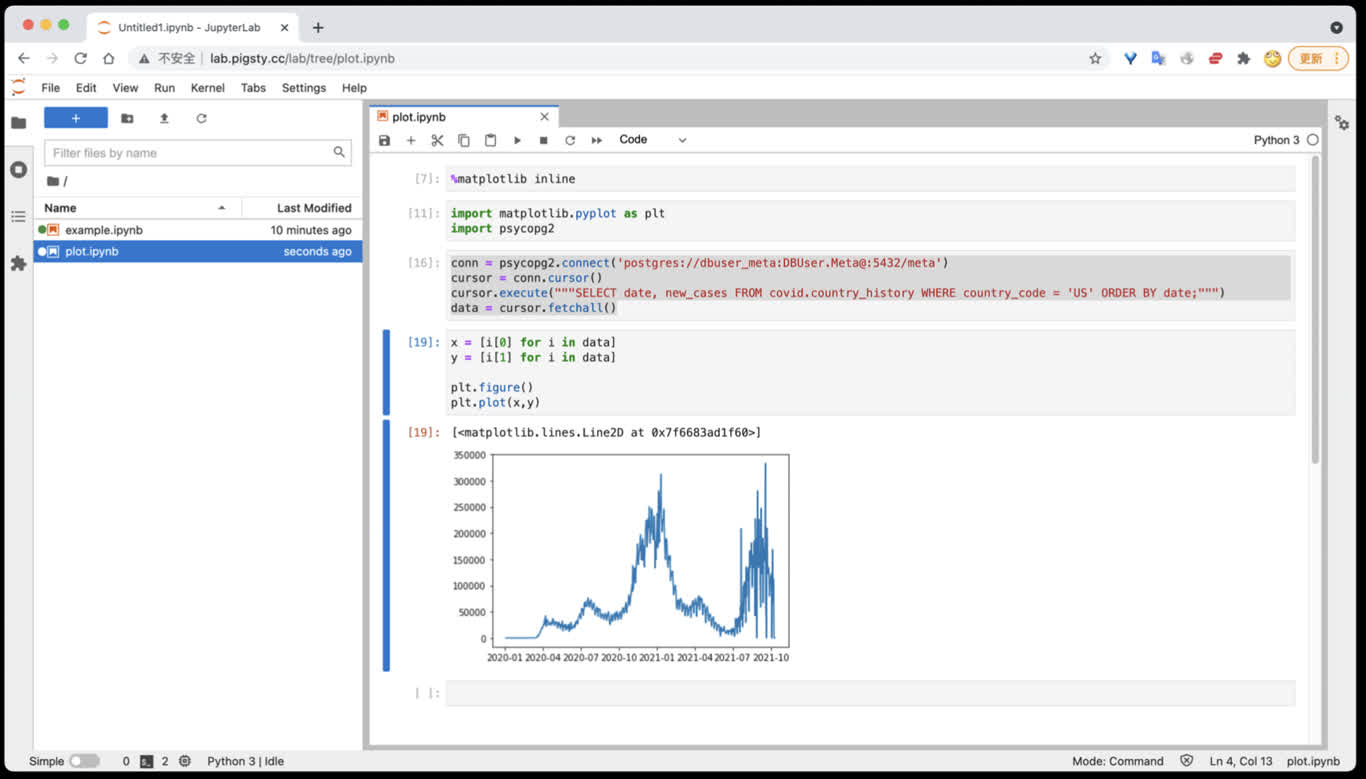
Quick Start
Generate a strong token with openssl rand -hex 32. The default port is 8888; open http://<host_ip>:8888.
lab.pigsty works only when that name is configured in infra_portal, Nginx, and DNS. The template default JUPYTER_TOKEN=pigsty is for local demonstrations only and must be replaced in production.
Current Template
The v4.5.0 .env defaults are:
Compose mounts host /data/jupyter at /home/jovyan/work and passes the token into the container. The upstream latest tag changes. Production deployments should use a tested image tag or digest.
For SciPy, R, Julia, TensorFlow, PyTorch, or Spark, select another Jupyter Docker Stacks image from .env. Pin its version and validate architecture support.
Access PostgreSQL
Install the modern Psycopg driver and optional analysis libraries from a Jupyter terminal:
Do not store real passwords in notebooks. This example obtains the connection string through hidden input and reads system information only:
Use Pandas and SQLAlchemy with a system statistics view:
These examples access system views only. Obtain authorization from the data owner before reading application tables, and limit columns, predicates, and result size.
Persistence and Dependencies
Only /home/jovyan/work is mapped to /data/jupyter. The following are not persistent across container recreation by default:
- Python or Conda packages installed temporarily inside the container
- notebooks, configuration, and caches outside
work - the container’s own user state
For production, install dependencies with a pinned image, custom Dockerfile, or reproducible dependency file. Back up /data/jupyter separately. A persistent mount is not a backup.
Management Commands
From ~/pigsty/app/jupyter:
make clean removes the container and retains /data/jupyter. make purge recursively deletes /data/jupyter, and this deletion is unrecoverable. Confirm the exact directory and a recent backup before running it.
Security Checklist
- Use a strong random token, protect
.env, and do not disable authentication. - The default port mapping listens on the host network. Restrict sources with a firewall and prefer Nginx with valid HTTPS.
- A notebook can execute arbitrary code and access mounted files and databases. Grant only least-privilege database accounts and host directories.
- Pin and scan the image, and validate dependency upgrades reproducibly.
- Back up
/data/jupyterregularly and test restoration to a temporary directory.
Related Links
24 - PGLOG: PostgreSQL Log Analysis Application
PGLOG is a sample Pigsty application that uses pglog.sample in MetaDB as its data source. Load logs into this table, then open the related dashboard.
Pigsty provides commands to retrieve CSV logs and load them into the sample table. These shortcuts are available on the meta node by default:
Use these links to view the sample log analysis:
- PGLOG Overview: Present the entire CSV log sample details, aggregated by multiple dimensions.
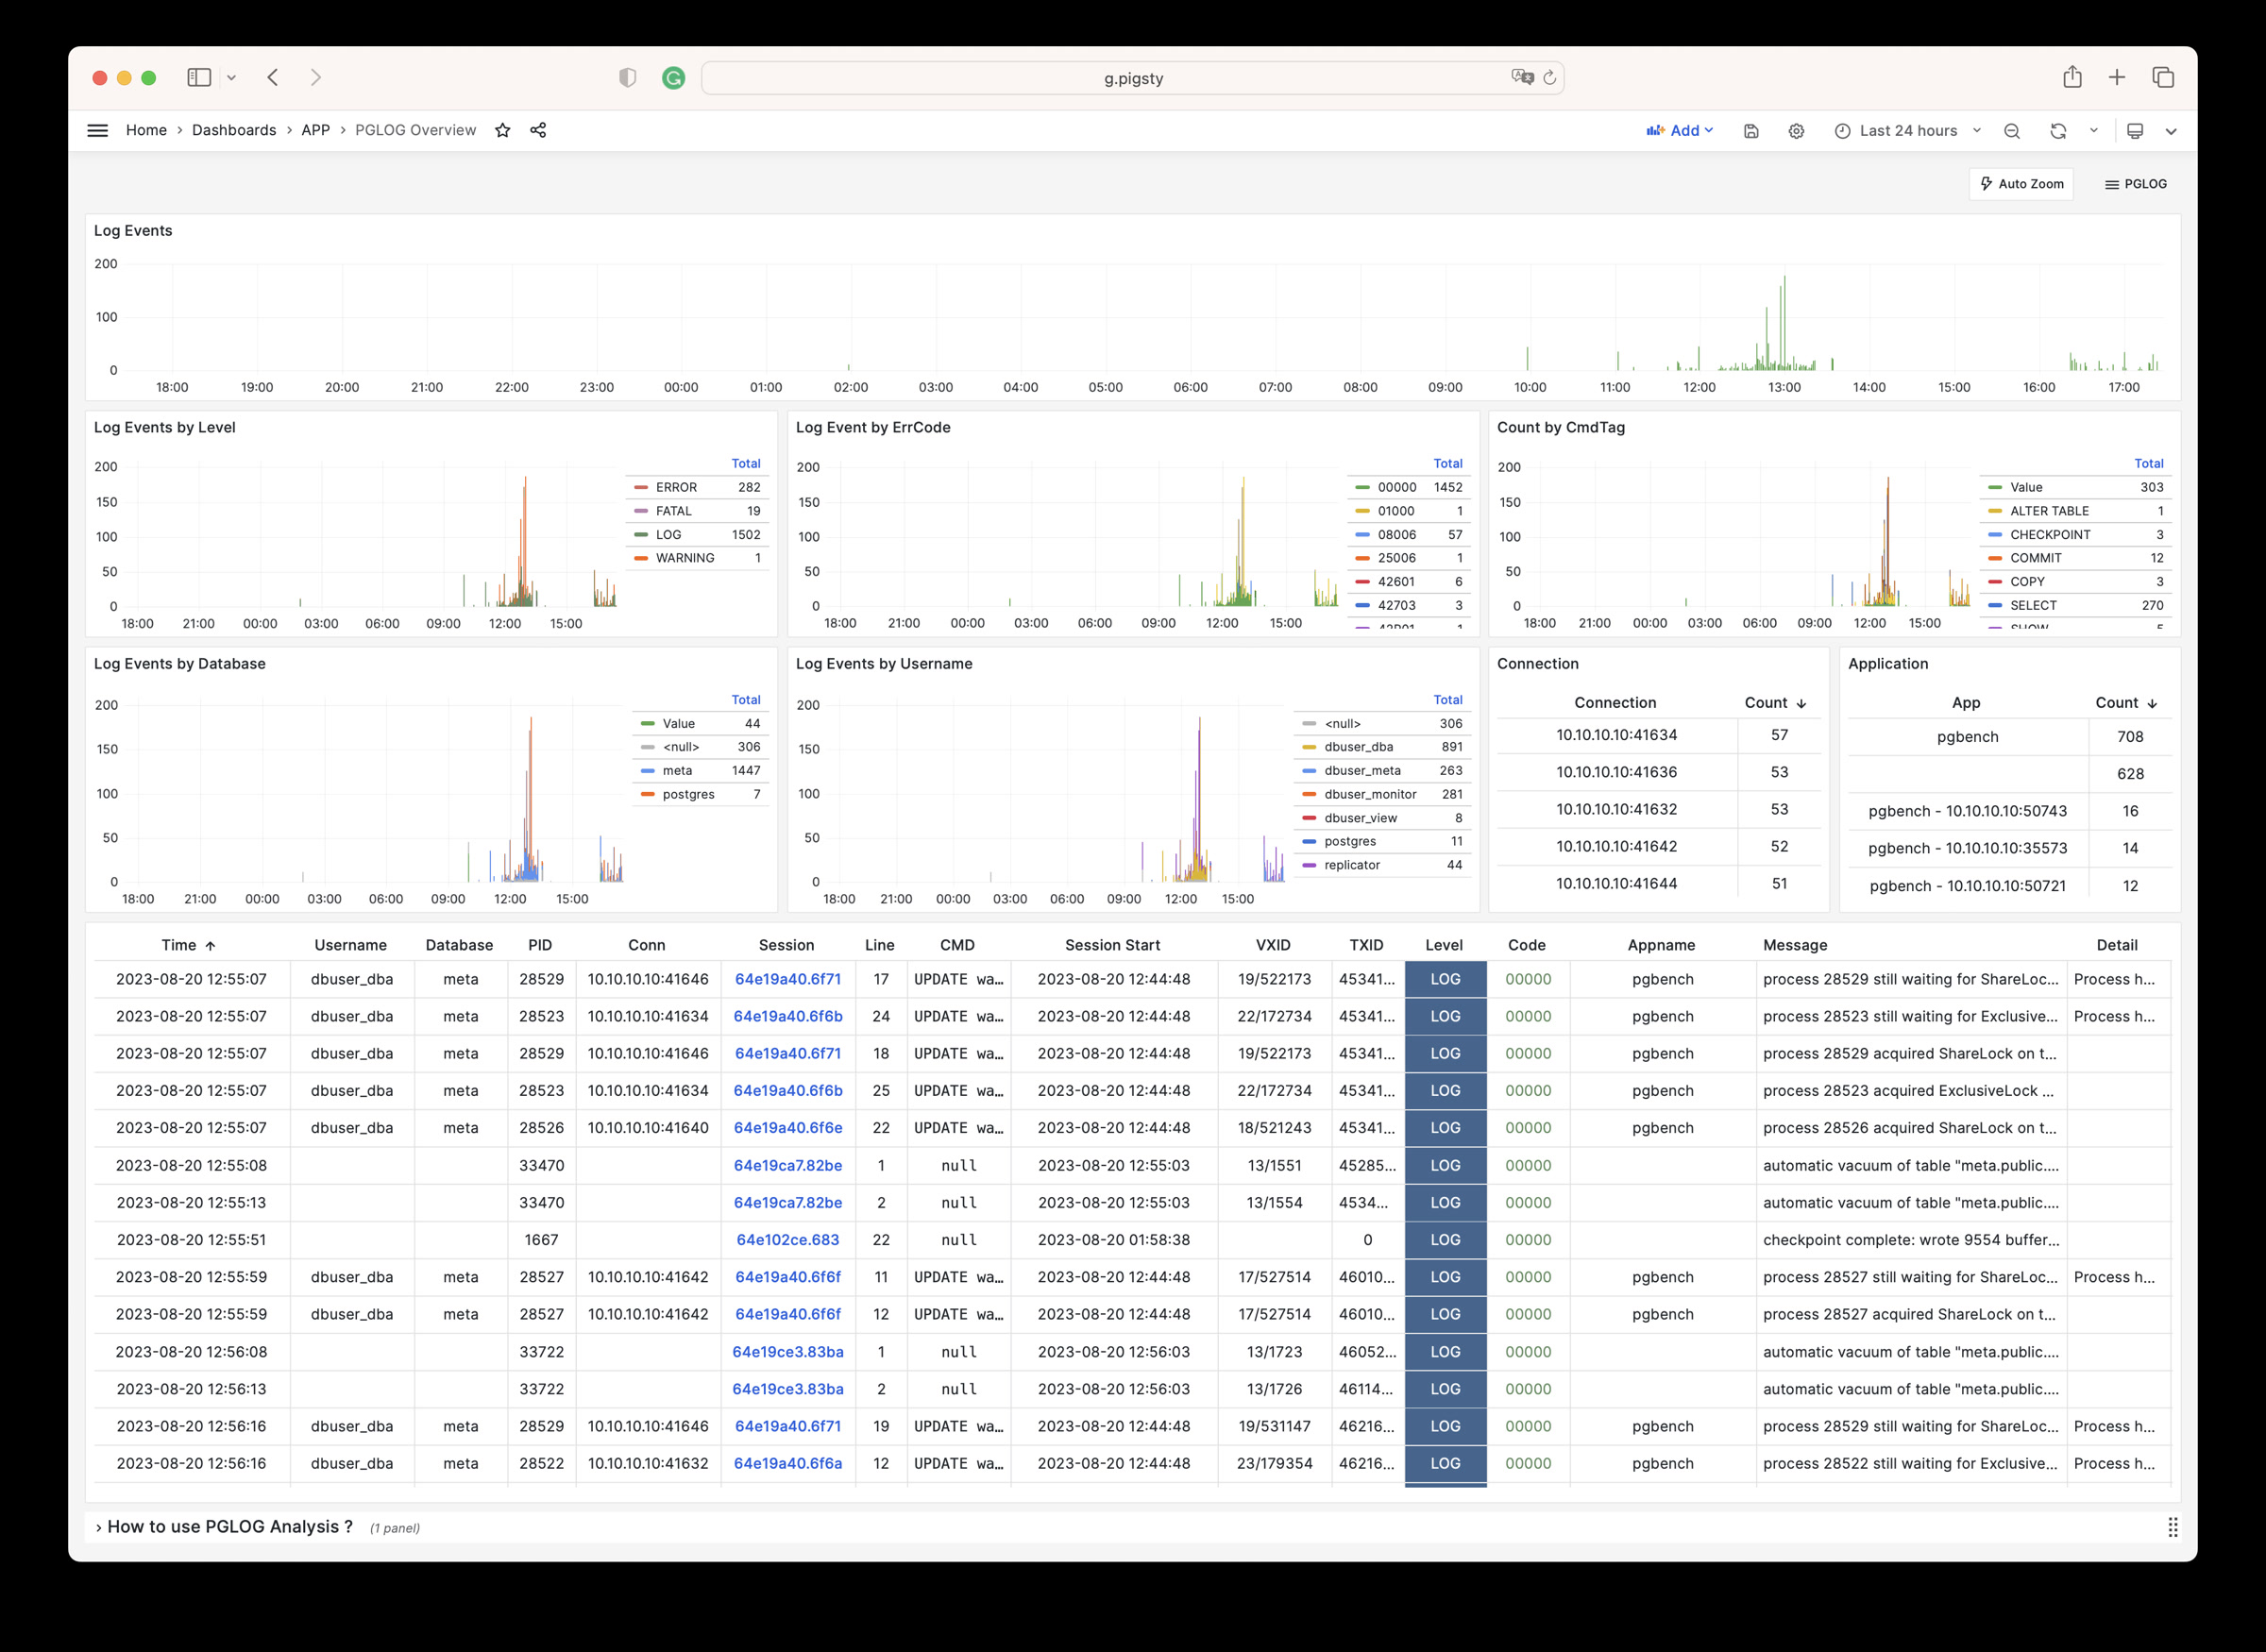
- PGLOG Session: Present detailed information about a specific connection in the log sample.
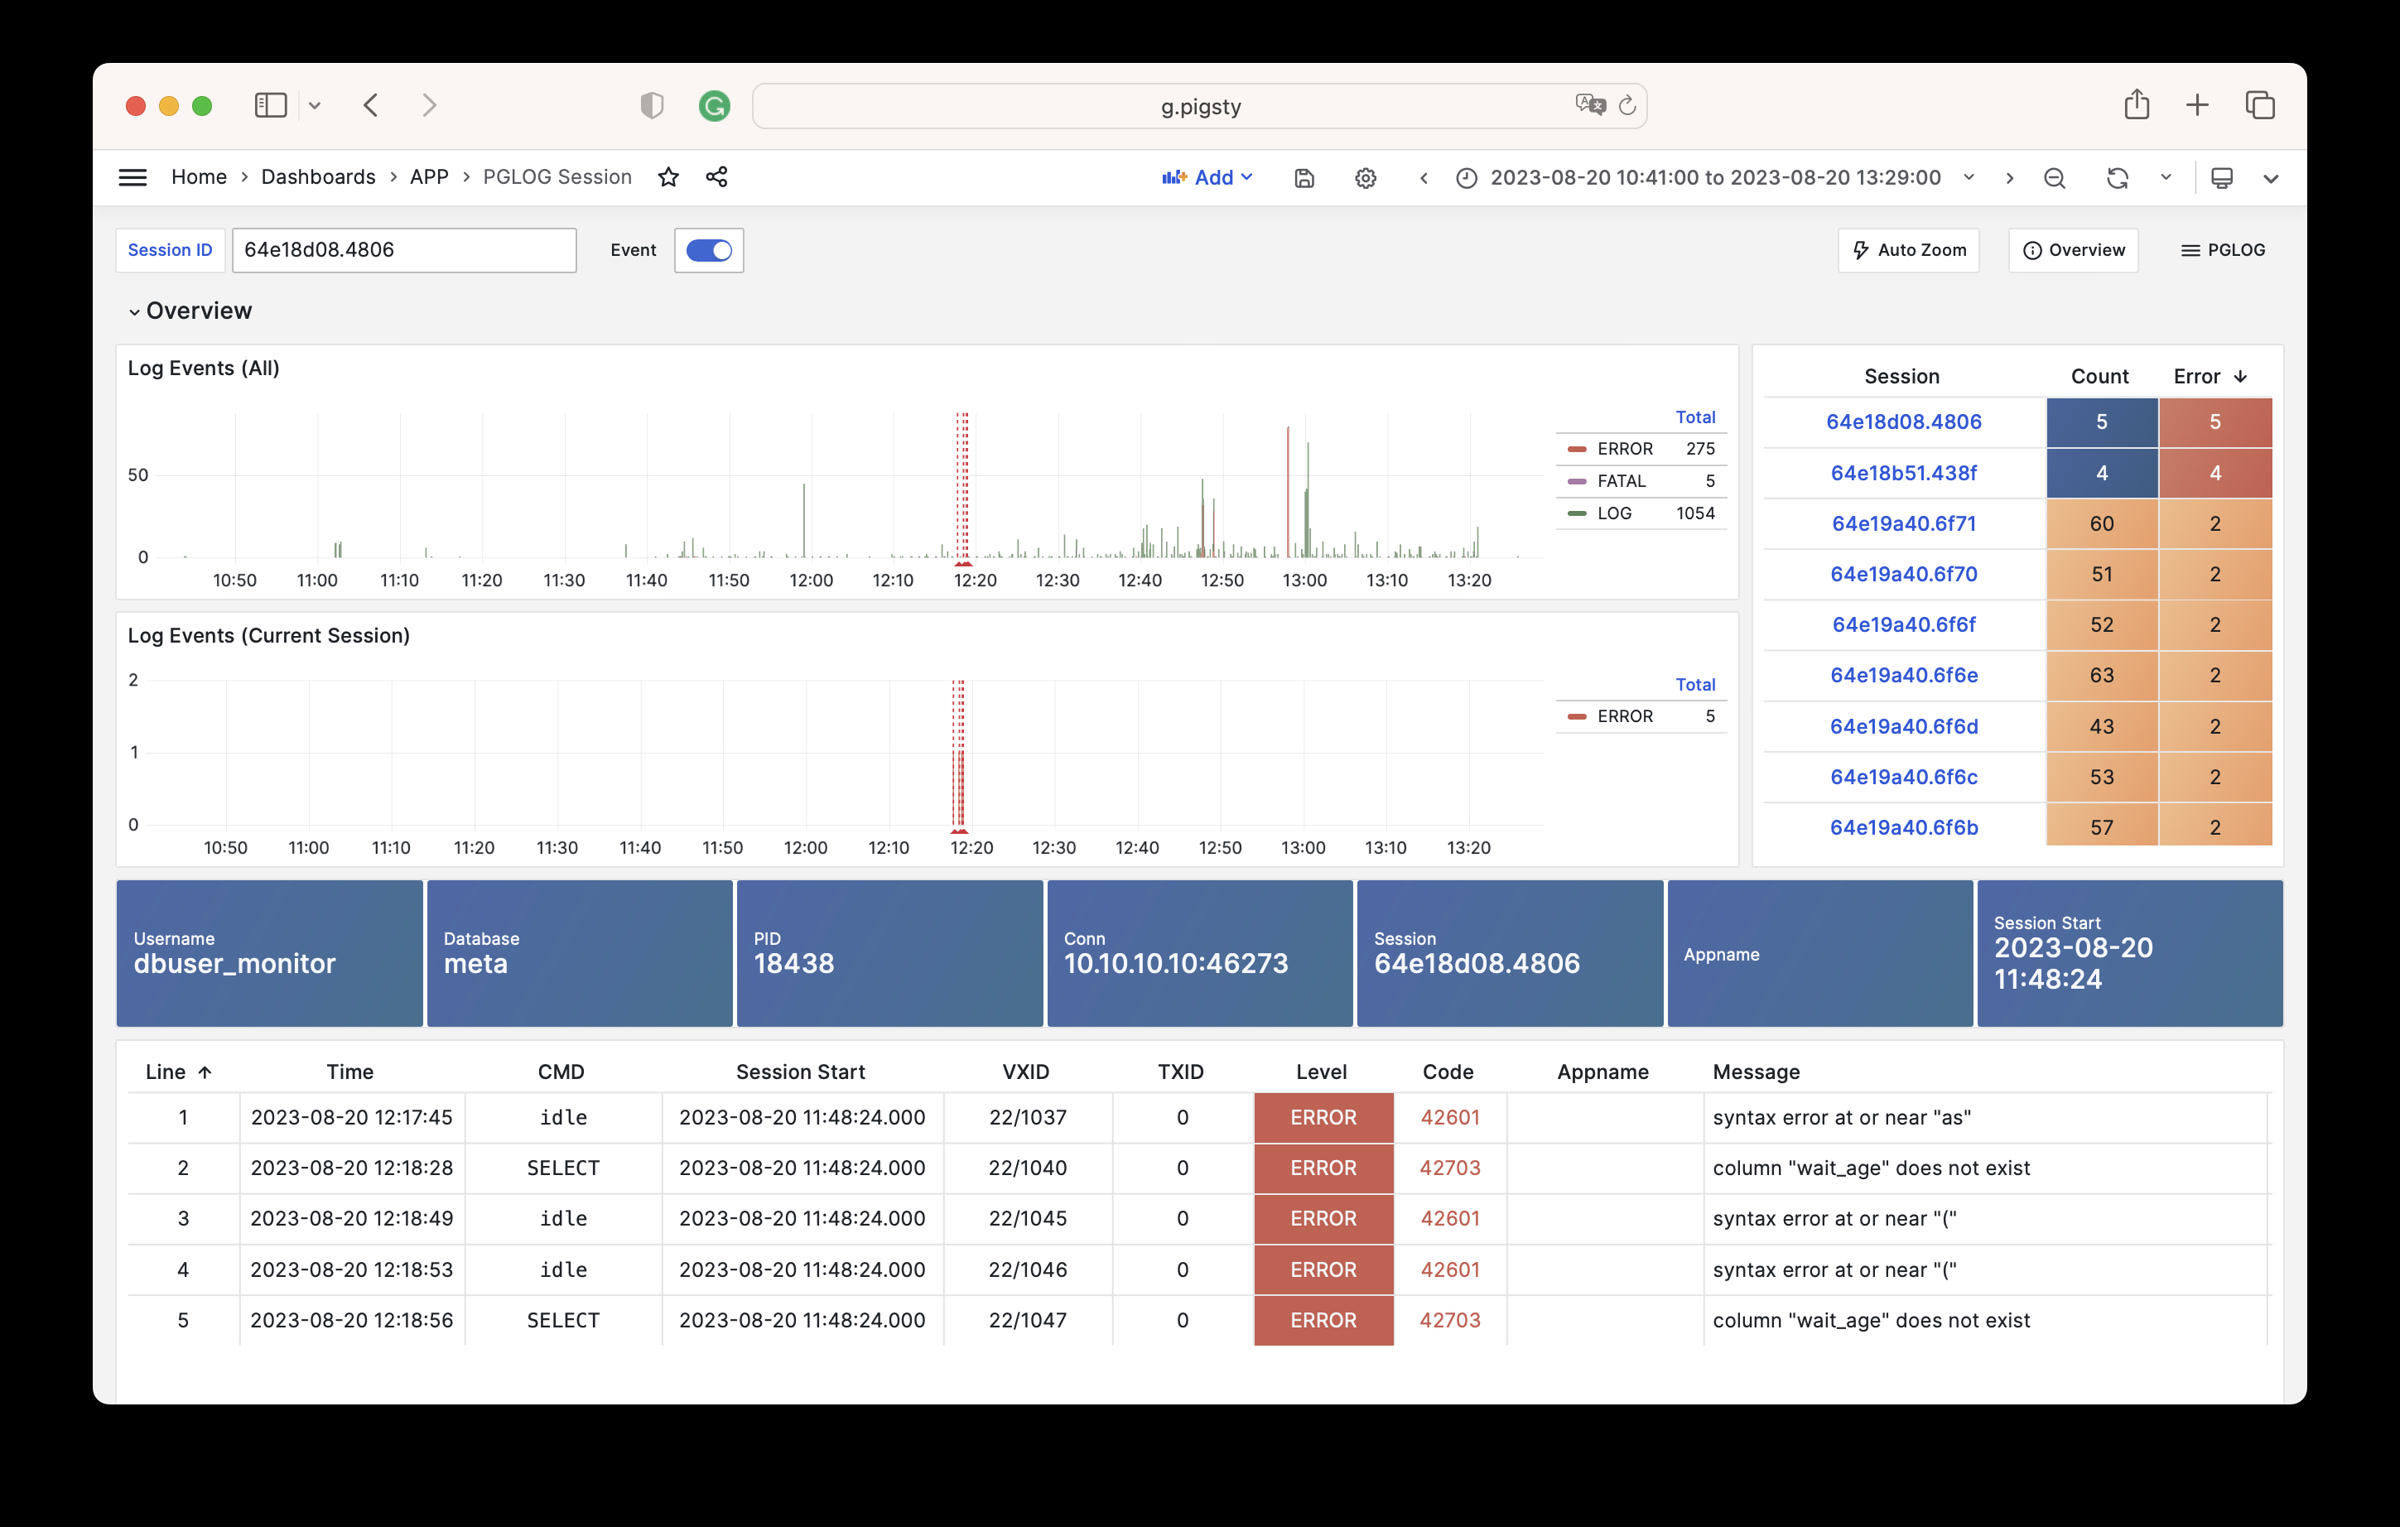
The catlog command retrieves CSV database logs for a node and date, then writes them to stdout.
By default, catlog pulls logs from the current node for today. You can specify the node and date through parameters.
Use pglog with catlog to retrieve and analyze database CSV logs:
25 - NOAA ISD Global Weather Station Historical Data Query
Use the open-source Vonng/isd project to explore weather data in your database.
Use the existing Grafana monitoring system to browse sub-hourly weather data interactively. It covers nearly 30,000 surface stations over the past 120 years.
This is a fully functional data application that can query meteorological observation records from 30,000 global surface weather stations since 1901.
Project URL: https://github.com/Vonng/isd
Online Demo: https://demo.pigsty.io/d/isd-overview
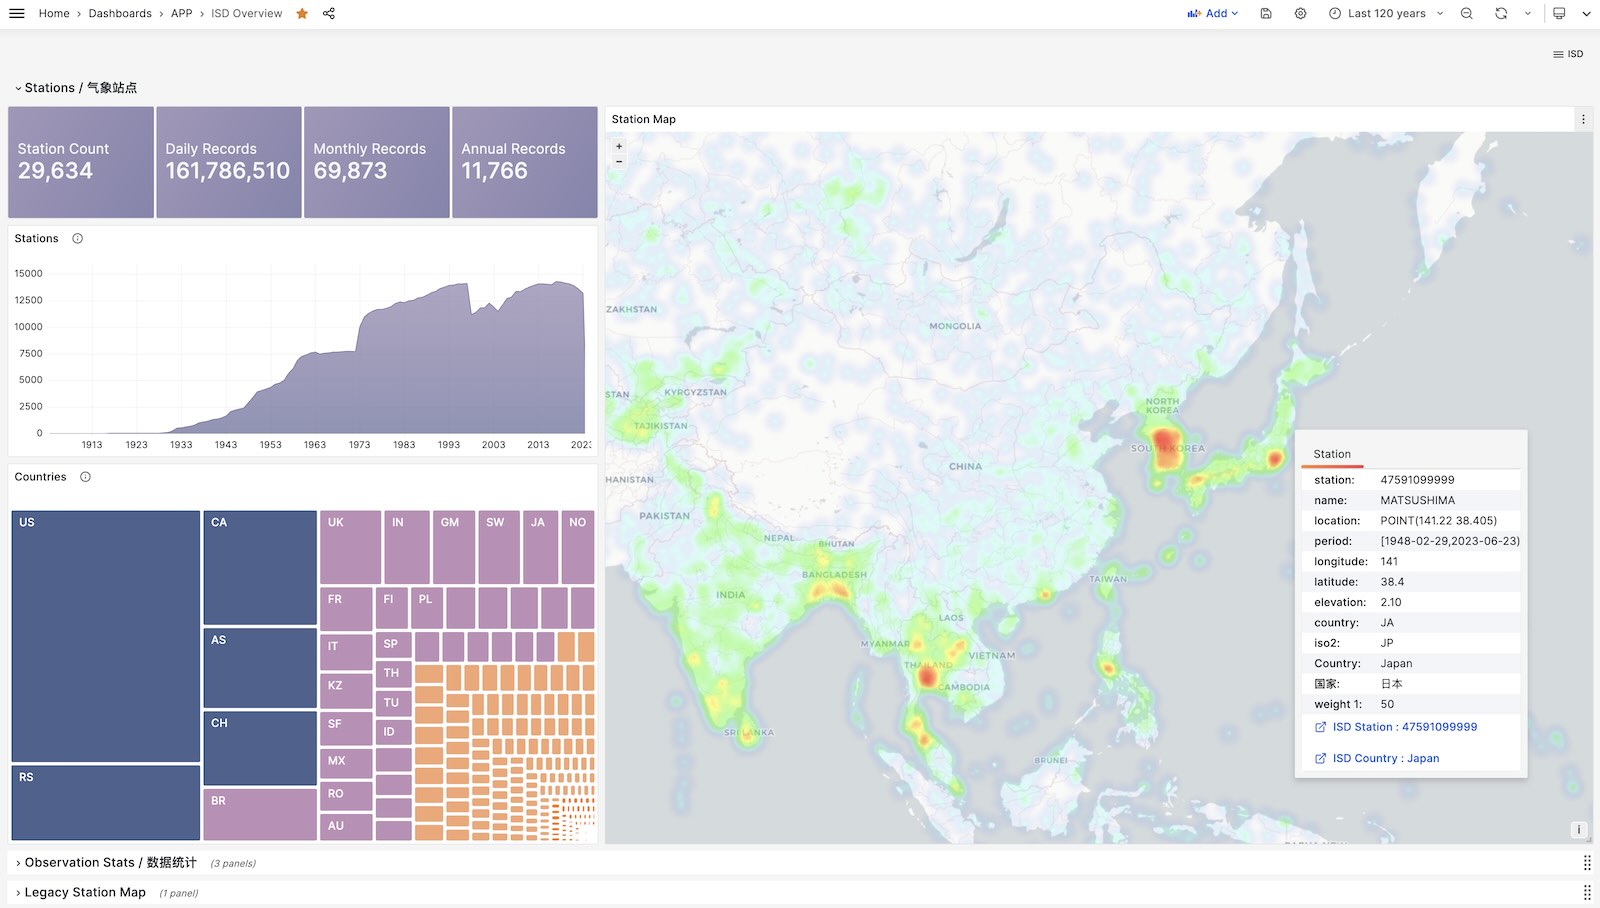
Quick Start
Clone this repository
Prepare a PostgreSQL instance
The PostgreSQL instance should have the PostGIS extension enabled. Use the PGURL environment variable to pass database connection information:
Fetch and import ISD weather station metadata
This metadata file updates daily. It contains station longitude, latitude, elevation, name, country, province, and other information. Download and import it with:
Fetch and import the latest isd.daily data
isd.daily updates daily with summaries of observations from global weather stations. Raw NOAA downloads must be parsed before database loading. Download or build the ISD parser, then download and import the data:
Load pre-parsed CSV dataset
ISD Daily contains invalid data and duplicates. Use the provided stable CSV dataset to avoid manual parsing and cleanup.
This dataset contains isd.daily data up to 2023-06-24. You can download and import it directly into PostgreSQL without needing a parser.
More Data
Two parts of the ISD dataset are updated daily: weather station metadata and the latest year’s isd.daily (e.g., the 2023 tarball).
Use this command to refresh both datasets. It does not download unchanged data packages again:
You can also use the following commands to download and load isd.daily data for a specific year:
In addition to the daily summary isd.daily, ISD also provides more detailed sub-hourly raw observation records isd.hourly. The download and load methods are similar:
Data
Dataset Overview
ISD provides four datasets: sub-hourly raw observation data, daily statistical summary data, monthly statistical summary, and yearly statistical summary
| Dataset | Notes |
|---|---|
| ISD Hourly | Sub-hourly observation records |
| ISD Daily | Daily statistical summary |
| ISD Monthly | Not used, can be calculated from isd.daily |
| ISD Yearly | Not used, can be calculated from isd.daily |
Daily Summary Dataset
- Compressed package size 2.8GB (as of 2023-06-24)
- Table size 24GB, index size 6GB, total size approximately 30GB in PostgreSQL
- If timescaledb compression is enabled, total size can be compressed to 4.5 GB
Sub-hourly Observation Data
- Total compressed package size 117GB
- After loading into database: table size 1TB+, index size 600GB+, total size 1.6TB
Database Schema
Weather Station Metadata Table
Daily Summary Table
Sub-hourly Raw Observation Data Table
Parser
NOAA ISD raw data uses a highly compressed proprietary format. A parser must convert it to database table format.
Use isdd for Daily data and isdh for Hourly data. Both accept annual compressed packages and produce CSV output. They support pipelines as shown below:
User Interface
Use these Grafana dashboards to explore ISD data, weather stations, and historical observations.
ISD Overview
Global overview with overall metrics and weather station navigation.
ISD Country
Display all weather stations within a single country/region.
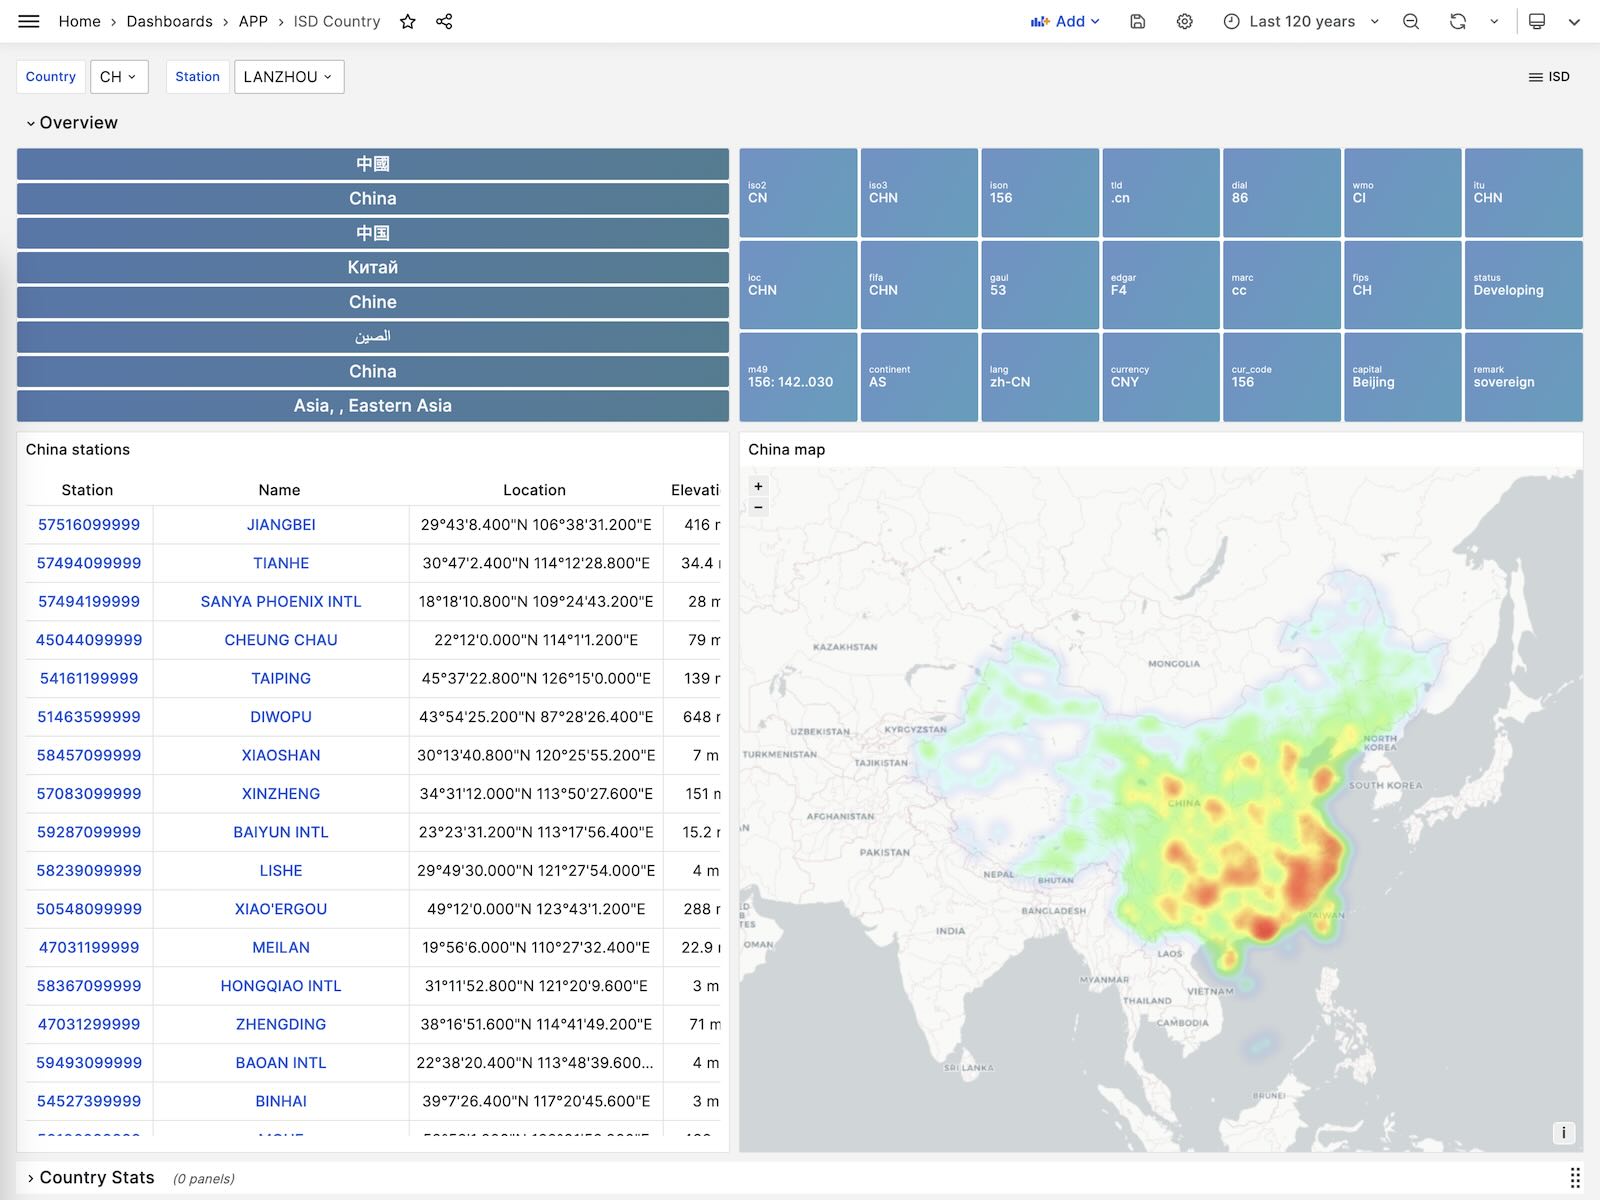
ISD Station
Display detailed information for a single weather station, including metadata and daily/monthly/yearly summary metrics.
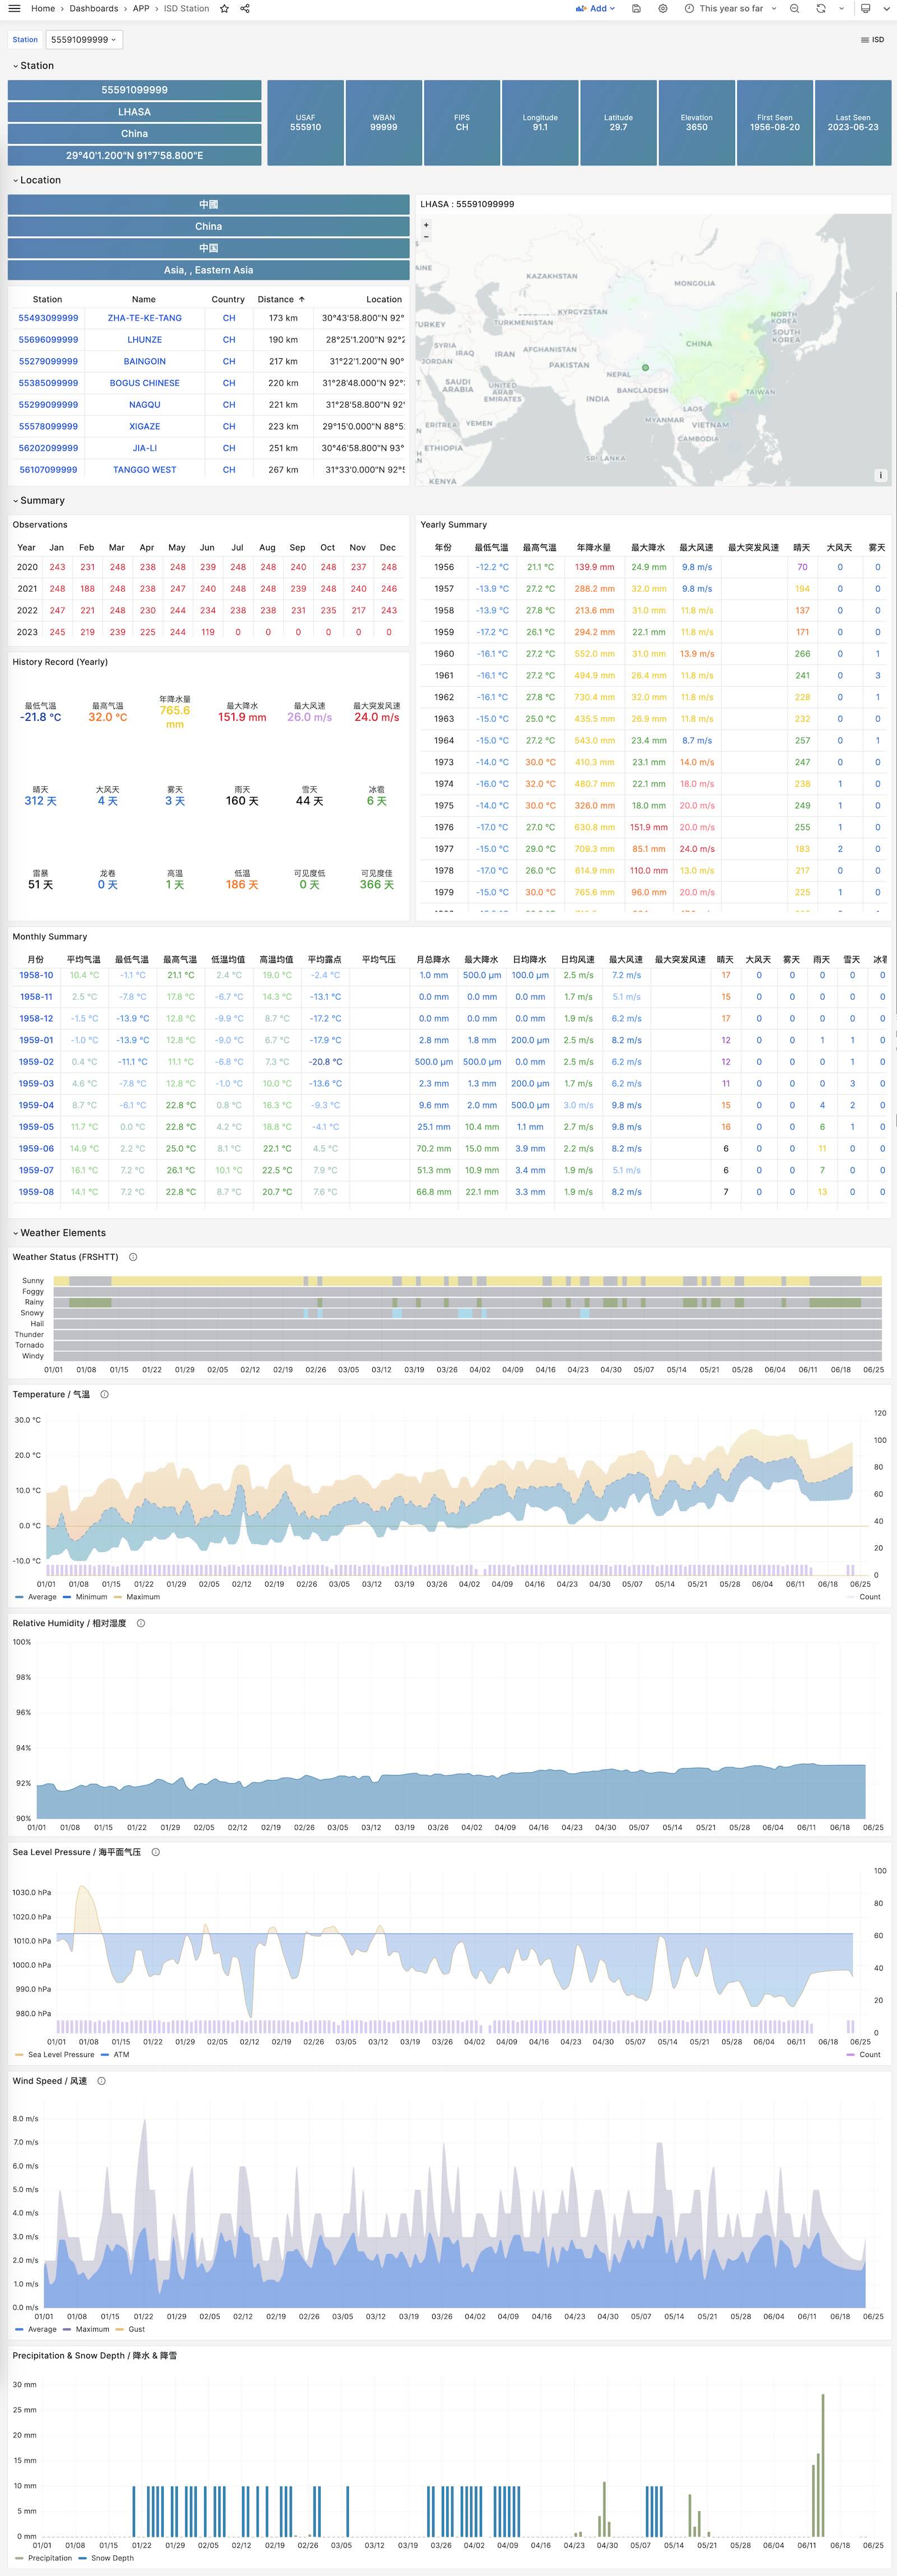
ISD Detail
Display raw sub-hourly observation metrics for one station. This requires isd.hourly.
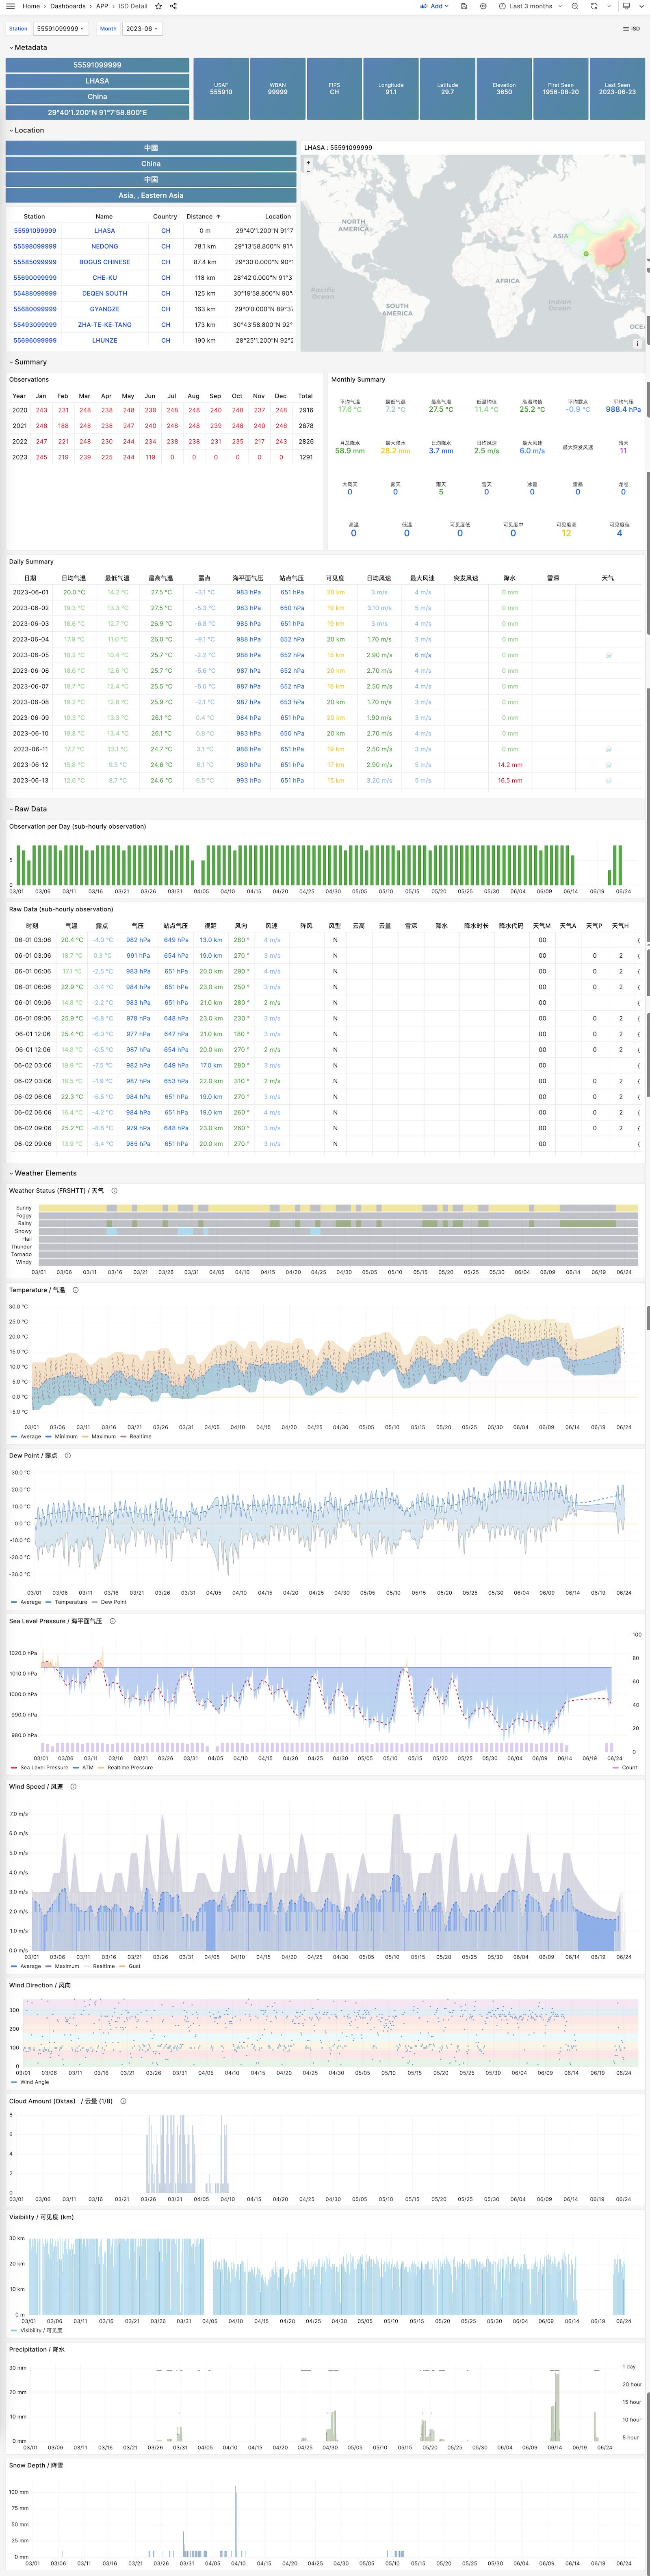
26 - WHO COVID-19 Pandemic Dashboard
Covid is a sample applet included with Pigsty. It visualizes the World Health Organization’s official pandemic data.
Browse COVID-19 infections and deaths by country and region, and view global pandemic trends.
Overview
GitHub Repository: https://github.com/pgsty/pigsty-app/tree/master/covid
Online Demo: https://demo.pigsty.io/d/covid
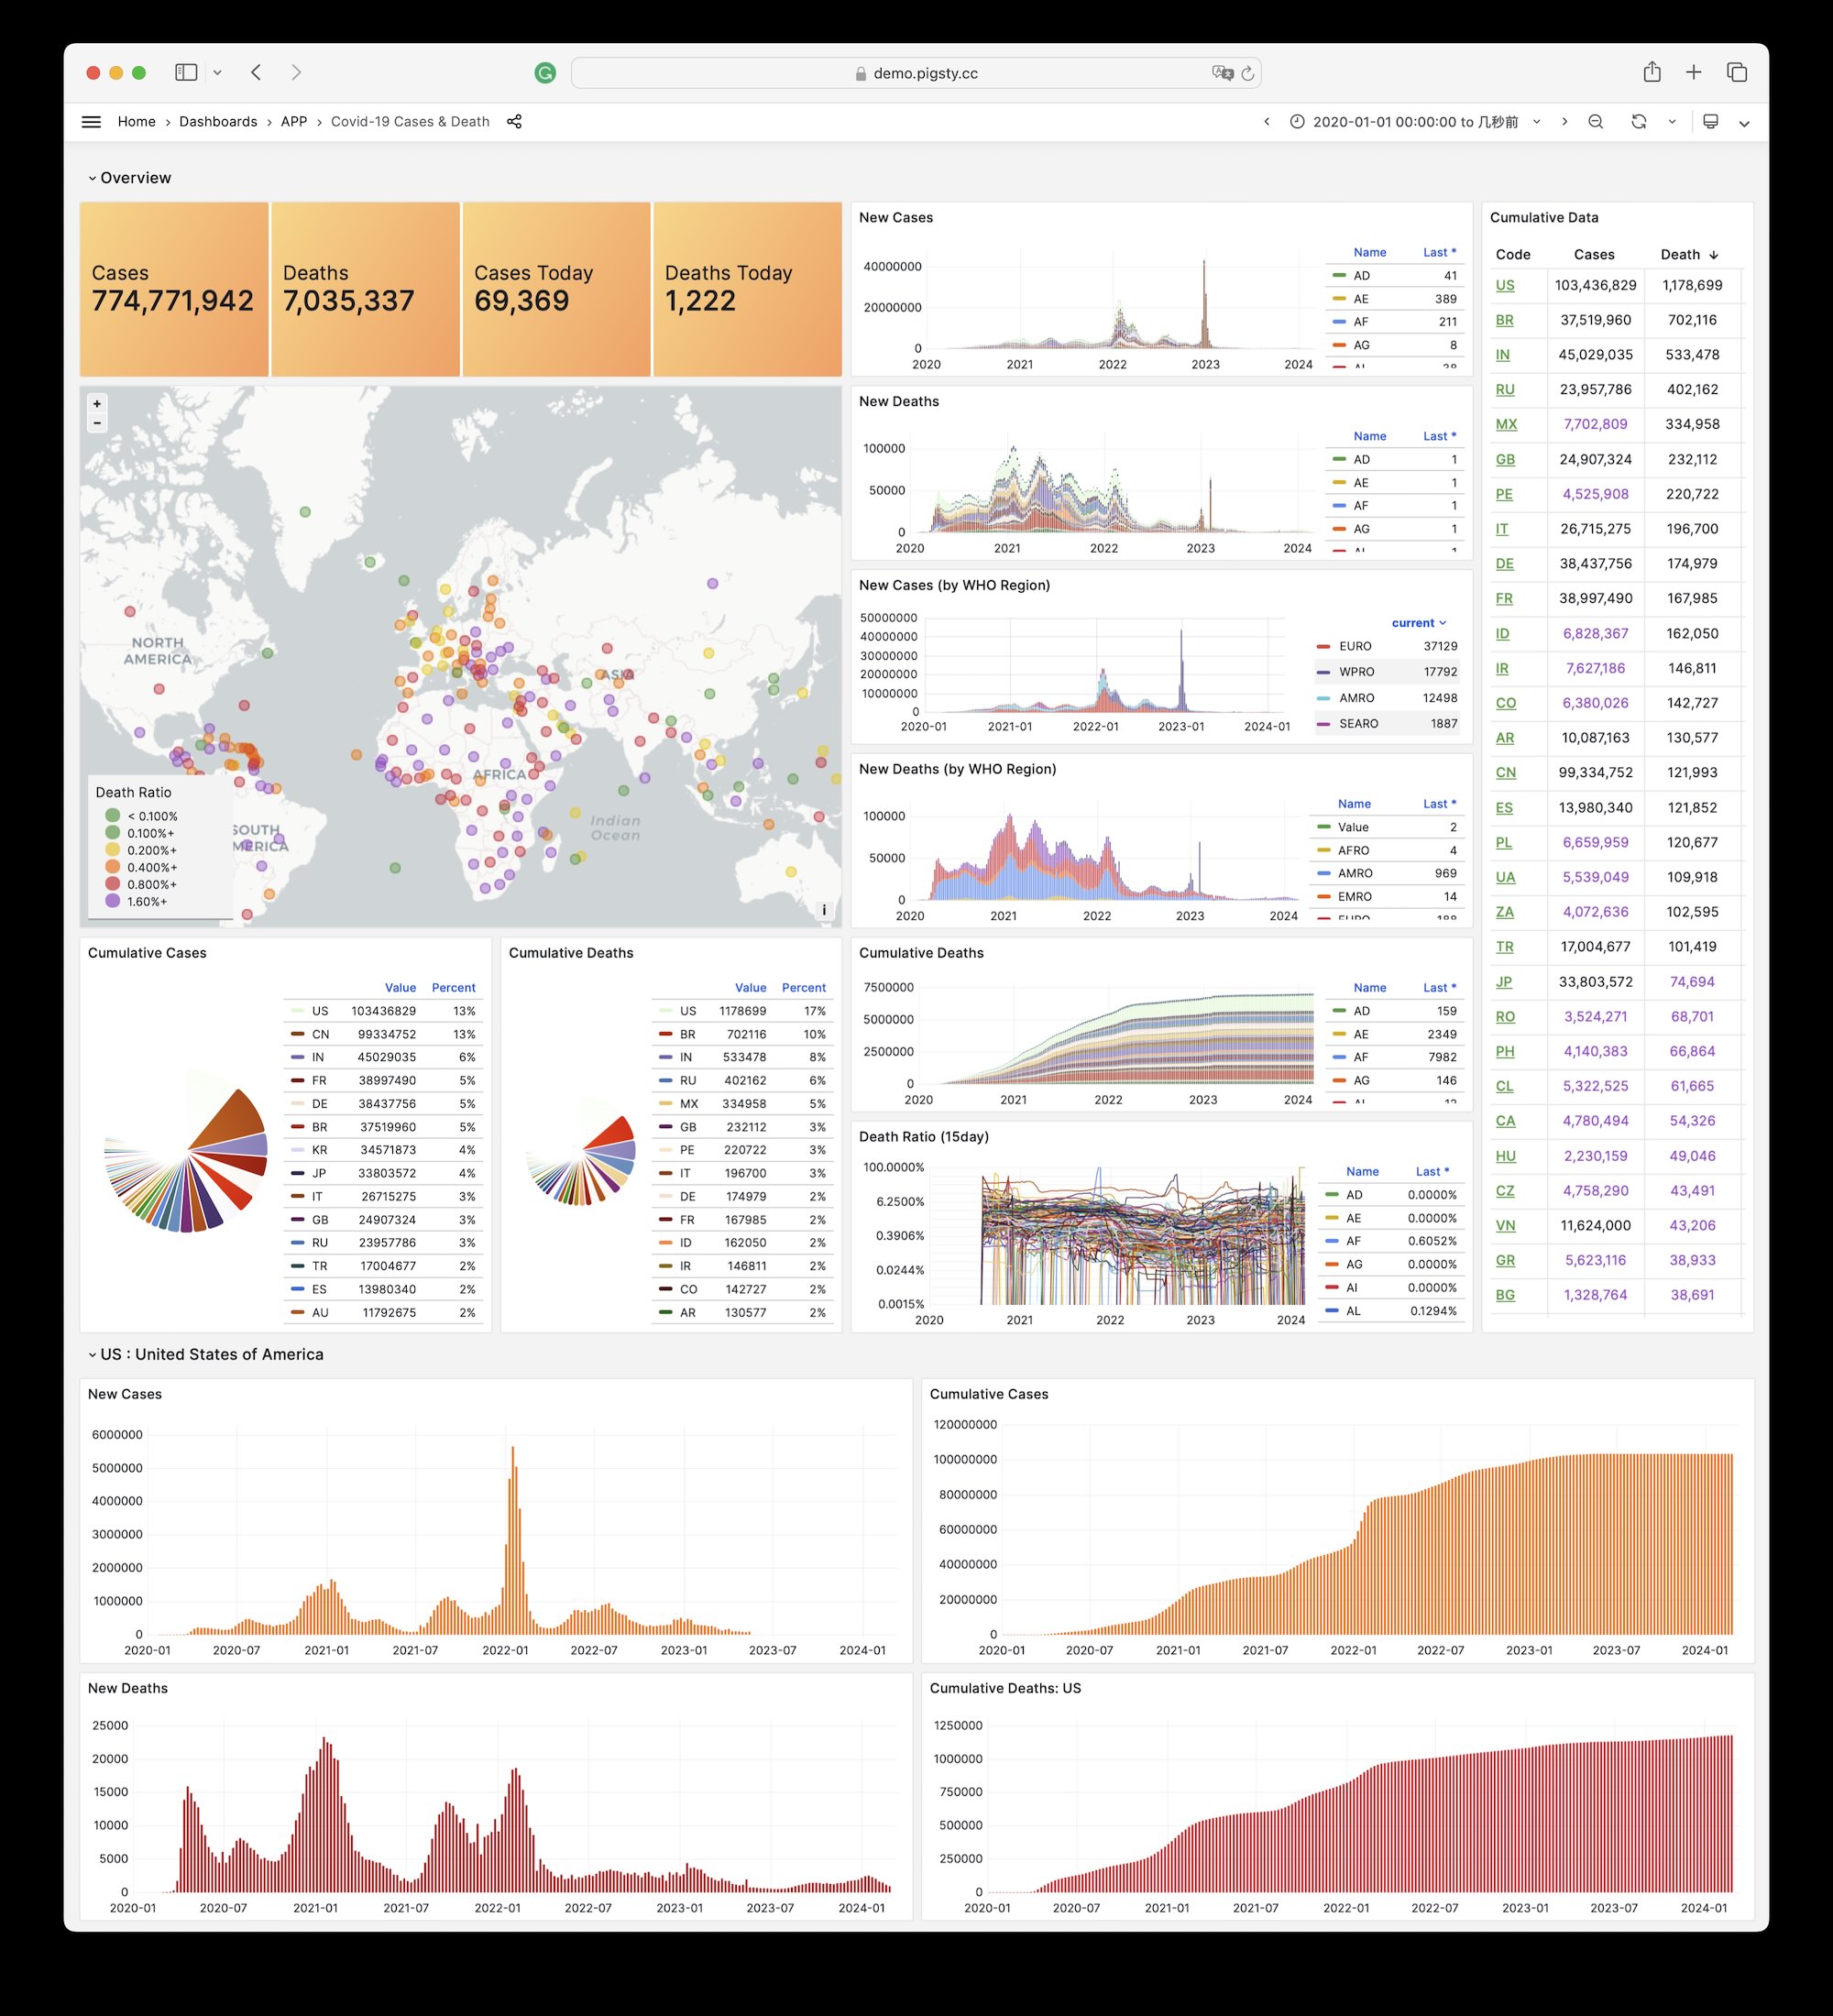
Installation
On the administration node, enter the application directory. Run make to complete installation.
Other sub-tasks:
27 - StackOverflow Global Developer Survey
Overview
GitHub Repository: https://github.com/pgsty/pigsty-app/tree/master/db
Online Demo: https://demo.pigsty.io/d/sf-survey
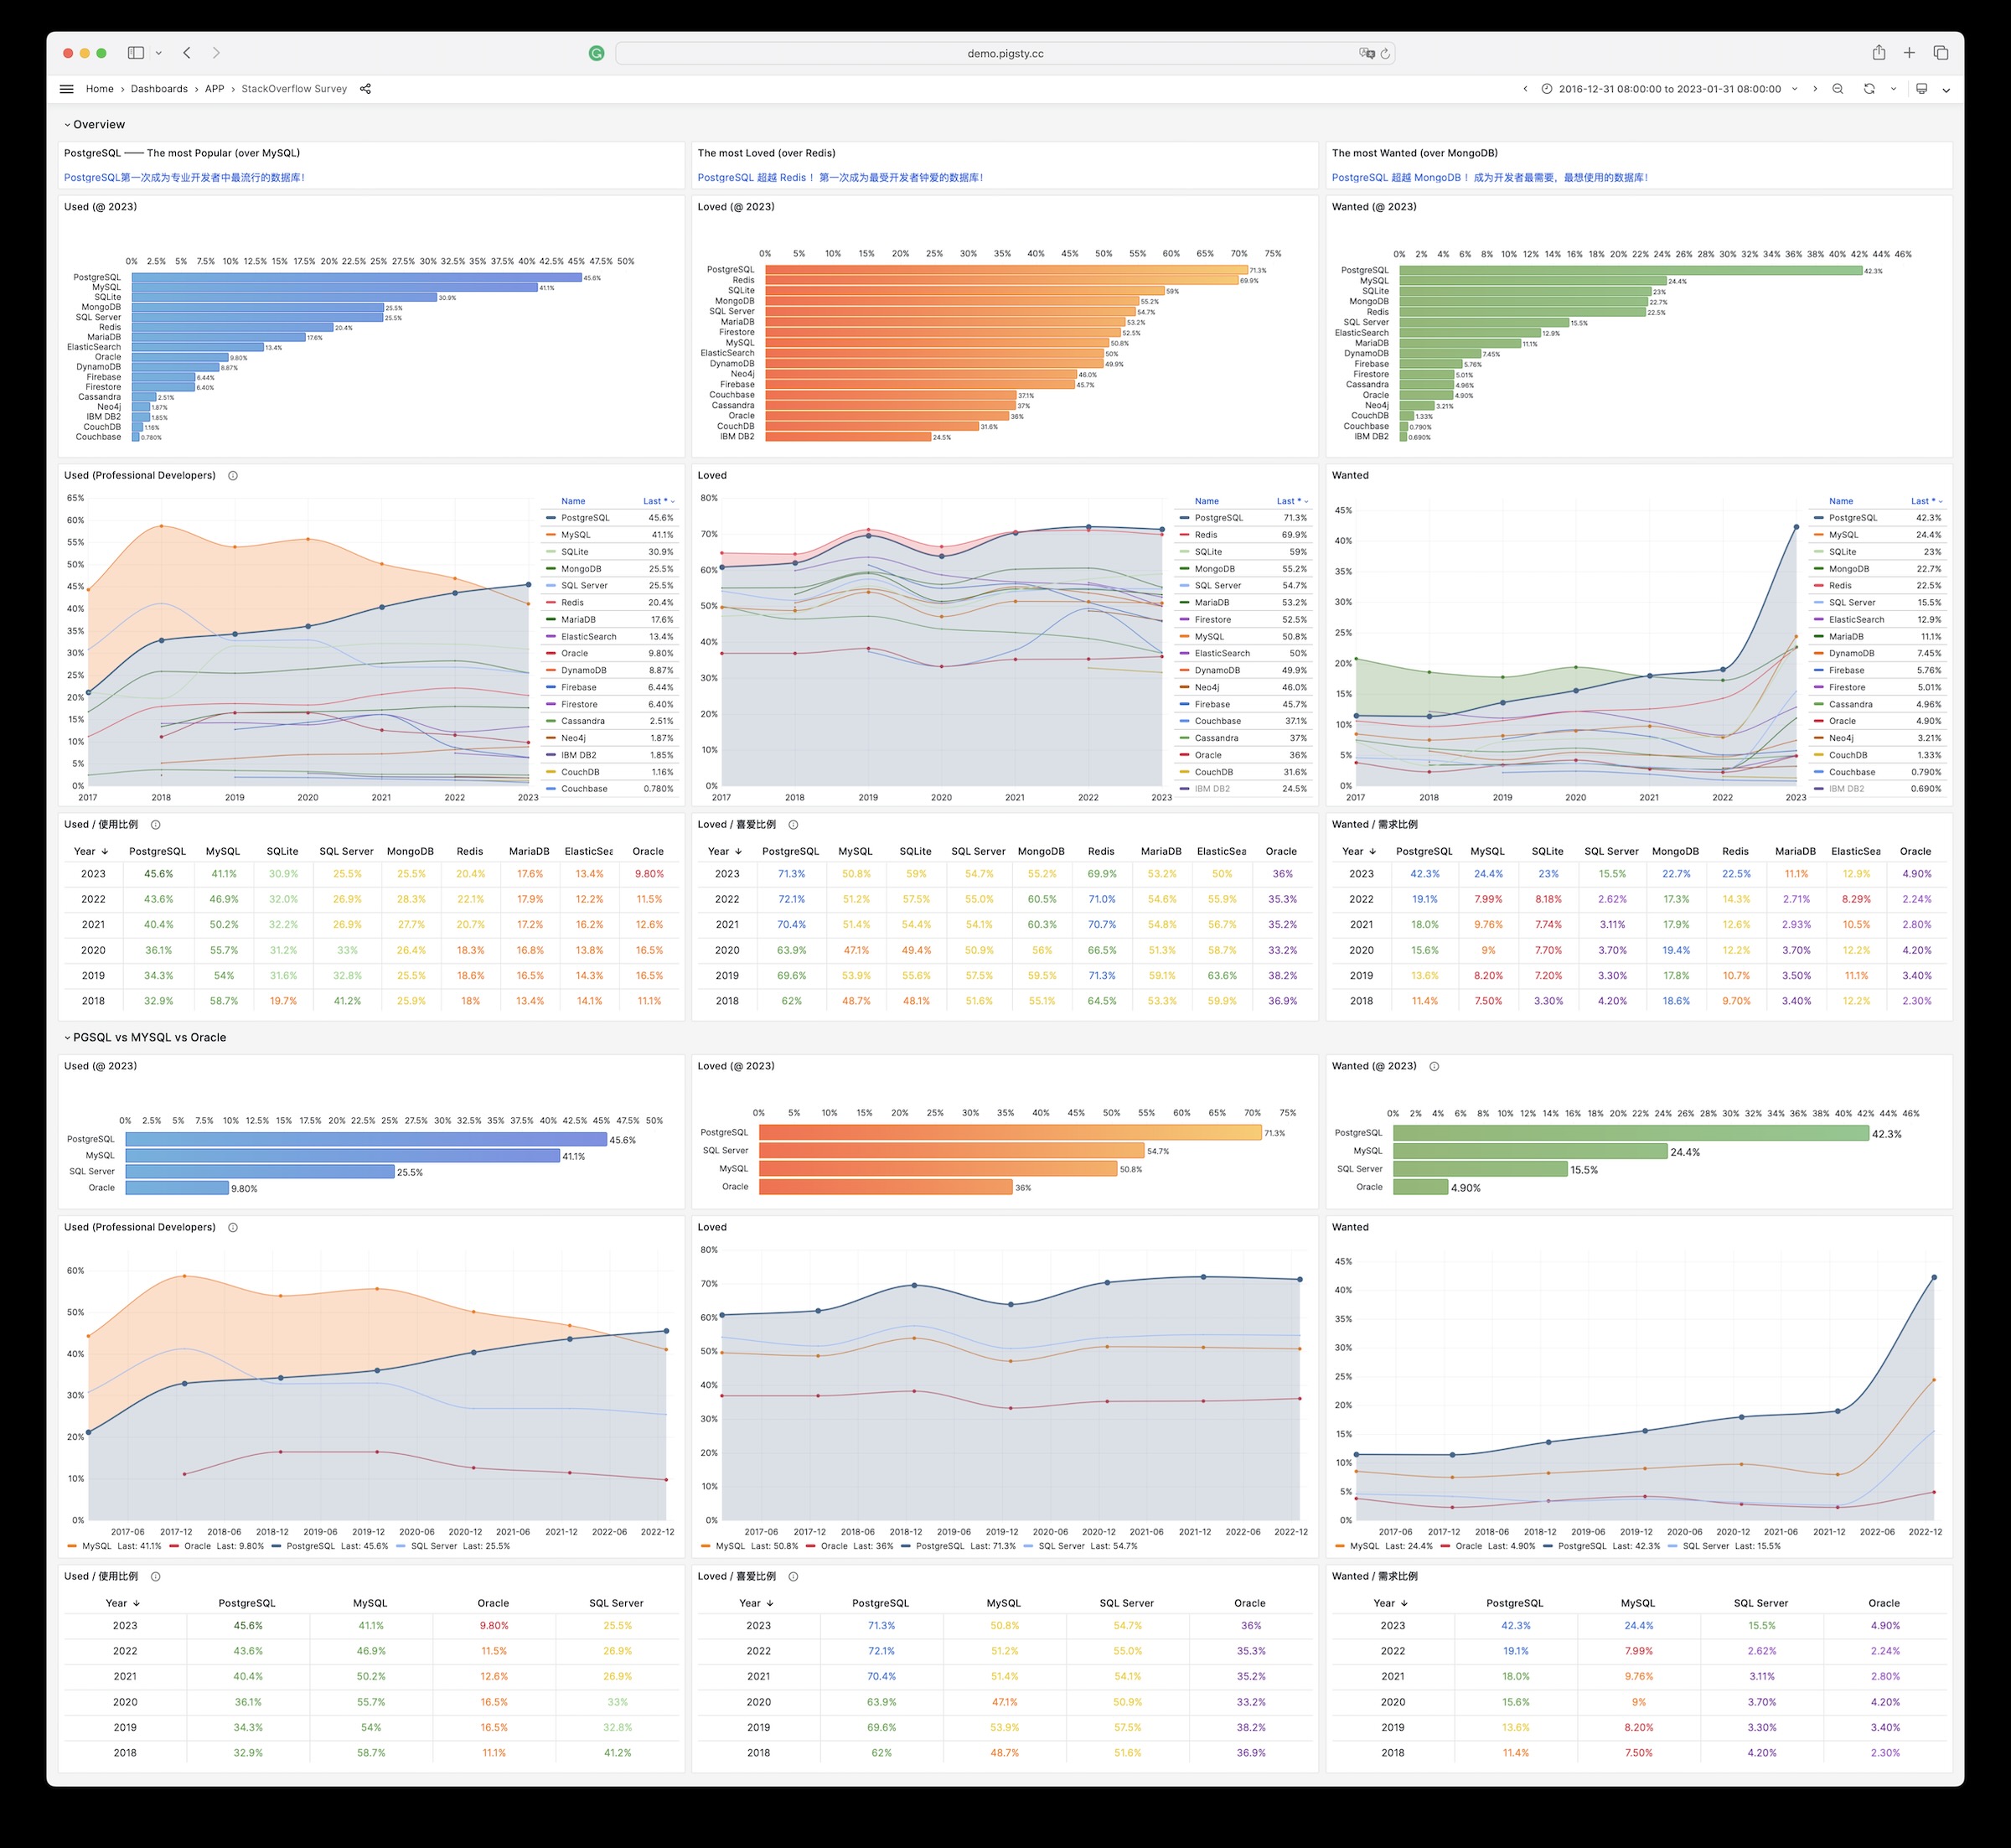
28 - DB-Engines Database Popularity Trend Analysis
Overview
GitHub Repository: https://github.com/pgsty/pigsty-app/tree/master/db
Online Demo: https://demo.pigsty.io/d/db-engine
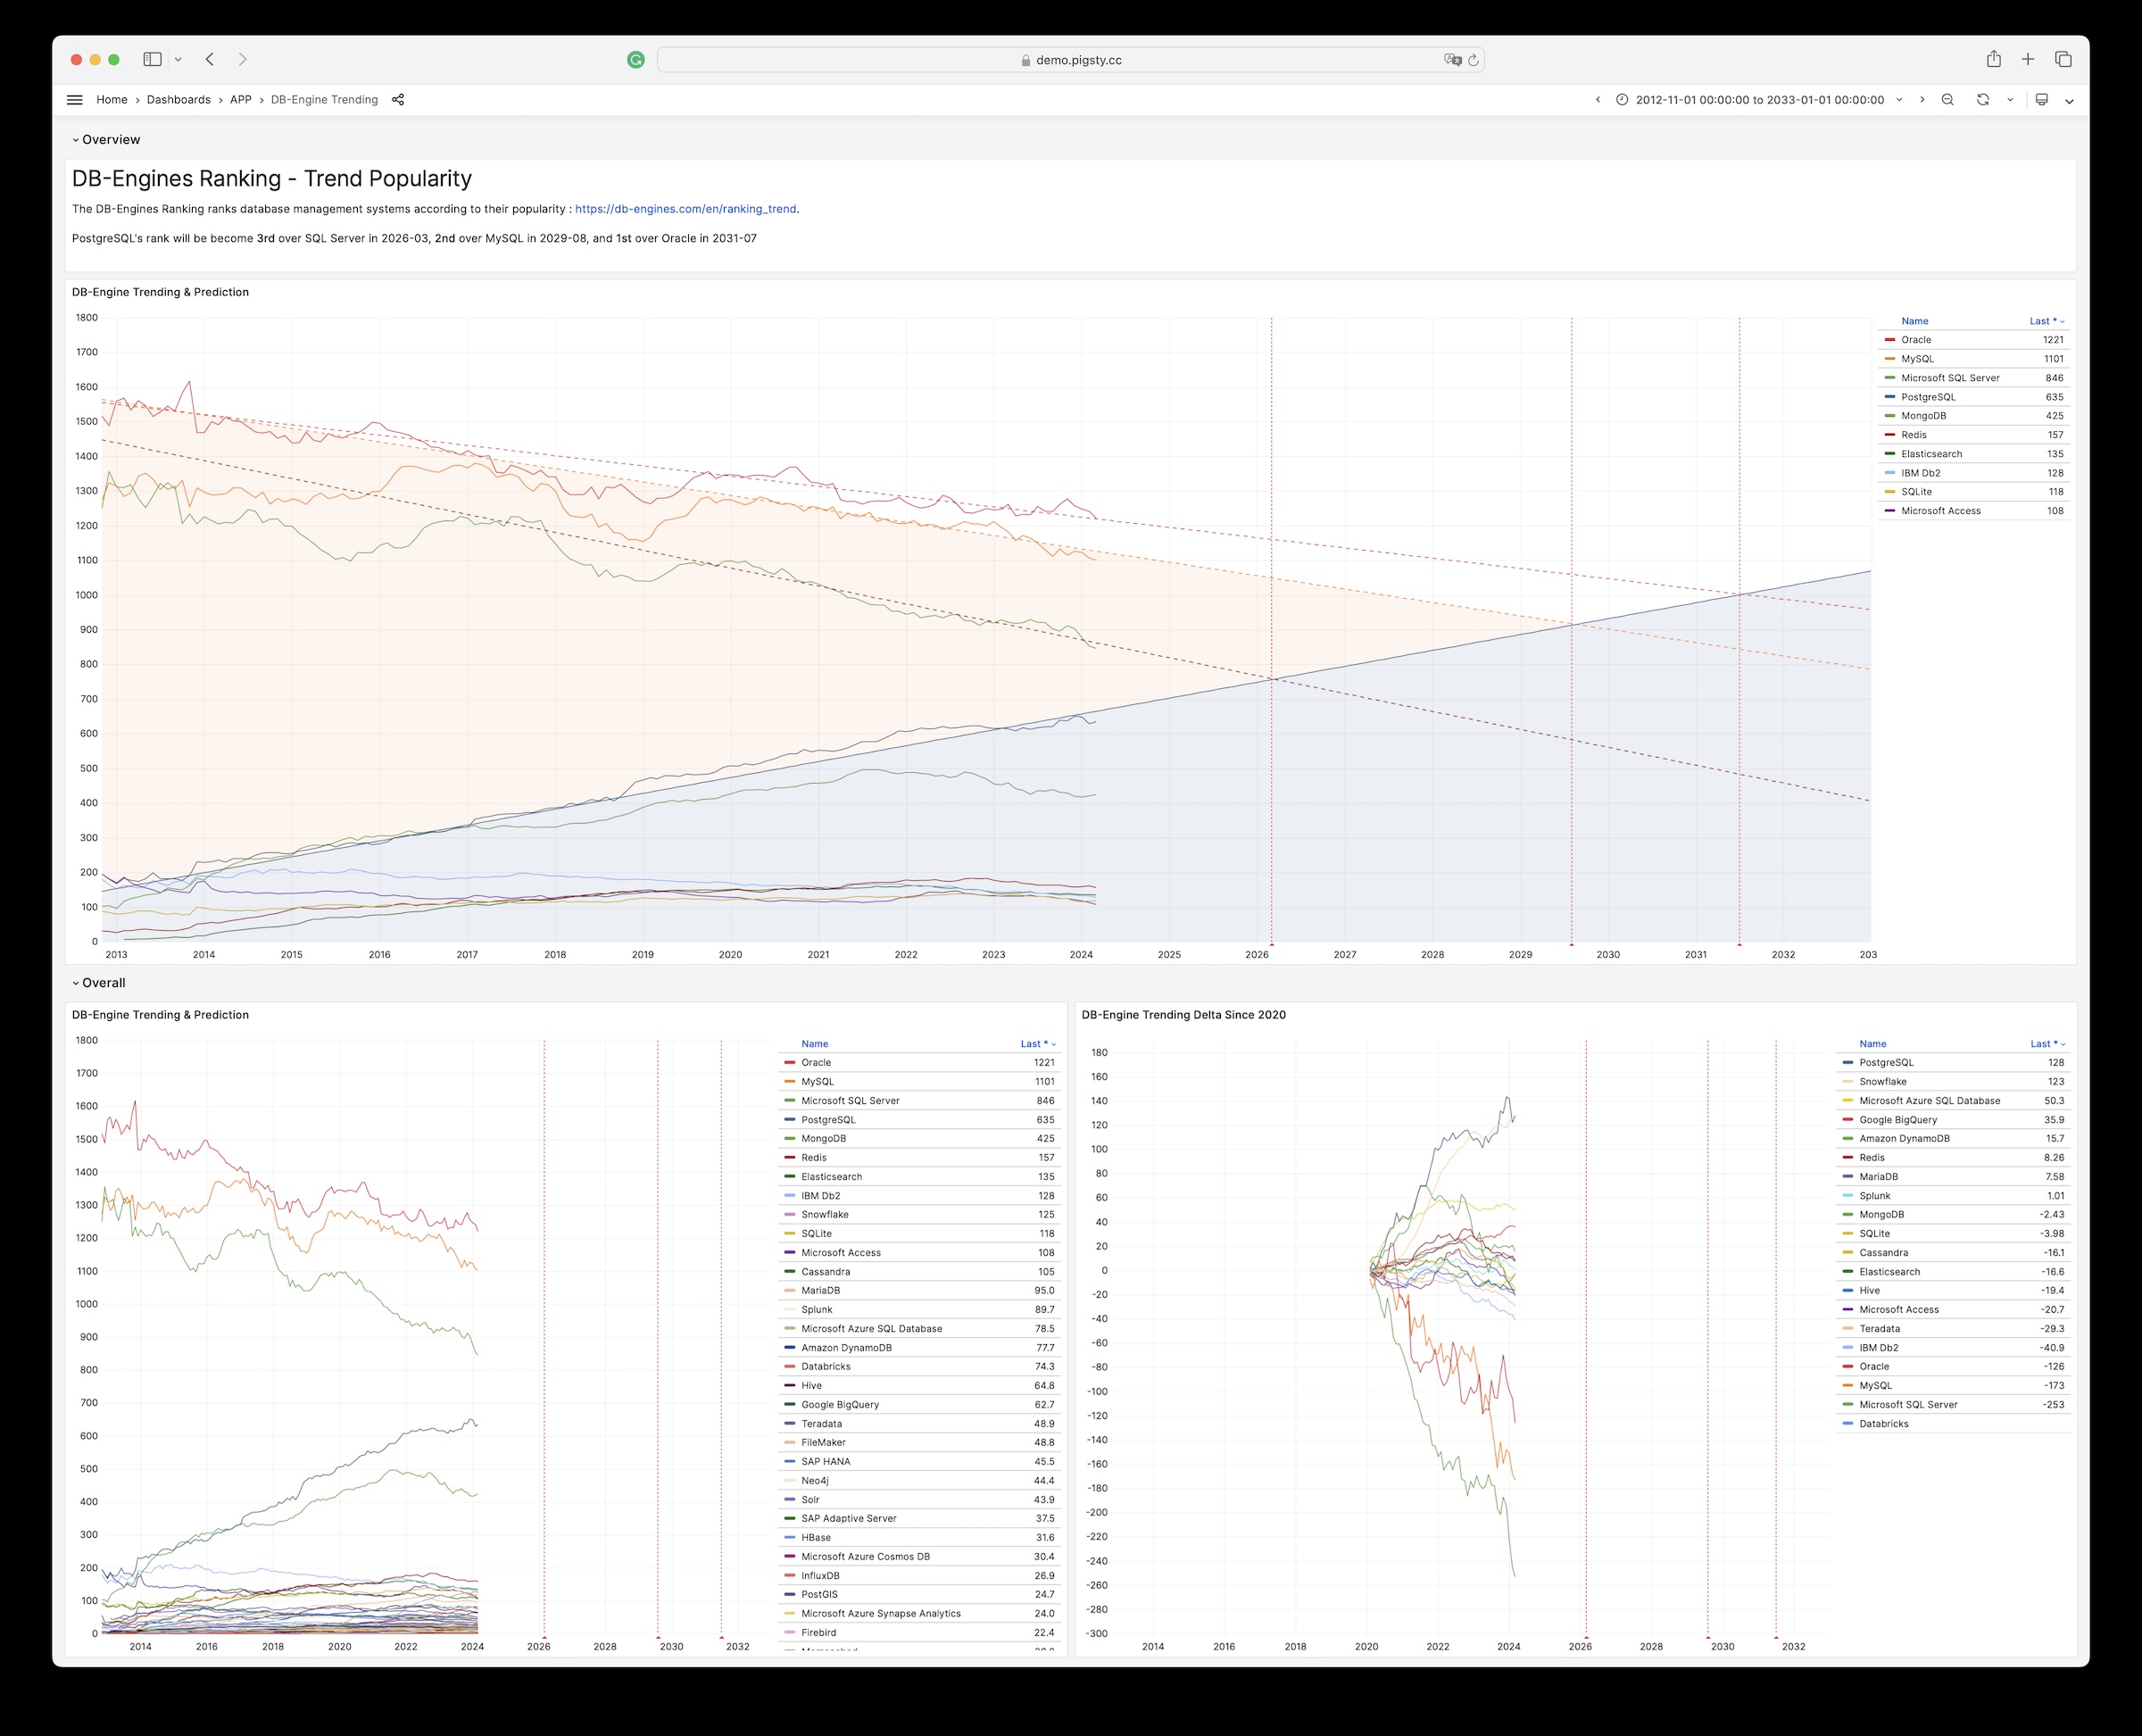
29 - AWS & Aliyun Server Pricing
Overview
GitHub Repository: https://github.com/pgsty/pigsty-app/tree/master/cloud
Online Demo: https://demo.pigsty.io/d/ecs
Article: Analyzing Computing Costs: Has Aliyun Really Reduced Prices?
Data Source
Download Aliyun ECS prices as raw CSV data from Price Calculator - Pricing Details - Price Download.
Schema
Download Aliyun pricing details, then import them for analysis:
For AWS EC2, download the price list from Vantage:
Visualization
Browse the interactive panels in the online demo: https://demo.pigsty.io/d/ecs