1 - Dify:自建开源AI工作流编排平台
如何使用 Pigsty 自建 AI Workflow LLMOps 平台 —— Dify,并使用外部 PostgreSQL,PGVector,Redis 作为存储?
Dify 是一个生成式 AI 应用创新引擎,开源的 LLM 应用开发平台。提供从 Agent 构建到 AI workflow 编排、RAG 检索、模型管理等能力,帮助用户轻松构建和运营生成式 AI 原生应用。
当然,像这样的一个 AI 工作流编排软件,在底下也少不得用到数据库 —— Dify 便是用 PostgreSQL 存储数据的,当然还有 Redis 缓存,与一个专用的向量数据库。Docker 镜像拉起来本地玩玩可以,生产环境部署的话,数据库肯定不能这么搞,高可用,备份,监控啥都没有。
好在 Pigsty 就提供了开箱即用的生产级高可用 PostgreSQL 集群,也正好提供了 Dify 需要用到的 Redis 与 S3 (MinIO) 服务,也提供了 Nginx 可以对外暴露 Web 服务,堪称 Dify 最佳拍档。
这里我不得不吐槽一下 Dify 模板的设计,元数据都已经用 PostgreSQL 存储了,你直接加个 pgvector 不就能拿来当向量数据库了?更让人想吐槽的是 pgvector 竟然还是一个单独的镜像与容器,你直接用一个带 pgvector 的 PG 镜像不就行了?
Dify “支持” 了一堆花里胡哨的向量数据库,但你既然已经选定了 PostgreSQL 了,向量数据库默认也用 pgvector 就是自然而然地选择了。同理,我觉得 Dify 官方应该考虑一下把 Redis 去掉,Celery 任务队列又不是不能用 PostgreSQL 作为后端存储,弄那么多数据库纯属吃饱了撑着。如无必要,勿增实体。
所以 Pigsty 提供的 Dify Docker Compose 模板 也对官方的样例做了一些修改,把 db 和 redis 两个数据库镜像给去掉了,使用由 Pigsty 管理的实例,向量数据库固定使用 pgvector,复用同一个 PostgreSQL 实例。
最后上面那个架构就被简化为无状态的:dify-api,dify-web,dify-worker 三个无状态容器,可以随意创建销毁。当然还有两个可选的 ssrf_proxy 与 nginx,用于提供代理与些许安全特性。
还有一点状态尾巴是 文件系统卷,存放私钥之类的东西,定期备份一下就好了,也可以使用 MinIO 替代。
参考资料:
Pigsty的准备工作
我们用 单机安装 的 Pigsty 为例,假设你有一台 IP 地址为 10.10.10.10 的机器,已经 安装好了单机 Pigsty。
当然,我们需要在 Pigsty 配置文件 pigsty.yml 中定义一下我们所需的数据库集群。
这里定义了一个名为 pg-meta 的集群,其中有一个名为 dbuser_dify 的超级业务用户(它这个实现的有点挫,在 Migration 脚本里面执行了 CREATE EXTENSION ),一个安装了 pgvector 扩展插件的数据库 dify,以及一条特定的防火墙规则,允许用户通过密码从任何地方访问数据库(你也可以将其限制为docker的网段 172.0.0.0/8 之类更精确的范围)。
同时,上面还定义了一个单实例的标准 Redis 集群 redis-dify,设置了密码 redis.dify。
pg-meta:
  hosts: { 10.10.10.10: { pg_seq: 1, pg_role: primary } }
  vars:
    pg_cluster: pg-meta
    pg_users: [ { name: dbuser_dify ,password: DBUser.Dify  ,superuser: true ,pgbouncer: true ,roles: [ dbrole_admin ] } ]
    pg_databases: [ { name: dify, owner: dbuser_dify, extensions: [ { name: pgvector } ] } ]
    pg_hba_rules: [ { user: dbuser_dify , db: all ,addr: world ,auth: pwd ,title: 'allow dify user world pwd access' } ]

redis-dify:
  hosts: { 10.10.10.10: { redis_node: 1 , redis_instances: { 6379: { } } } }
  vars: { redis_cluster: redis-dify ,redis_password: 'redis.dify' ,redis_max_memory: 64MB }
这里出于演示目的,我们全部使用单实例配置,你可以参考 Pigsty 文档部署 高可用 的 PG 集群与 Redis 集群。总之,在定义完成后,使用以下命令创建 PG 和 Redis 。
bin/pgsql-add  pg-meta                # create the dify database cluster
bin/redis-add  redis-dify             # create redis cluster
当然,您也可以在现有的 PostgreSQL 集群,例如 pg-meta 上新定义业务用户与业务数据库,并通过以下命令创建:
bin/pgsql-user pg-meta dbuser_dify    # create dify biz user
bin/pgsql-db   pg-meta dify           # create dify biz database
您应该可以通过以下的连接串,访问到 PostgreSQL 与 Redis,当然连接信息请根据实际情况进行修改。
当你确认这两个连接串可用后,大功告成,你可以开始部署 Dify 了。
这里出于演示方便的原因,使用IP直连的土办法,如果是多节点的高可用 PG 集群,请参考 接入 一节。
当然,上面的部分是假设你已经是 Pigsty 用户,了解如何部署 PostgreSQL 与 Redis 集群。你可以直接跳过下一节,查看 Dify 如何配置。
从零开始的一些说明
如果您已经了解如何配置使用 Pigsty,可以略过本节。
从零安装 Pigsty 需要 准备 一台符合要求的机器节点: Linux / x86_64,静态 IP,使用带有免密 sudo 权限的用户,执行以下命令:
curl -fsSL https://repo.pigsty.io/get | bash
然后依次完成以下步骤:
cd ~/pigsty      # 下载源码包解压后进入 Pigsty 源码目录,完成后续 准备、配置、安装 三个步骤
./bootstrap      # 【可选项】用于确保 Ansible 正常安装,如果 /tmp/pkg.tgz 离线包则使用它
./configure      # 【可选项】执行环境检测,并生成相应的推荐配置文件,如果知道如何配置可以跳过

# …… 这里请修改自动生成的配置 pigsty.yml ,将上面的集群定义填入 all.children 部分内

./install.yml    # 根据生成的配置文件开始在当前节点上执行安装,使用离线安装包大概需要10分钟完成
您应当将上面的 PostgreSQL 集群与 Redis 集群定义填入 pigsty.yml 文件中,然后执行 install.yml 完成安装。
Redis安装问题
Pigsty 默认不会安装 Redis,所以您需要使用 redis.yml 剧本显式完成 Redis 安装:
Docker安装问题
Pigsty 默认不会在当前节点安装 Docker,所以您需要使用 docker.yml 剧本安装 Docker。
Docker Hub 被墙问题
请注意,对于中国大陆用户来说,Docker Hub 与各镜像站点目前出于封锁状态,需要 “科学上网” 才能拉取 Dify 所需的镜像,您可以考虑 docker save|load,或者为 Docker Daemon 配置代理。
要为 Docker Daemon 配置代理,您需要在 proxy_env 中指定 http_proxy 与 https_proxy 环境变量,该参数会在 docker_config 任务中被写入 /etc/docker/daemon.json 中:
{
  "proxies": {
    "http-proxy": "http://192.168.x.x:8118",
    "https-proxy": "http://192.168.x.x:8118",
    "no-proxy": "localhost,127.0.0.1,10.0.0.0/8,192.168.0.0/16,*.pigsty,*.aliyun.com,mirrors.*,*.myqcloud.com,*.tsinghua.edu.cn"
  }
}
当然您也可以直接在配置文件中填入您的 HTTP/HTTPS 代理地址,并使用 systemctl restart docker 重启生效。
$ docker compose pull
[+] Pulling 5/5
✔ worker Skipped - Image is already being pulled by api
✔ web Pulled
✔ api Pulled
✔ ssrf_proxy Pulled
✔ nginx Pulled
配置代理后,镜像都可以成功拉取了。当然您也可以使用其他可用的镜像站点,例如 quay.io 等。
Dify的配置工作
Dify 的配置参数一如往常地放在 .env 文件中,内容如下所示:
所有参数都顾名思义,已经填入了在 Pigsty默认沙箱环境 中可以直接工作的默认值,数据库连接信息请根据您的真实配置,与上面 PG / Redis 集群配置保持一致即可。
我们建议你随便改一下这个 SECRET_KEY 字段,可以使用 openssl rand -base64 42 生成一个强密钥。
# meta parameter
DIFY_PORT=8001 # expose dify nginx service with port 8001 by default
LOG_LEVEL=INFO # The log level for the application. Supported values are `DEBUG`, `INFO`, `WARNING`, `ERROR`, `CRITICAL`
SECRET_KEY=sk-9f73s3ljTXVcMT3Blb3ljTqtsKiGHXVcMT3BlbkFJLK7U # A secret key for signing and encryption, gen with `openssl rand -base64 42`

# postgres credential
PG_USERNAME=dbuser_dify
PG_PASSWORD=DBUser.Dify
PG_HOST=10.10.10.10
PG_PORT=5432
PG_DATABASE=dify

# redis credential
REDIS_HOST=10.10.10.10
REDIS_PORT=6379
REDIS_USERNAME=''
REDIS_PASSWORD=redis.dify

# minio/s3 [OPTIONAL] when STORAGE_TYPE=s3
STORAGE_TYPE=local
S3_ENDPOINT='https://sss.pigsty'
S3_BUCKET_NAME='infra'
S3_ACCESS_KEY='dba'
S3_SECRET_KEY='S3User.DBA'
S3_REGION='us-east-1'
填好连接信息后,我们就可以使用 Docker Compose 拉起 Dify 服务了:
cd pigsty/app/dify && make up
使用Nginx暴露Web服务
Dify 的 Docker Compose 模板里面已经包含了一个 Nginx Server,占据了宿主机的 80 端口。如果你的这台机器就是拿来专门跑 Dify 的那没问题。如果你用的是 Pigsty 单机安装,那么这台宿主机上的 80 端口已经被 Pigsty 部署的 Nginx Web Portal 占据了。
所以,Pigsty 提供的模板中,DIFY_PORT 默认使用了 8001,并通过宿主机上 Pigsty 部署的 Nginx 转发至此端口。当然我们也提供选项B,你也可以直接在 /etc/nginx/conf.d/dify.conf 里使用样例配置,直接指向 Dify 的 web 与 api 端口。
在 pigsty.yml 配置文件中的 infra_portal 参数中新增一行 Dify 的配置
infra_portal:                     # domain names and upstream servers
  home         : { domain: h.pigsty }
  grafana      : { domain: g.pigsty ,endpoint: "${admin_ip}:3000" , websocket: true }
  prometheus   : { domain: p.pigsty ,endpoint: "${admin_ip}:9090" }
  alertmanager : { domain: a.pigsty ,endpoint: "${admin_ip}:9093" }
  blackbox     : { endpoint: "${admin_ip}:9115" }
  loki         : { endpoint: "${admin_ip}:3100" }

  dify         : { domain: dify.pigsty ,endpoint: "10.10.10.10:8001", websocket: true }
执行以下剧本,重新生成 Nginx 配置、证书并应用:
当然如果要通过域名访问,你要把自己的域名 dify.pigsty 添加到域名服务器,或者简单地写入:/etc/hosts 或 C:\Windows\System32\drivers\etc\hosts 之类的静态域名解析文件。
然后,你就可以从浏览器中,通过 http://dify.pigsty 访问 Dify IDE 了。
2 - Odoo:自建开源ERP系统
如何拉起开箱即用的企业级应用全家桶 Odoo,并使用 Pigsty 管理其后端 PostgreSQL 数据库。
Odoo 是一个开源的企业级 ERP 系统,提供了从 CRM、销售、采购、库存、生产、财务等全方位的企业管理功能。Odoo 也是一个典型的 Web 应用,底层使用 PostgreSQL 数据库作为存储。
将你所有的业务都汇总入一个平台,简单,高效,省钱。
公开演示(不一定开放):http://odoo.pigsty.cc, username: [email protected], password: pigsty
快速上手
首先准备一个 Pigsty 单节点配置文件,如下所示:
 curl -fsSL https://repo.pigsty.io/get | bash
./bootstrap               # prepare local repo & ansible
./configure -c demo/odoo  # IMPORTANT: CHANGE CREDENTIALS!!
./install.yml             # install pigsty & pgsql & minio
./docker.yml              # install docker & docker-compose
./app.yml                 # install odoo
Odoo 默认监听在 8069 端口,你可以通过浏览器访问 http://<ip>:8069。第一次登陆会提示您创建数据库(建议使用 odoo 即可,其他初始用户名密码按实际情况填写并记录)
你可以在浏览器所在主机(/etc/hosts)添加一条解析记录 odoo.pigsty 指向您的服务器,这样您就可以通过 http://odoo.pigsty 访问 Odoo 网络界面了。
如果你想要通过 SSL/HTTPS 访问 Odoo,你需要使用真正的 SSL 证书,或者信任 Pigsty 自动生成的自签名 ca 证书。(当然,在 Chrome 浏览器中,你也可以使用敲击键入 thisisunsafe 来绕过证书验证)
单节点配置文件
在 conf/demo/odoo.yml 中有一个样例配置文件:
all:
  children:

    infra:
      hosts: { 10.10.10.10: { infra_seq: 1 } }
      vars:

        # ./docker.yml -l infra
        docker_enabled: true
        docker_registry_mirrors: []
        #  - https://docker.m.daocloud.io
        #  - https://dockerproxy.com

        # ./app.yml -l infra -e app=odoo
        app: odoo
        app_config:
          PG_HOST: 10.10.10.10
          PG_PORT: 5432
          PG_USER: dbuser_odoo
          PG_PASS: DBUser.Odoo
          ODOO_PORT: 8069

    etcd: { hosts: { 10.10.10.10: { etcd_seq: 1 } }, vars: { etcd_cluster: etcd } }
    #minio: { hosts: { 10.10.10.10: { minio_seq: 1 } }, vars: { minio_cluster: minio } }

    pg-meta:
      hosts: { 10.10.10.10: { pg_seq: 1, pg_role: primary } }
      vars:
        pg_cluster: pg-meta
        pg_users:
          - {name: dbuser_meta       ,password: DBUser.Meta       ,pgbouncer: true ,roles: [dbrole_admin]    ,comment: pigsty admin user }
          - {name: dbuser_view       ,password: DBUser.Viewer     ,pgbouncer: true ,roles: [dbrole_readonly] ,comment: read-only viewer for meta database }
          - {name: dbuser_odoo       ,password: DBUser.Odoo       ,pgbouncer: true ,roles: [dbrole_admin]    ,comment: admin user for odoo service ,createdb: true } #,superuser: true}
        pg_databases:
          - {name: meta ,baseline: cmdb.sql ,comment: pigsty meta database ,schemas: [pigsty] ,extensions: [{name: vector}]}
          #- {name: odoo ,owner: dbuser_odoo ,revokeconn: true ,comment: odoo main database  }  # this will be created by the dbuser_odoo, you can register it to grafana later
        pg_hba_rules:
          - {user: dbuser_view , db: all ,addr: infra ,auth: pwd ,title: 'allow grafana dashboard access cmdb from infra nodes'}
        pg_libs: 'pg_stat_statements, auto_explain'  # add timescaledb to shared_preload_libraries

  vars:                               # global variables
    version: v3.2.1                   # pigsty version string
    admin_ip: 10.10.10.10             # admin node ip address
    region: default                   # upstream mirror region: default|china|europe
    infra_portal:                     # domain names and upstream servers
      home         : { domain: h.pigsty }
      grafana      : { domain: g.pigsty ,endpoint: "${admin_ip}:3000" , websocket: true }
      prometheus   : { domain: p.pigsty ,endpoint: "${admin_ip}:9090" }
      alertmanager : { domain: a.pigsty ,endpoint: "${admin_ip}:9093" }
      blackbox     : { endpoint: "${admin_ip}:9115" }
      loki         : { endpoint: "${admin_ip}:3100" }
      odoo         : { domain: odoo.pigsty, endpoint: "127.0.0.1:8069", websocket: true } # <-- 在这里指定 Odoo 的域名

    # Credential: CHANGE THESE PASSWORDS IN PRODUCTION
    grafana_admin_password: pigsty
    pg_admin_password: DBUser.DBA
    pg_monitor_password: DBUser.Monitor
    pg_replication_password: DBUser.Replicator
    patroni_password: Patroni.API
    haproxy_admin_password: pigsty

    repo_modules: infra,node,pgsql,docker
    repo_packages: [ node-bootstrap, infra-package, infra-addons, node-package1, node-package2, pgsql-utility, docker ]
    repo_extra_packages: [ pg17-main ]
    pg_version: 17
然后依次执行以下剧本,即可完成 Odoo 安装:
./install.yml   # 完成单节点 Pigsty 安装
./docker.yml    # 安装 Docker 模块
./app.yml       # 安装 Odoo 模块
默认的连接串如下所示,你可以在 app.yml 中修改用户的密码,并相应修改 app_config 中的配置
将 Odoo 服务对外暴露
infra_portal:                     # domain names and upstream servers
  home         : { domain: h.pigsty }
  grafana      : { domain: g.pigsty    ,endpoint: "${admin_ip}:3000" , websocket: true }
  prometheus   : { domain: p.pigsty    ,endpoint: "${admin_ip}:9090" }
  alertmanager : { domain: a.pigsty    ,endpoint: "${admin_ip}:9093" }
  blackbox     : { endpoint: "${admin_ip}:9115" }
  loki         : { endpoint: "${admin_ip}:3100" }
  odoo         : { domain: odoo.pigsty, endpoint: "127.0.0.1:8069", websocket: true }  # <------ add this line
./infra.yml -t nginx # setup nginx infra portal
Odoo 扩展插件
社区中有很多可用的 Odoo 模块,你可以通过下载并将它们放置在 addons 文件夹中来安装它们。
volumes:
  - ./addons:/mnt/extra-addons
你可以将 ./addons 目录挂载到容器中的 /mnt/extra-addons 目录,然后下载并解压到 addons 文件夹中,然后启用这些模块。
要启用这些模块,首先进入 开发者模式
Settings -> Generic Settings -> Developer Tools -> Activate the developer Mode
然后,转到 > Apps -> Update Apps List, 然后你可以在面板中找到这些额外的模块并安装它们。
经常使用的 免费模块 ,当然以及大家最需要的 Accounting Kit 模块。
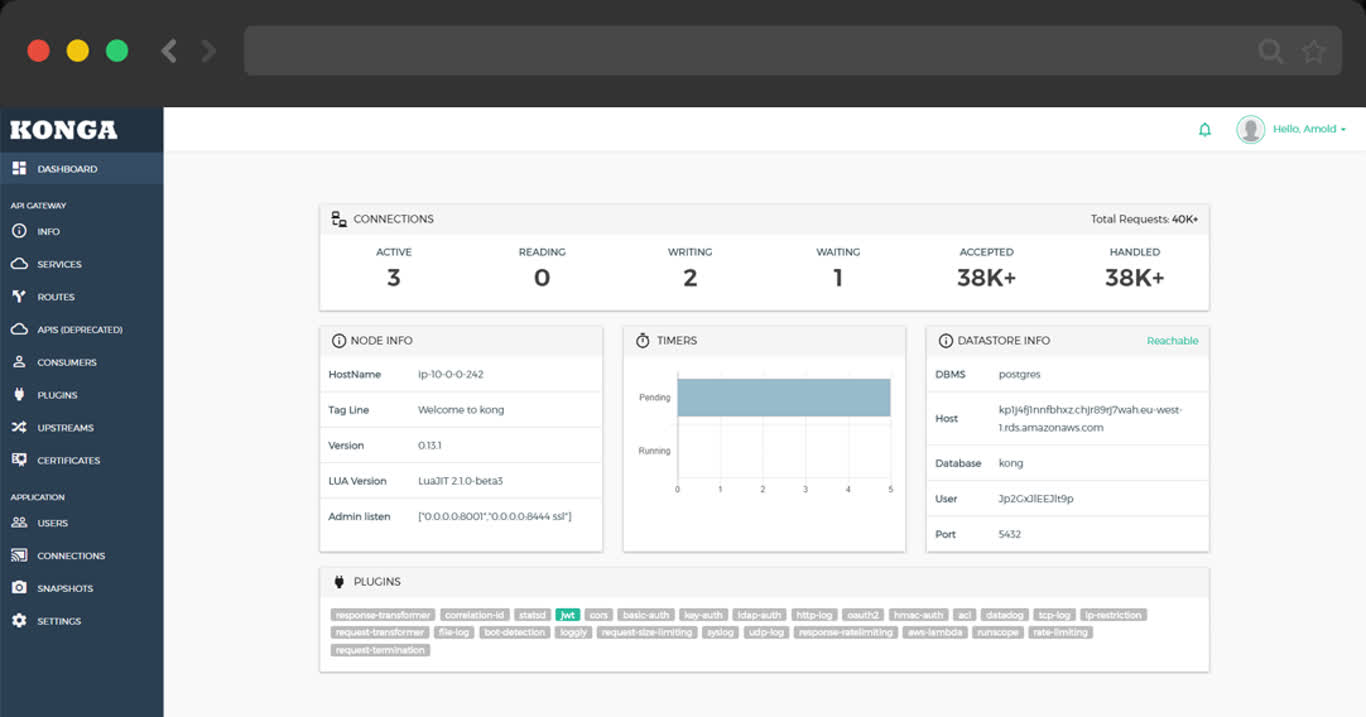
3 - Kong:企业级开源 API 网关
拉起基于 Nginx 与 OpenResty 的强力开源 API 网关,并使用 PostgreSQL 与 Redis 作为其后端状态存储
TL;DR
cd app/kong ; docker-compose up -d
make up         # pull up kong with docker-compose
make ui         # run swagger ui container
make log        # tail -f kong logs
make info       # introspect kong with jq
make stop       # stop kong container
make clean      # remove kong container
make rmui       # remove swagger ui container
make pull       # pull latest kong image
make rmi        # remove kong image
make save       # save kong image to /tmp/kong.tgz
make load       # load kong image from /tmp
Scripts
- Default Port: 8000
- Default SSL Port: 8443
- Default Admin Port: 8001
- Default Postgres Database:
postgres://dbuser_kong:[email protected]:5432/kong
# postgres://dbuser_kong:[email protected]:5432/kong
- { name: kong, owner: dbuser_kong, revokeconn: true , comment: kong the api gateway database }
- { name: dbuser_kong, password: DBUser.Kong , pgbouncer: true , roles: [ dbrole_admin ] }
4 - Jupyter:数据分析笔记本与AI IDE
使用 Jupyter Lab 并访问 PostgreSQL 数据库,并组合使用SQL与Python的能力进行数据分析。
本文需要更新
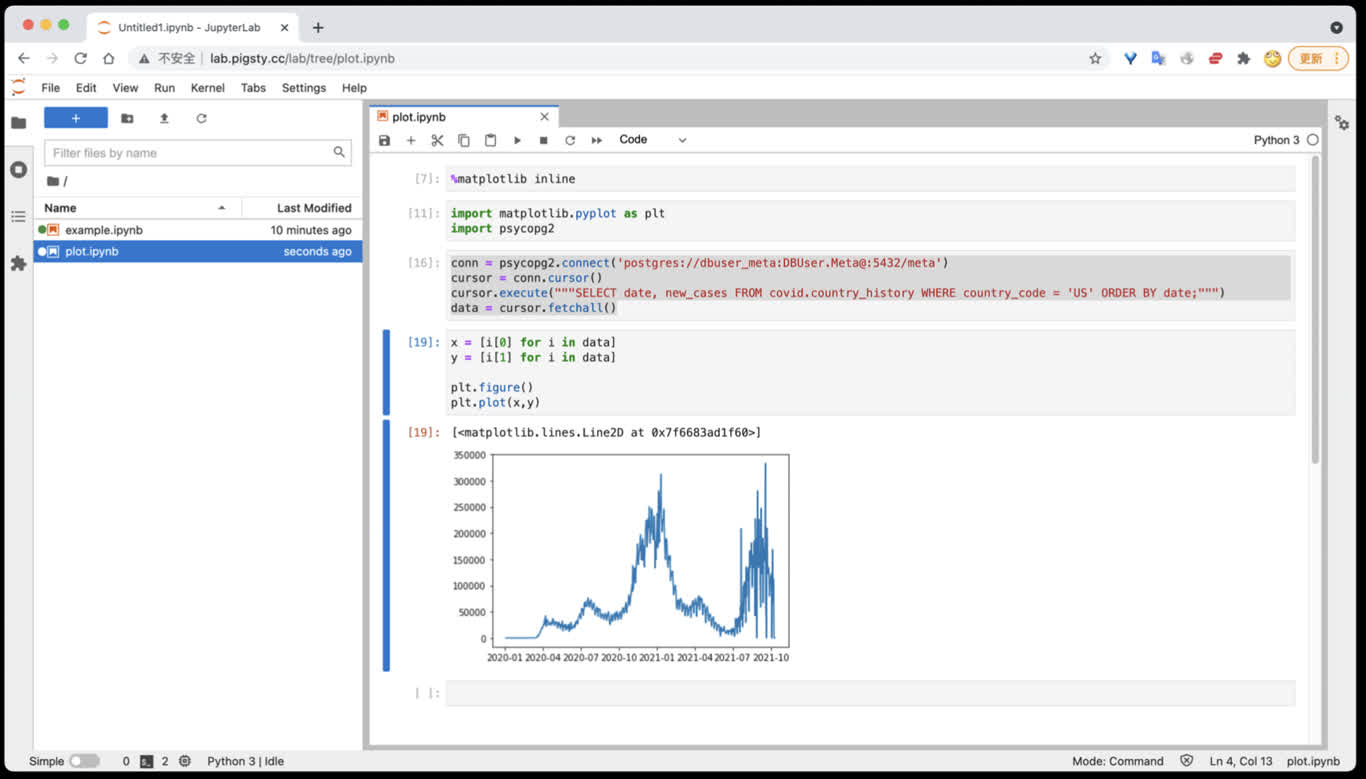
Jupyter Lab 是基于 IPython Notebook 的完整数据科学研发环境,可用于数据分析与可视化。
因为JupyterLab提供了Web Terminal功能,因此在默认安装中不启用,需要主动使用 infra-jupyter.yml 在元节点上进行部署。
数据分析环境:Jupyter
Jupyter Lab 是一站式数据分析环境,下列命令将在 8887 端口启动一个Jupyter Server.
docker run -it --restart always --detach --name jupyter -p 8888:8888 -v "${PWD}":/tmp/notebook jupyter/scipy-notebook
docker logs jupyter # 打印日志,获取登陆的Token
访问 http://10.10.10.10:8888/ 即可使用 JupyterLab,(需要填入自动生成的Token)。
您也可以使用 infra-jupyter.yml 在管理节点裸机上启用Jupyter Notebook。
太长不看
./infra-jupyter.yml # 在管理节点上安装 Jupyter Lab,使用8888端口,OS用户jupyter,默认密码 pigsty
./infra-jupyter.yml -e jupyter_domain=lab.pigsty.cc  # 使用另一个域名(默认为lab.pigsty)
./infra-jupyter.yml -e jupyter_port=8887             # 使用另一个端口(默认为8888)
./infra-jupyter.yml -e jupyter_username=osuser_jupyter jupyter_password=pigsty2 # 使用不同的操作系统用户与密码
Jupyter配置
默认值
jupyter_username: jupyter       # os user name, special names: default|root (dangerous!)
jupyter_password: pigsty        # default password for jupyter lab (important!)
jupyter_port: 8888              # default port for jupyter lab
jupyter_domain: lab.pigsty      # domain name used to distinguish jupyter
jupyter_username
Jupyter使用的操作系统用户, 类型:bool,层级:G,默认值为:"jupyter"
其他用户名亦同理,但特殊用户名default会使用当前执行安装的用户(通常为管理员)运行 Jupyter Lab,这会更方便,但也更危险。
jupyter_password
Jupyter Lab的密码, 类型:bool,层级:G,默认值为:"pigsty"
如果启用Jupyter,强烈建议修改此密码。加盐混淆的密码默认会写入~jupyter/.jupyter/jupyter_server_config.json。
jupyter_port
Jupyter监听端口, 类型:int,层级:G,默认值为:8888。
启用JupyterLab时,Pigsty会使用jupyter_username 参数指定的用户运行本地Notebook服务器。
此外,需要确保配置node_packages_meta_pip 参数包含默认值 'jupyterlab'。
Jupyter Lab可以从Pigsty首页导航进入,或通过默认域名 lab.pigsty 访问,默认监听于8888端口。
jupyter_domain
Jupyter域名, 类型:string,层级:G,默认值为:lab.pigsty。
该域名会被写入 /etc/nginx/conf.d/jupyter.conf 中,作为Jupyter服务的监听域名。
Jupyter剧本
infra-jupyter
infra-jupyter.yml 剧本用于在元节点上加装 Jupyter Lab服务
Jupyter Lab 是非常实用的Python数据分析环境,但自带Web Shell,风险较大,需要使用专用剧本显式安装。
使用说明:参照 Jupyter配置 中的说明调整配置清单,然后执行此剧本即可。
如果您在生产环境中启用了Jupyter,请务必修改Jupyter的密码
在Jupyter中访问PostgreSQL数据库
您可以直接使用 psycopg2 驱动访问 PostgreSQL 数据库
import psycopg2
conn = psycopg2.connect('postgres://dbuser_meta:DBUser.Meta@:5432/meta')
cursor = conn.cursor()
cursor.execute("""SELECT date, new_cases FROM covid.country_history WHERE country_code = 'CN';""")
data = cursor.fetchall()
5 - Gitea:自建简易代码托管平台
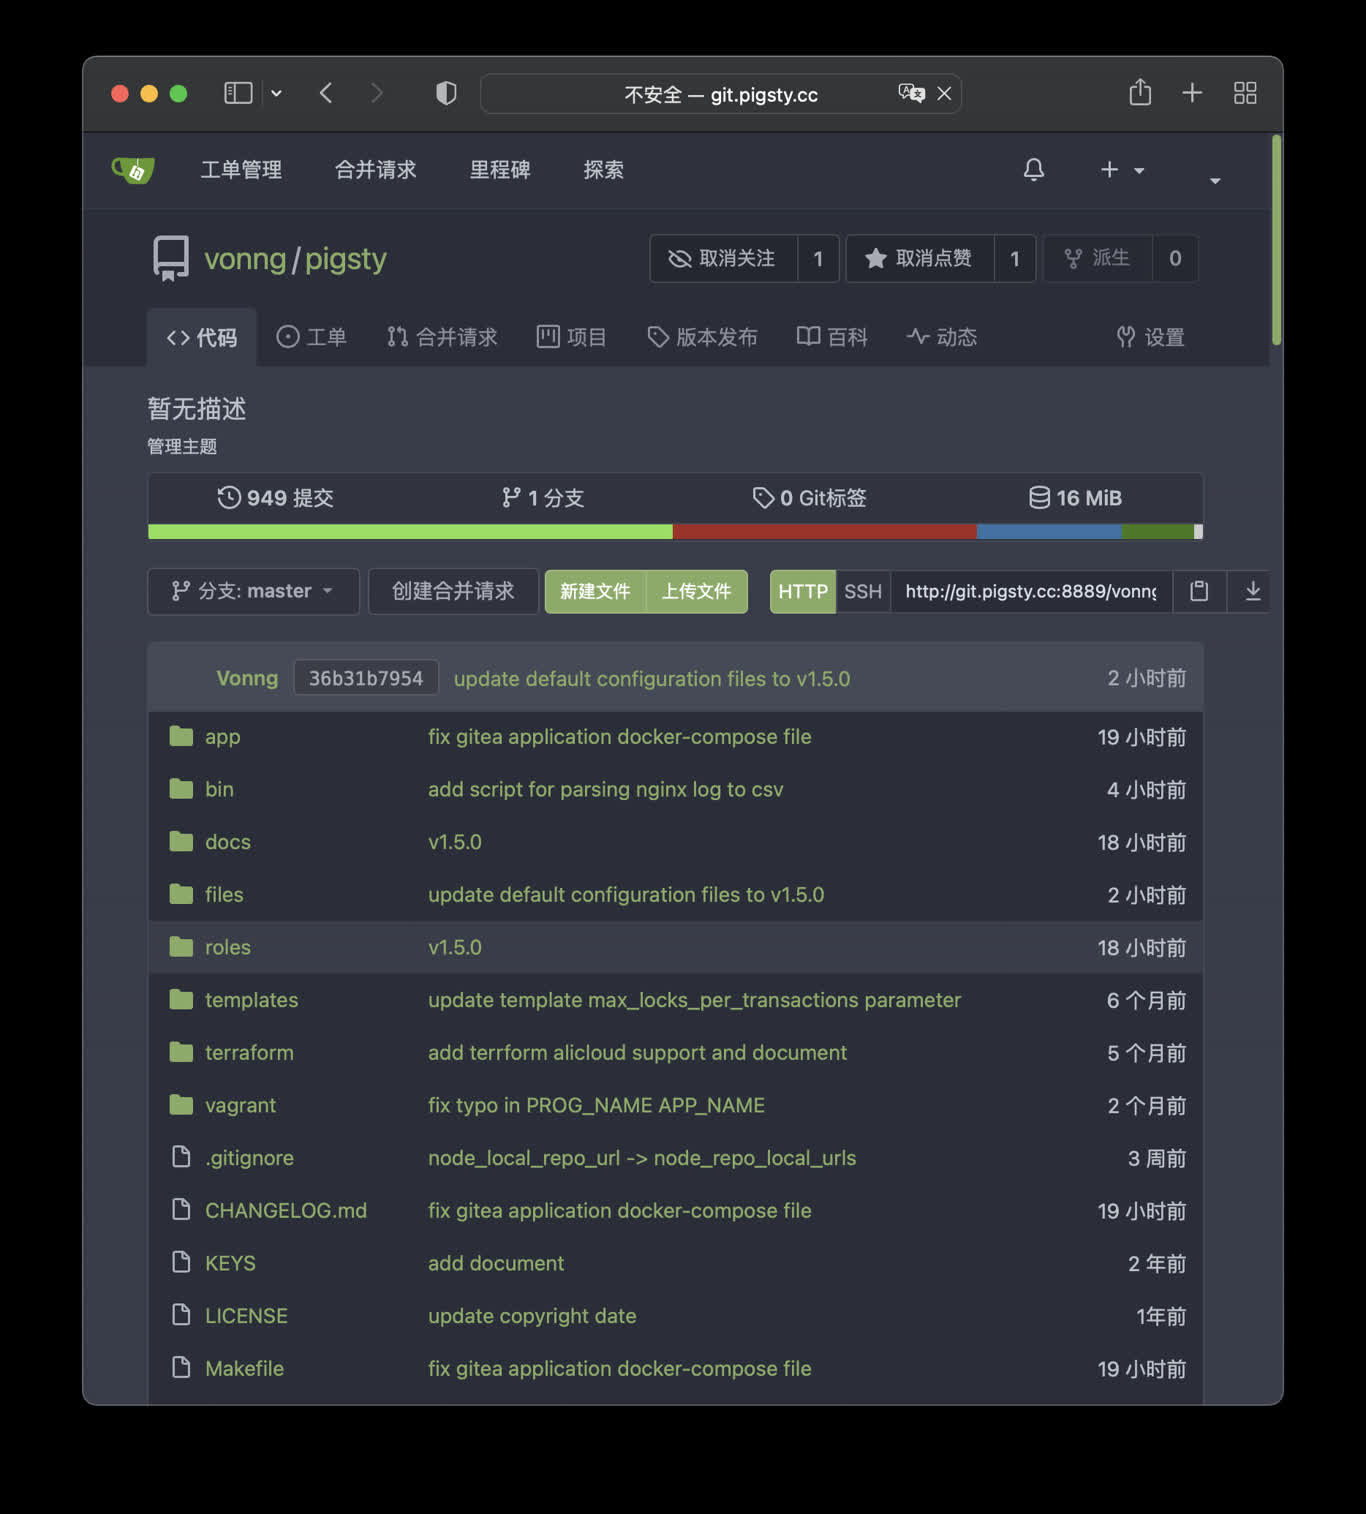
使用Docker拉起Gitea,并使用Pigsty的PG作为外部的元数据库
公开Demo地址:http://git.pigsty.cc
太长;不看
cd ~/pigsty/app/gitea; make up
在本例中,Gitea 默认使用 8889 端口,您可以访问以下位置:
http://git.pigsty 或 http://10.10.10.10:8889
make up      # pull up gitea with docker-compose in minimal mode
make run     # launch gitea with docker , local data dir and external PostgreSQL
make view    # print gitea access point
make log     # tail -f gitea logs
make info    # introspect gitea with jq
make stop    # stop gitea container
make clean   # remove gitea container
make pull    # pull latest gitea image
make rmi     # remove gitea image
make save    # save gitea image to /tmp/gitea.tgz
make load    # load gitea image from /tmp
使用外部的PostgreSQL
Pigsty默认使用容器内的 Sqlite 作为元数据存储,您可以让 Gitea 通过连接串环境变量使用外部的PostgreSQL
# postgres://dbuser_gitea:[email protected]:5432/gitea
db:   { name: gitea, owner: dbuser_gitea, comment: gitea primary database }
user: { name: dbuser_gitea , password: DBUser.gitea, roles: [ dbrole_admin ] }
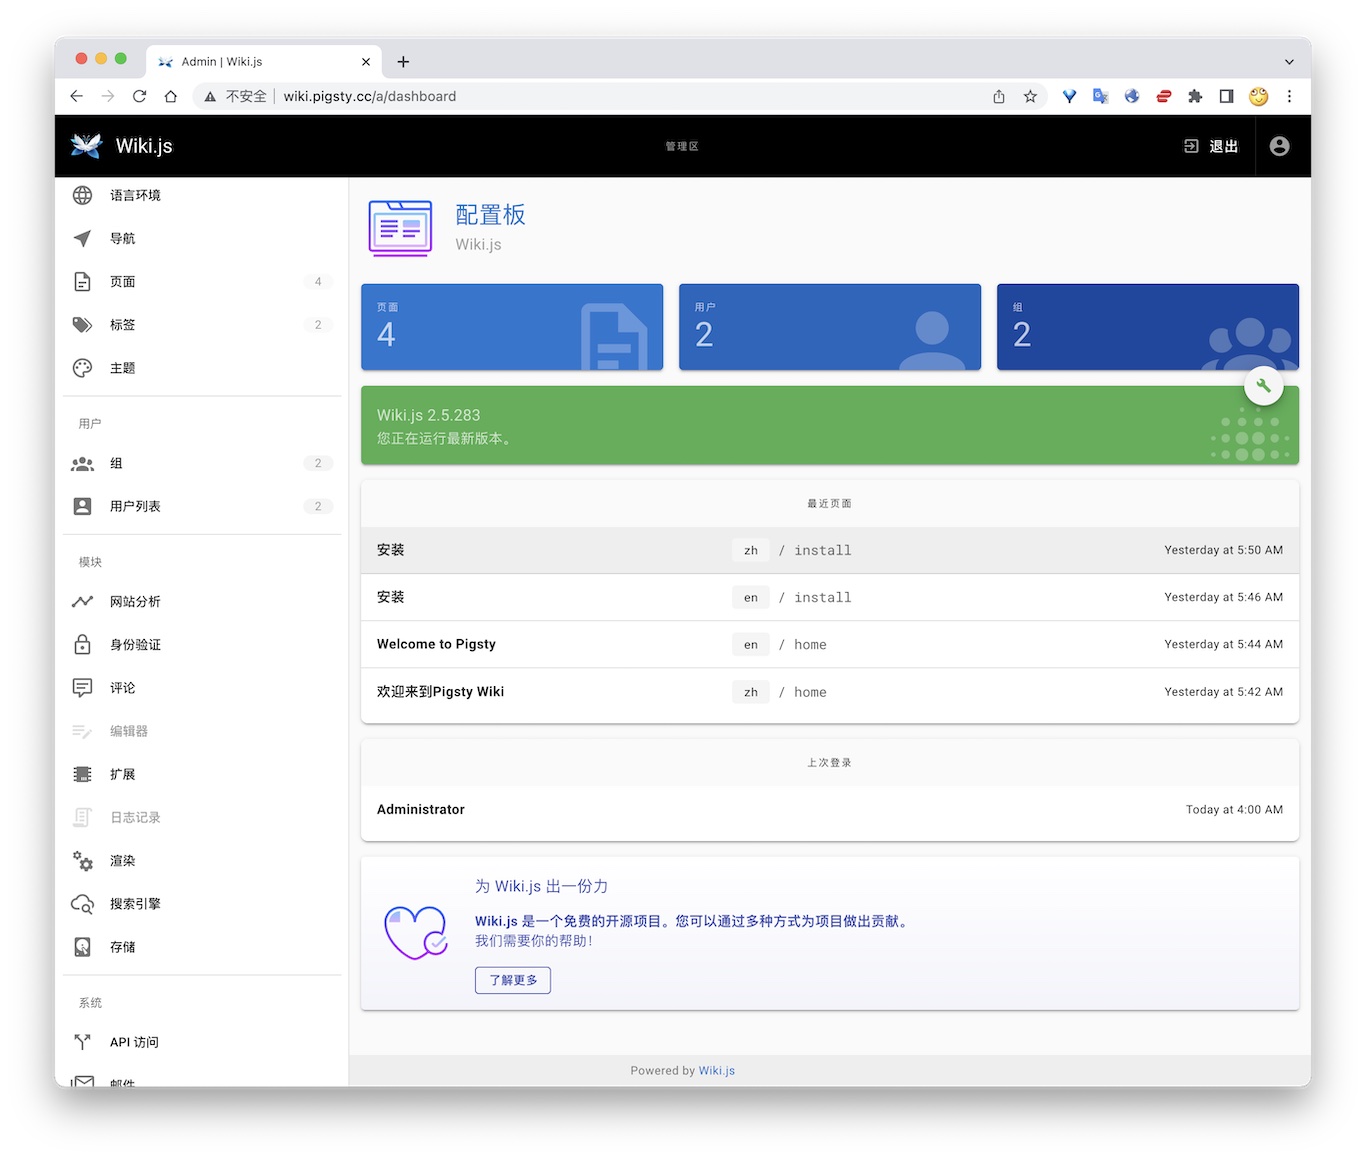
6 - Wiki.js:搭建你自己的维基百科
如何使用 Wiki.js 搭建你自己的开源维基百科,并使用 Pigsty 管理的PG作为持久数据存储
公开Demo地址:http://wiki.pigsty.cc
太长;不看
cd app/wiki ; docker-compose up -d
准备数据库
# postgres://dbuser_wiki:[email protected]:5432/wiki
- { name: wiki, owner: dbuser_wiki, revokeconn: true , comment: wiki the api gateway database }
- { name: dbuser_wiki, password: DBUser.Wiki , pgbouncer: true , roles: [ dbrole_admin ] }
bin/createuser pg-meta dbuser_wiki
bin/createdb   pg-meta wiki
容器配置
version: "3"
services:
  wiki:
    container_name: wiki
    image: requarks/wiki:2
    environment:
      DB_TYPE: postgres
      DB_HOST: 10.10.10.10
      DB_PORT: 5432
      DB_USER: dbuser_wiki
      DB_PASS: DBUser.Wiki
      DB_NAME: wiki
    restart: unless-stopped
    ports:
      - "9002:3000"
Access
- Default Port for wiki: 9002
# add to nginx_upstream
- { name: wiki  , domain: wiki.pigsty.cc , endpoint: "127.0.0.1:9002"   }
./infra.yml -t nginx_config
ansible all -b -a 'nginx -s reload'
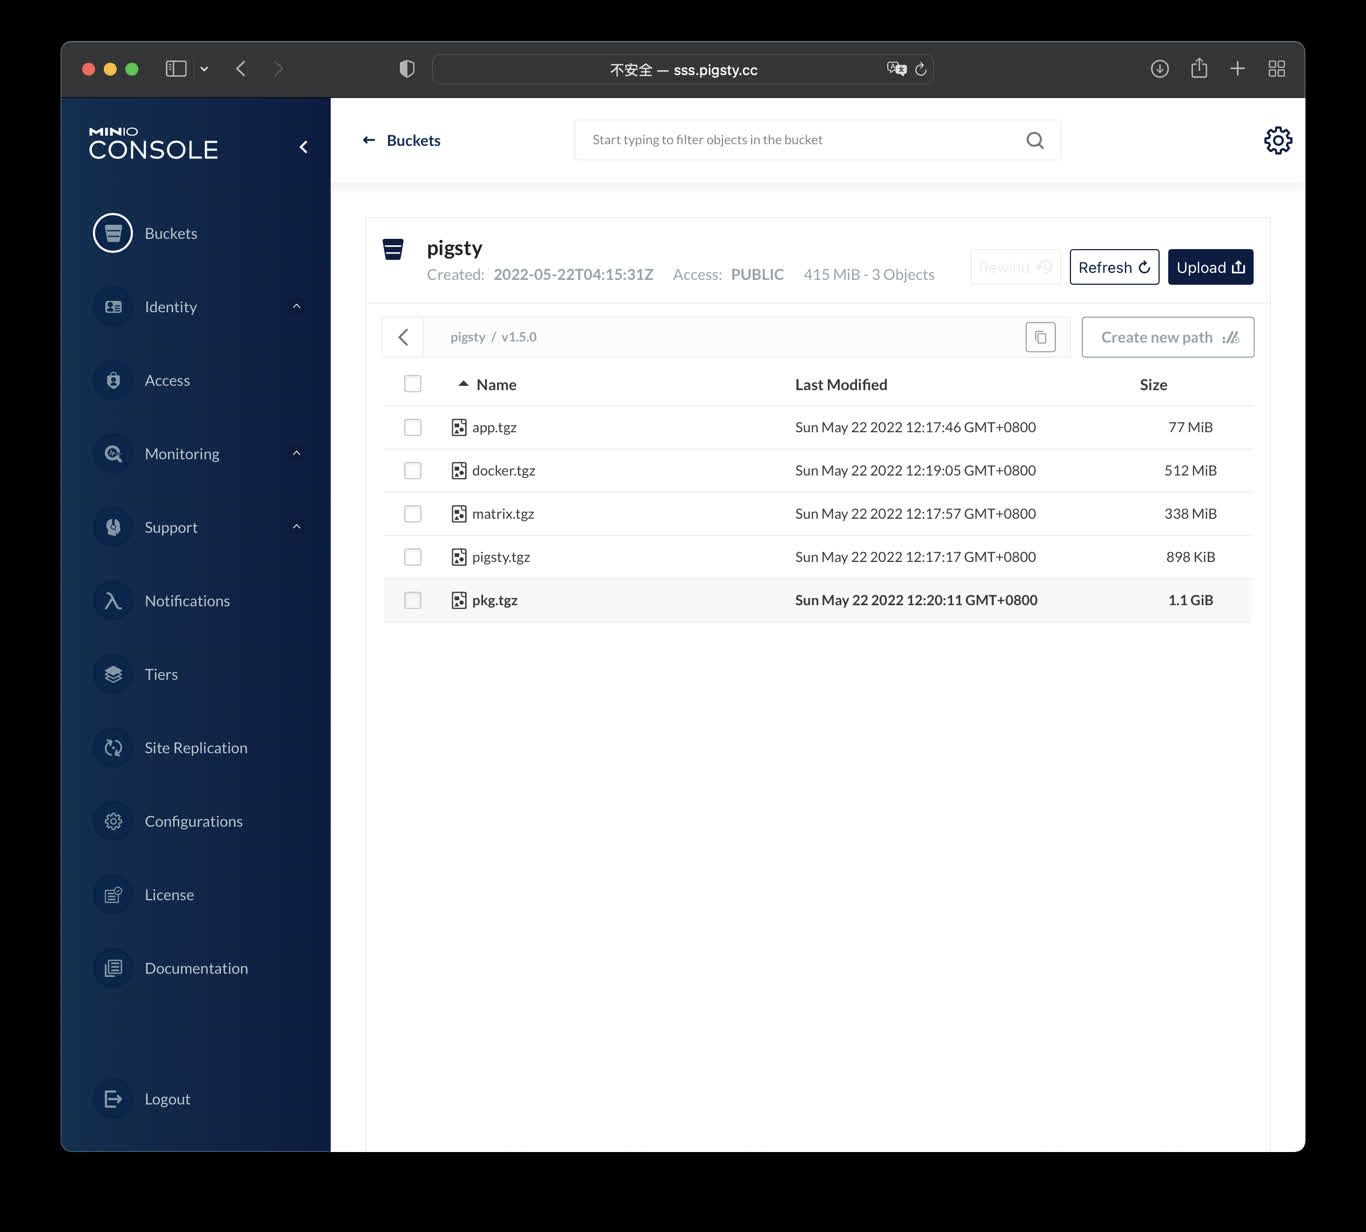
7 - Minio:开源S3,简单对象存储服务
使用Docker拉起Minio,即刻拥有你自己的对象存储服务。
公开Demo地址:http://sss.pigsty.cc
默认用户名: admin / pigsty.minio
太长;不看
Launch minio (s3) service on 9000 & 9001
cd ~/pigsty/app/minio ; docker-compose up -d
docker run -p 9000:9000 -p 9001:9001 \
  -e "MINIO_ROOT_USER=admin" \
  -e "MINIO_ROOT_PASSWORD=pigsty.minio" \
  minio/minio server /data --console-address ":9001"
visit http://10.10.10.10:9000 with user admin and password pigsty.minio
make up         # pull up minio with docker-compose
make run        # launch minio with docker
make view       # print minio access point
make log        # tail -f minio logs
make info       # introspect minio with jq
make stop       # stop minio container
make clean      # remove minio container
make pull       # pull latest minio image
make rmi        # remove minio image
make save       # save minio image to /tmp/minio.tgz
make load       # load minio image from /tmp
8 - ByteBase:PG模式迁移工具
使用Docker拉起Bytebase,对PG的模式进行版本化管理
ByteBase
ByteBase是一个进行数据库模式变更的工具,以下命令将在元节点 8887 端口启动一个ByteBase。
mkdir -p /data/bytebase/data;
docker run --init --name bytebase --restart always --detach --publish 8887:8887 --volume /data/bytebase/data:/var/opt/bytebase \
    bytebase/bytebase:1.0.4 --data /var/opt/bytebase --host http://ddl.pigsty --port 8887
访问 http://10.10.10.10:8887/ 或 http://ddl.pigsty 即可使用 ByteBase,您需要依次创建项目、环境、实例、数据库,即可开始进行模式变更。 公开Demo地址: http://ddl.pigsty.cc
公开Demo地址:http://ddl.pigsty.cc
默认用户名与密码: admin / pigsty

Bytebase概览
Schema Migrator for PostgreSQL
Visit http://ddl.pigsty or http://10.10.10.10:8887
make up         # pull up bytebase with docker-compose in minimal mode
make run        # launch bytebase with docker , local data dir and external PostgreSQL
make view       # print bytebase access point
make log        # tail -f bytebase logs
make info       # introspect bytebase with jq
make stop       # stop bytebase container
make clean      # remove bytebase container
make pull       # pull latest bytebase image
make rmi        # remove bytebase image
make save       # save bytebase image to /tmp/bytebase.tgz
make load       # load bytebase image from /tmp
使用外部的PostgreSQL
Bytebase use its internal PostgreSQL database by default, You can use external PostgreSQL for higher durability.
# postgres://dbuser_bytebase:[email protected]:5432/bytebase
db:   { name: bytebase, owner: dbuser_bytebase, comment: bytebase primary database }
user: { name: dbuser_bytebase , password: DBUser.Bytebase, roles: [ dbrole_admin ] }
if you wish to user an external PostgreSQL, drop monitor extensions and views & pg_repack
DROP SCHEMA monitor CASCADE;
DROP EXTENSION pg_repack;
After bytebase initialized, you can create them back with /pg/tmp/pg-init-template.sql
psql bytebase < /pg/tmp/pg-init-template.sql
9 - PGAdmin4:用GUI管理PG数据库
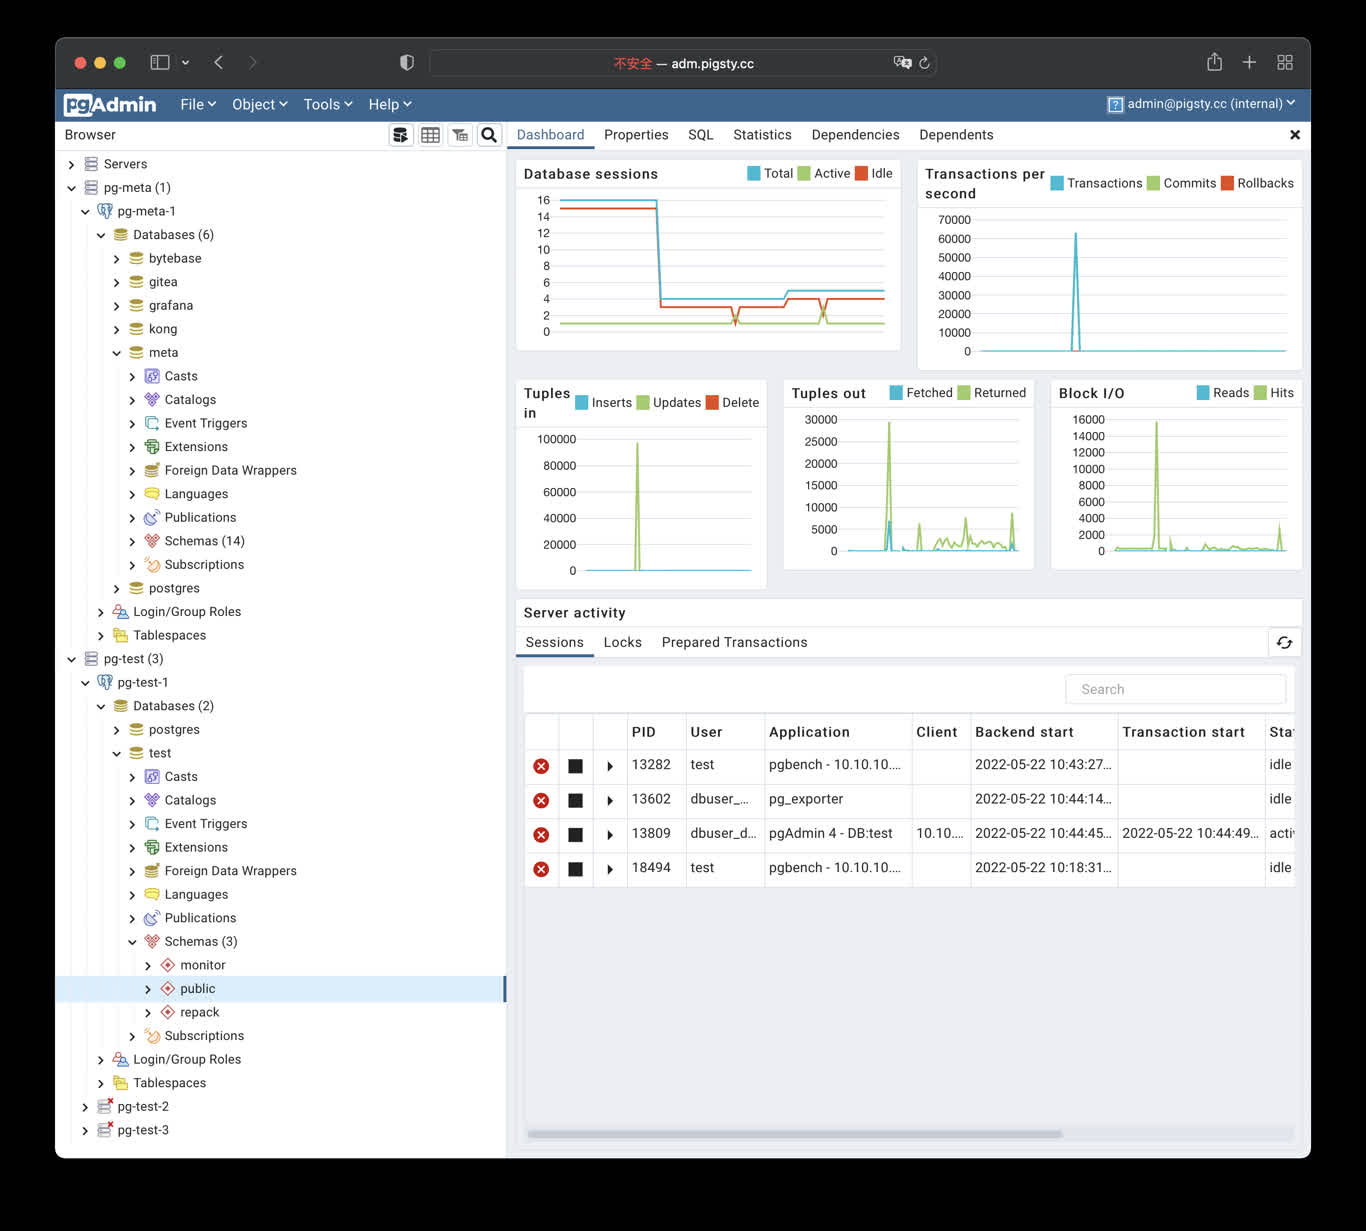
使用Docker拉起PgAdmin4,并加载Pigsty服务器列表
PgAdmin4 是一个实用的PostgreSQL管理工具,执行以下命令可在管理节点拉起 pgadmin服务:
cd ~/pigsty/app/pgadmin ; docker-compose up -d
默认分配 8885 端口,使用域名: http://adm.pigsty 访问, Demo:http://adm.pigsty.cc。
默认用户名:[email protected],密码:pigsty。
Demo
公开Demo地址:http://adm.pigsty.cc
默认用户名与密码: [email protected] / pigsty
太长;不看
cd ~/pigsty/app/pgadmin   # 进入应用目录
make up                   # 拉起pgadmin容器
make conf view            # 加载Pigsty服务器列表文件至Pgadmin容器内并加载
Pigsty的Pgadmin应用模板默认使用8885端口,您可以通过以下地址访问:
http://adm.pigsty 或 http://10.10.10.10:8885
默认用户名与密码: [email protected] / pigsty
make up         # pull up pgadmin with docker-compose
make run        # launch pgadmin with docker
make view       # print pgadmin access point
make log        # tail -f pgadmin logs
make info       # introspect pgadmin with jq
make stop       # stop pgadmin container
make clean      # remove pgadmin container
make conf       # provision pgadmin with pigsty pg servers list
make dump       # dump servers.json from pgadmin container
make pull       # pull latest pgadmin image
make rmi        # remove pgadmin image
make save       # save pgadmin image to /tmp/pgadmin.tgz
make load       # load pgadmin image from /tmp
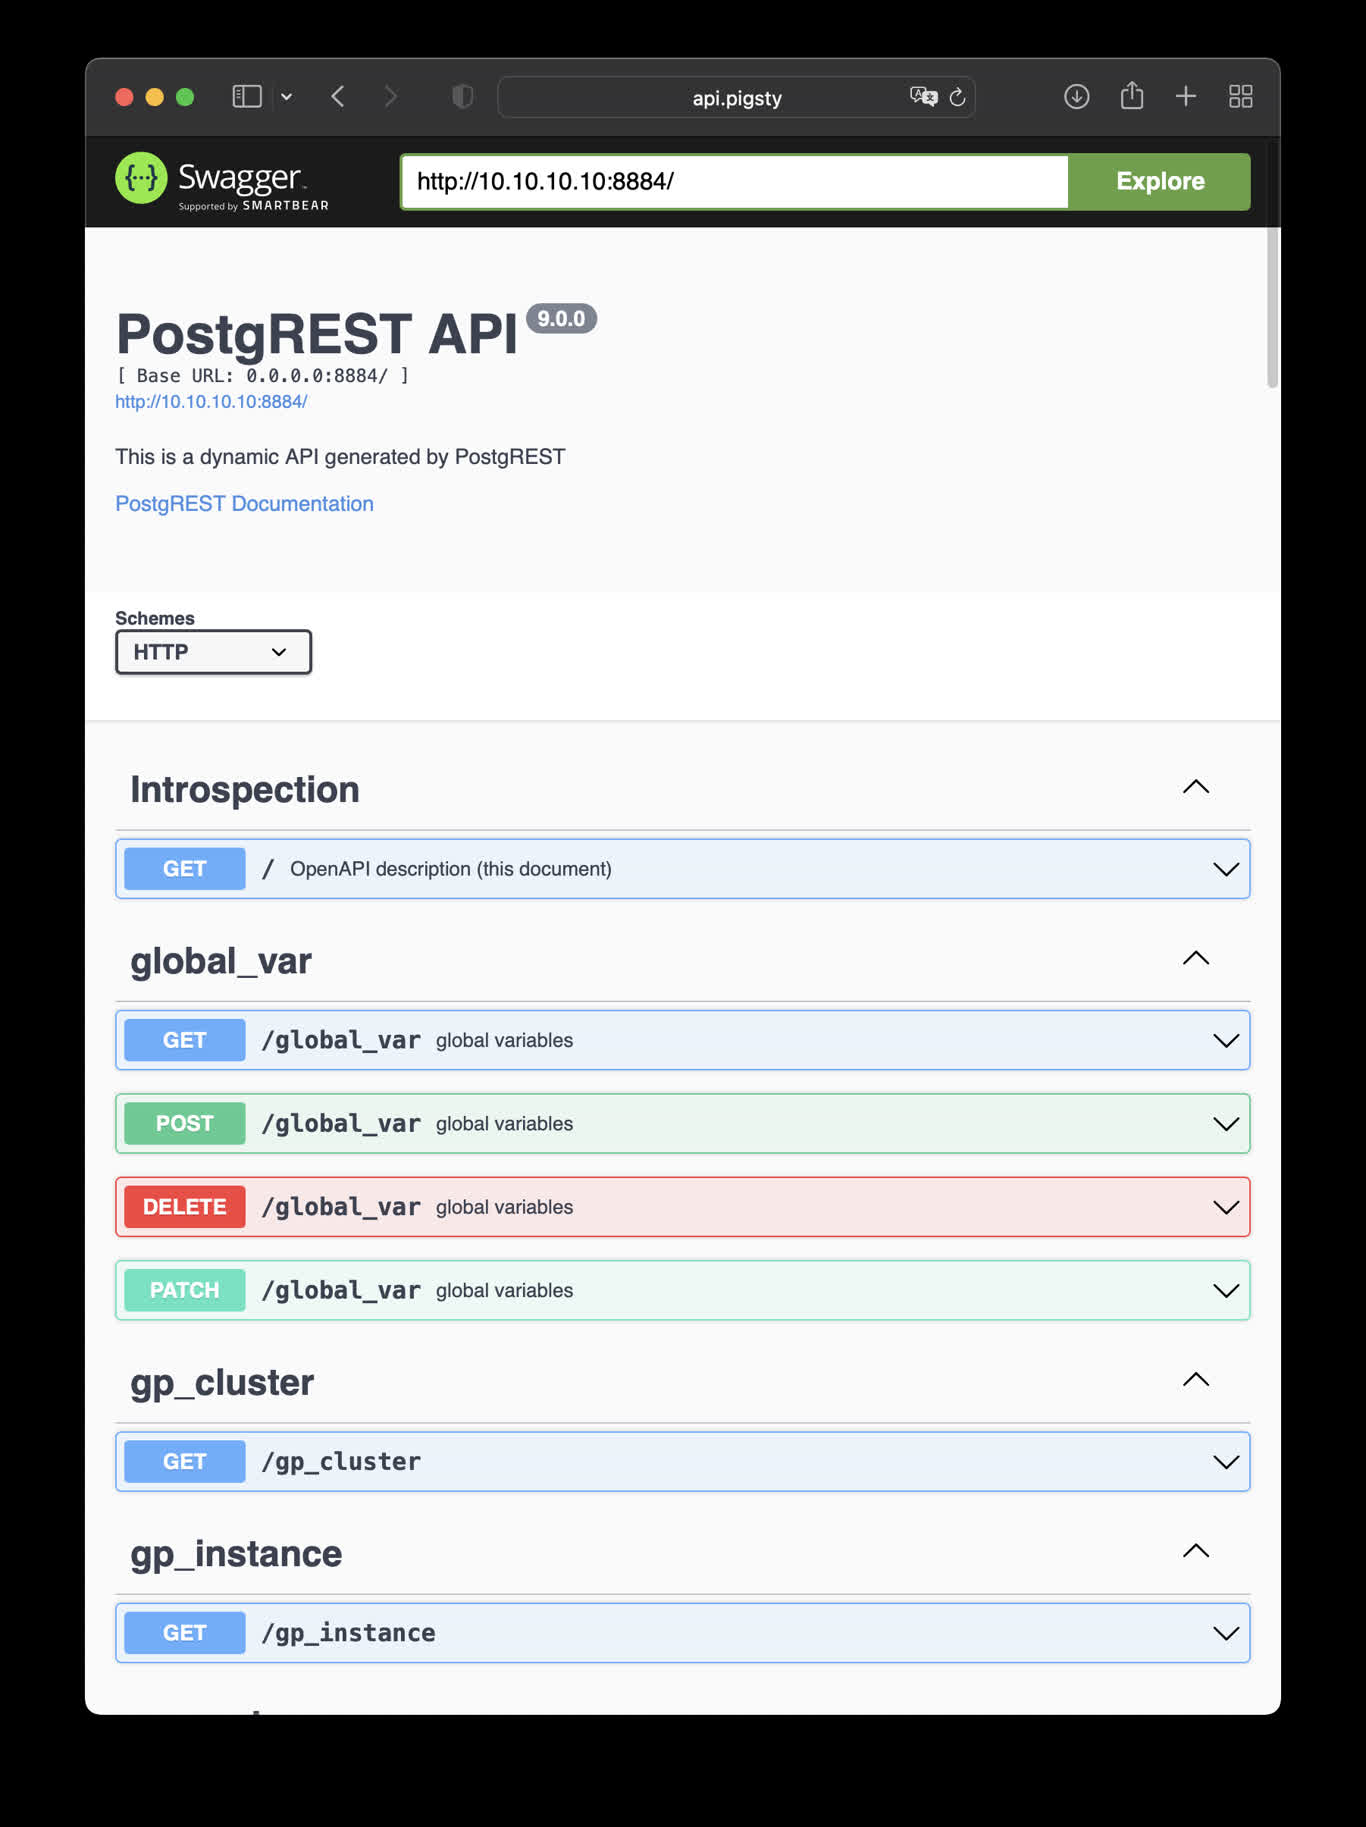
10 - PostgREST:自动生成REST API
使用Docker拉起PostgREST,自动根据PostgreSQL模式生成后端REST API
PostgREST
PostgREST是一个自动根据 PostgreSQL 数据库模式生成 REST API的二进制组件。
例如,以下命令将使用docker拉起 postgrest (本地 8884 端口,使用默认管理员用户,暴露Pigsty CMDB模式)
docker run --init --name postgrest --restart always --detach --publish 8884:8081 postgrest/postgrest
访问 http://10.10.10.10:8884 会展示所有自动生成API的定义,并自动使用 Swagger Editor 暴露API文档。
如果您想要进行增删改查,设计更精细的权限控制,请参考 Tutorial 1 - The Golden Key,生成一个签名JWT。
This is an example of creating pigsty cmdb API with PostgREST
cd ~/pigsty/app/postgrest ; docker-compose up -d
http://10.10.10.10:8884 is the default endpoint for PostgREST
http://10.10.10.10:8883 is the default api docs for PostgREST
make up         # pull up postgrest with docker-compose
make run        # launch postgrest with docker
make ui         # run swagger ui container
make view       # print postgrest access point
make log        # tail -f postgrest logs
make info       # introspect postgrest with jq
make stop       # stop postgrest container
make clean      # remove postgrest container
make rmui       # remove swagger ui container
make pull       # pull latest postgrest image
make rmi        # remove postgrest image
make save       # save postgrest image to /tmp/postgrest.tgz
make load       # load postgrest image from /tmp
Swagger UI
Launch a swagger OpenAPI UI and visualize PostgREST API on 8883 with:
docker run --init --name postgrest --name swagger -p 8883:8080 -e API_URL=http://10.10.10.10:8884 swaggerapi/swagger-ui
# docker run -d -e API_URL=http://10.10.10.10:8884 -p 8883:8080 swaggerapi/swagger-editor # swagger editor
Check http://10.10.10.10:8883/
11 - SchemaSPY:PG模式可视化
使用 SchemaSPY 镜像解析 PostgreSQL 数据库模式,生成可视化报表
使用以下docker生成数据库模式报表,以CMDB为例:
docker run -v /www/schema/pg-meta/meta/pigsty:/output andrewjones/schemaspy-postgres:latest -host 10.10.10.10 -port 5432 -u dbuser_dba -p DBUser.DBA -db meta -s pigsty
然后访问 http://h.pigsty/schema/pg-meta/meta/pigsty 即可访问Schema报表
12 - PGWeb:从浏览器访问PostgreSQL
使用Docker拉起PGWEB,以便从浏览器进行小批量在线数据查询
PGWeb客户端工具
PGWeb是一款基于浏览器的PG客户端工具,使用以下命令,在元节点上拉起PGWEB服务,默认为主机8886端口。可使用域名: http://cli.pigsty 访问,公开Demo:http://cli.pigsty.cc。
# docker stop pgweb; docker rm pgweb
docker run --init --name pgweb --restart always --detach --publish 8886:8081 sosedoff/pgweb
用户需要自行填写数据库连接串,例如默认CMDB的连接串:
postgres://dbuser_dba:[email protected]:5432/meta?sslmode=disable
公开Demo地址:http://cli.pigsty.cc

使用Docker Compose拉起PGWEB容器:
cd ~/pigsty/app/pgweb ; docker-compose up -d
接下来,访问您本机的 8886 端口,即可看到 PGWEB 的UI界面: http://10.10.10.10:8886
您可以尝试使用下面的URL连接串,通过 PGWEB 连接至数据库实例并进行探索。
快捷方式
make up         # pull up pgweb with docker-compose
make run        # launch pgweb with docker
make view       # print pgweb access point
make log        # tail -f pgweb logs
make info       # introspect pgweb with jq
make stop       # stop pgweb container
make clean      # remove pgweb container
make pull       # pull latest pgweb image
make rmi        # remove pgweb image
make save       # save pgweb image to /tmp/pgweb.tgz
make load       # load pgweb image from /tmp
13 - Discourse:开源技术论坛
如何搭建开源的论坛软件 Discourse,并使用 Pigsty 管理的 PG 作为后端数据库存储?
搭建开源论坛Discourse,需要调整配置 app.yml ,重点是SMTP部分的配置
Discourse配置样例
templates:
  - "templates/web.china.template.yml"
  - "templates/postgres.template.yml"
  - "templates/redis.template.yml"
  - "templates/web.template.yml"
  - "templates/web.ratelimited.template.yml"
## Uncomment these two lines if you wish to add Lets Encrypt (https)
# - "templates/web.ssl.template.yml"
# - "templates/web.letsencrypt.ssl.template.yml"
expose:
  - "80:80"   # http
  - "443:443" # https
params:
  db_default_text_search_config: "pg_catalog.english"
  db_shared_buffers: "768MB"
env:
  LC_ALL: en_US.UTF-8
  LANG: en_US.UTF-8
  LANGUAGE: en_US.UTF-8
  EMBER_CLI_PROD_ASSETS: 1
  UNICORN_WORKERS: 4
  DISCOURSE_HOSTNAME: forum.pigsty
  DISCOURSE_DEVELOPER_EMAILS: '[email protected],[email protected]'
  DISCOURSE_SMTP_ENABLE_START_TLS: false
  DISCOURSE_SMTP_AUTHENTICATION: login
  DISCOURSE_SMTP_OPENSSL_VERIFY_MODE: none
  DISCOURSE_SMTP_ADDRESS: smtpdm.server.address
  DISCOURSE_SMTP_PORT: 80
  DISCOURSE_SMTP_USER_NAME: [email protected]
  DISCOURSE_SMTP_PASSWORD: "<password>"
  DISCOURSE_SMTP_DOMAIN: mail.pigsty.cc
volumes:
  - volume:
      host: /var/discourse/shared/standalone
      guest: /shared
  - volume:
      host: /var/discourse/shared/standalone/log/var-log
      guest: /var/log

hooks:
  after_code:
    - exec:
        cd: $home/plugins
        cmd:
          - git clone https://github.com/discourse/docker_manager.git
run:
  - exec: echo "Beginning of custom commands"
  # - exec: rails r "SiteSetting.notification_email='[email protected]'"
  - exec: echo "End of custom commands"
然后,执行以下命令,拉起Discourse即可。
14 - GitLab:企业级开源代码托管平台
如何自建企业级开源代码托管平台 GitLab,并使用 Pigsty 管理的 PG 作为后端数据库存储?
样例:开源代码仓库:Gitlab
请参考Gitlab Docker部署文档 完成Docker部署。
export GITLAB_HOME=/data/gitlab

sudo docker run --detach \
  --hostname gitlab.example.com \
  --publish 443:443 --publish 80:80 --publish 23:22 \
  --name gitlab \
  --restart always \
  --volume $GITLAB_HOME/config:/etc/gitlab \
  --volume $GITLAB_HOME/logs:/var/log/gitlab \
  --volume $GITLAB_HOME/data:/var/opt/gitlab \
  --shm-size 256m \
  gitlab/gitlab-ee:latest

sudo docker exec -it gitlab grep 'Password:' /etc/gitlab/initial_root_password